Updates (April 2026 to June 2026)
May 2026 — Updated the topic to add information about the availability of the enable and disable options for configured Imperva integration. For more information, see Manage configured integration.
Imperva WAF (Web Application Firewall) helps protect against the theft of sensitive data and critical transactions. Imperva empowers businesses with a comprehensive suite of products, including Web Application Firewall (WAF), Data and File Security, DDoS Protection, Cloud Security, and API Security to protect their digital assets, ensure data integrity, and maintain compliance. Traceable integrates with Imperva's WAF to block IP addresses and threat actors.
What will you learn in this topic?
By the end of this topic, you will be able to understand:
An overview of the steps required to set up the integration.
The prerequisites for setting up the integration with Traceable.
The steps to integrate Imperva with Traceable.
Integration overview
This section provides high-level information on integrating Imperva WAF with Traceable and managing threats.
Installation — Traceable allows you to choose from an agent-less or agent-based deployment option. For more information on Traceable agents, see Installation.
Integration Setup — After deploying the agent, you can retrieve the credentials and configure the Imperva integration. To do so, you must complete the following steps:
Prerequisites — Log in to your Imperva account and fetch the required credentials, such as the API ID and the API Key, to configure the integration. For more information, see Before you begin.
Integration — After obtaining the credentials from the previous steps, navigate to the Traceable platform and configure the integration. For more information, see Set up the integration.
Threat Management — After setting up the integration, you can establish rules to allow, block, or monitor IP addresses according to your specific requirements. Traceable's integration with Imperva supports the following three types of rules:
Threat Actors — Any status change of a threat actor on the Traceable Platform is propagated to Imperva. For example, if Traceable detects a threat actor and changes it to a deny state, then the requests from this threat actor can be blocked using Imperva. Moreover, if you make any changes, such as adding a threat actor to the allowlist or resolving a status, these changes are reflected in Imperva within a few minutes. Traceable allows creating allowlists using allowed and snoozed states, and supports blocking using deny and suspended states under threat actors. For more information, see Threat Actors.
Malicious Source Rules (IP Range only) — If you configure any malicious source rules under Protection → Policies → Custom Policies → Malicious Sources tab to enforce blocking or allow for IP ranges to be executed through Imperva.
Custom Signature Rules — You can set up the Custom Signature rules under Protection → Policies → Custom Policies → Custom Signatures tab to block incoming requests from a specific URL by matching the corresponding endpoints. For more information, see Custom Policy.
Note
The Custom Signature rule type in the Imperva integration allows you to define website-specific blocking rules tailored to your application’s traffic. Each rule consists of a filter condition and an associated action.
When rules are created through Traceable, only the rule attributes and operators exposed by Imperva’s APIs are available, so Traceable supports a defined subset of valid attribute–operator combinations for custom signature rules. For more information, see Support Matrix for Custom Signature Rules.
The following is a high-level integration diagram:

Traceable Imperva Integration Diagram
Before you begin
Make a note of the following before proceeding with the integration steps:
Make sure you have an API ID and API Key from Imperva. For more information, see Imperva documentation.
Make sure you have the Imperva Account ID. The Website(s) you choose for integration are tied to your Account ID.
The policies configured in Traceable apply to all the websites present in the configured Imperva account.
The policies set by Traceable would have their name as
Traceable:<UUID>.Additional Behavior and Constraints
Action Type — All custom signature rules created via Traceable enforce a
BLOCKaction in Imperva.Rule Name — Must be alphanumeric. Traceable automatically sanitizes rule names to meet Imperva requirements.
Website Association — As part of the integration setup in Traceable, you will select the target website where Custom Signature rules will be applied. For detailed syntax rules and parameter guidelines, see Imperva Rule Parameter Documentation.
Set up the integration
To configure a new Cloudflare integration, navigate to the Integrations page from the bottom left corner of your Traceable account, and do one of the following:
Search for Imperva in the search bar.
Navigate to WAF → Imperva
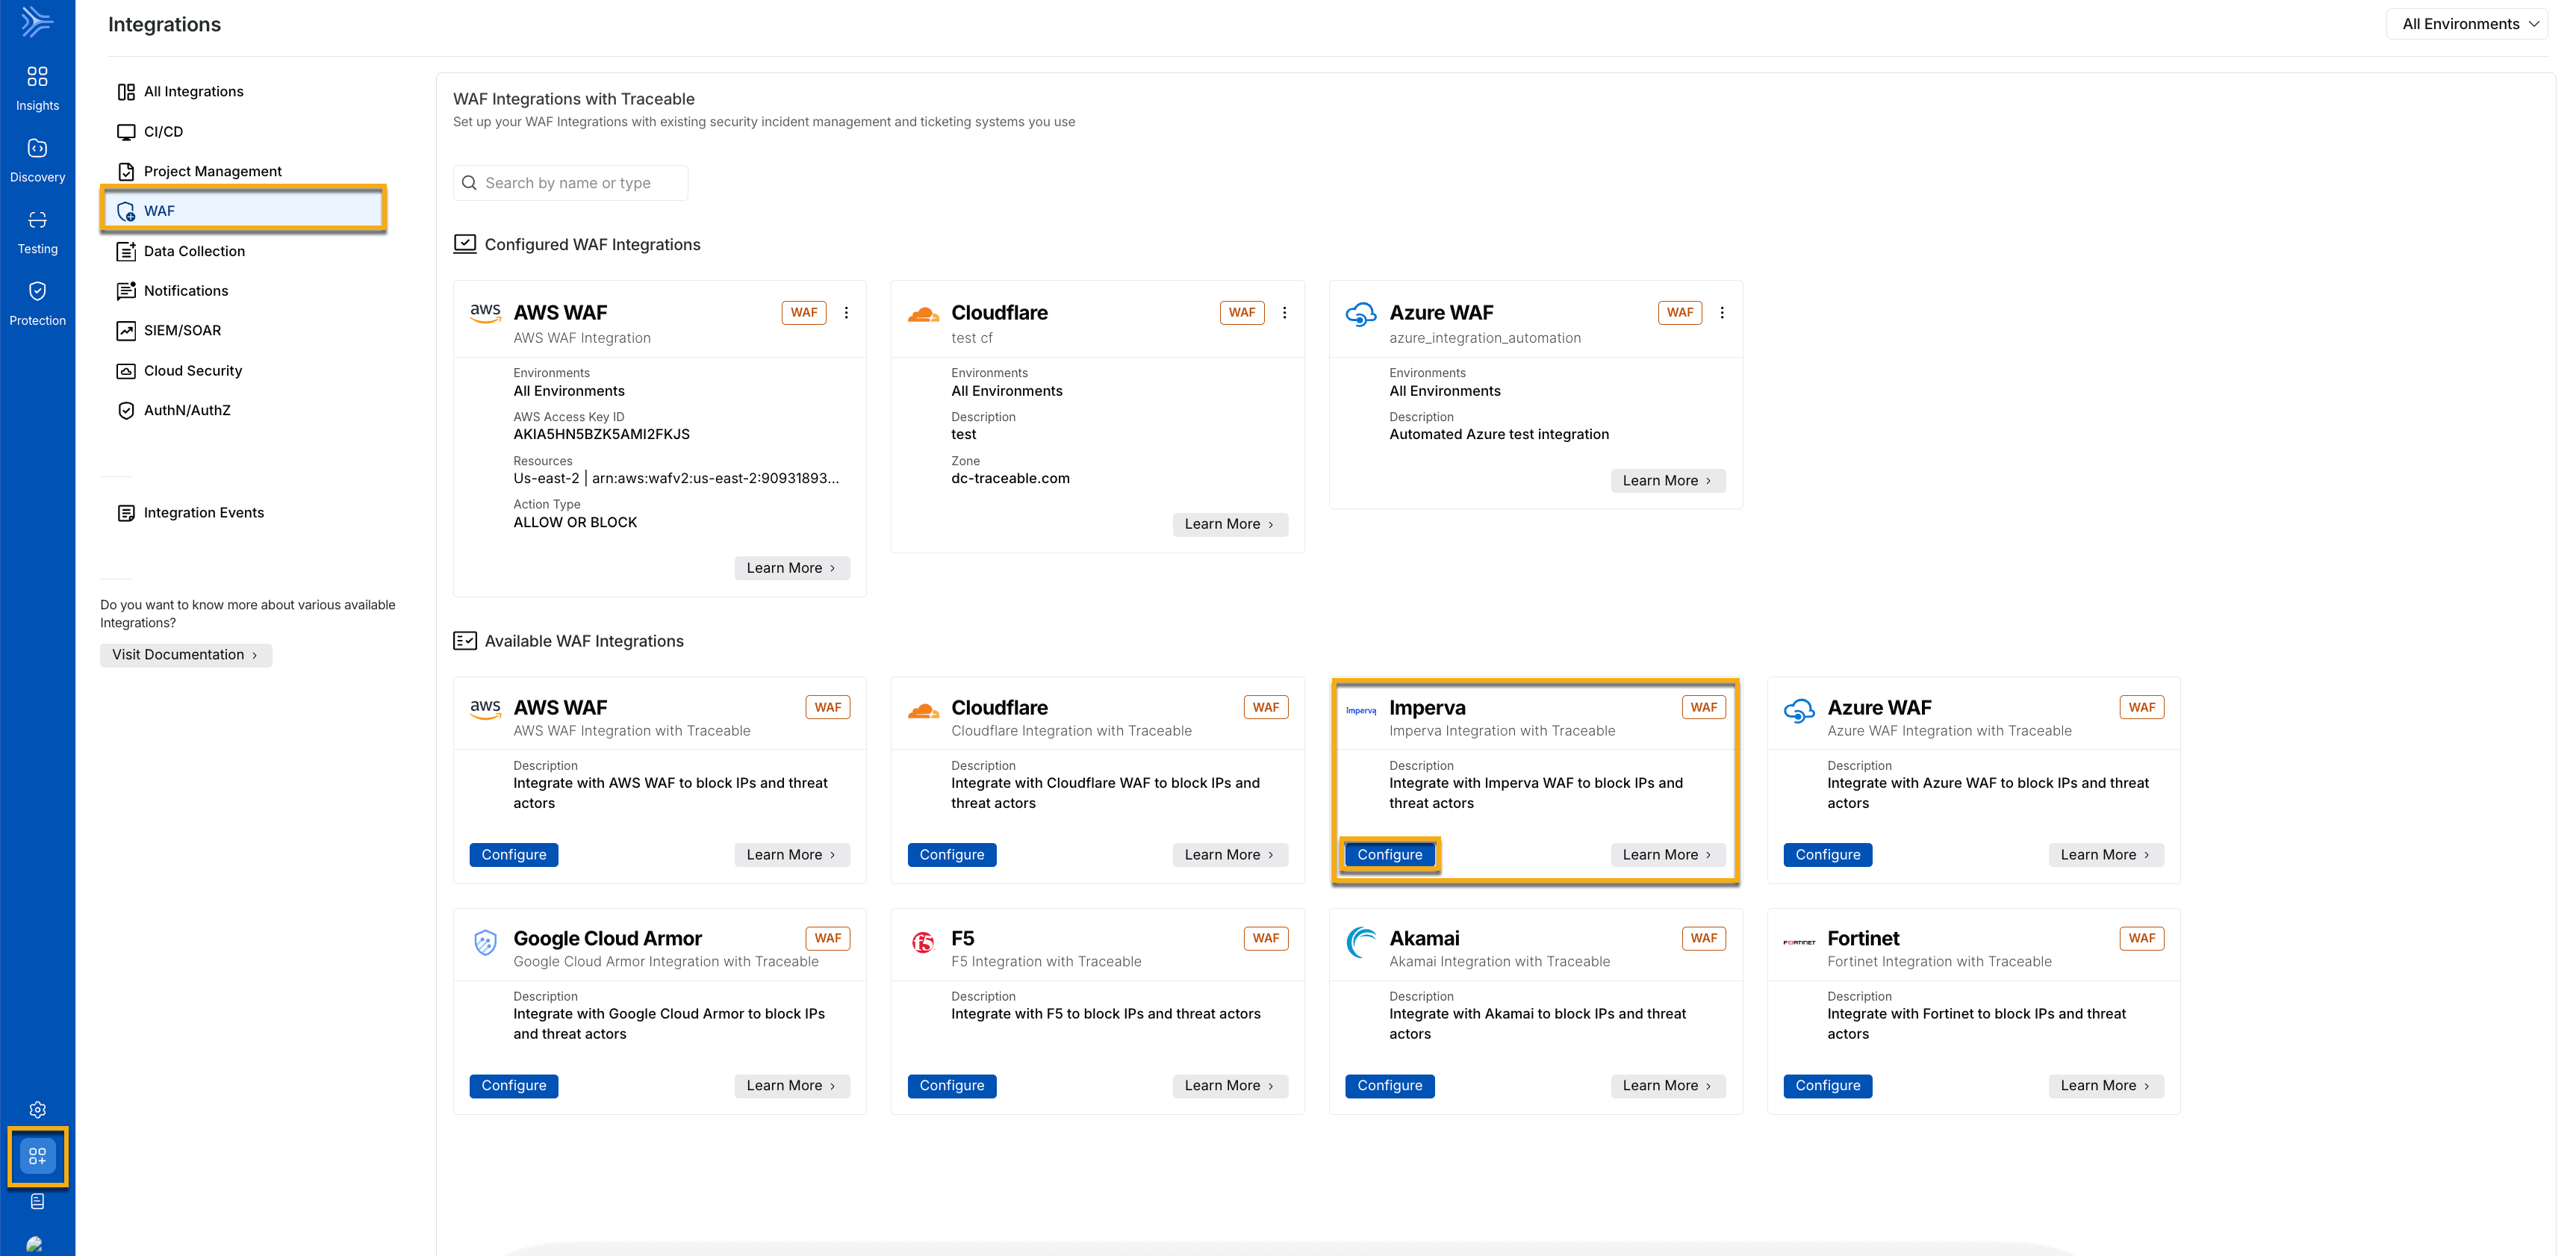
Imperva WAF navigation
In the Imperva widget, click Configure, and in the Add New Imperva Integration slide-out panel, complete the following steps:
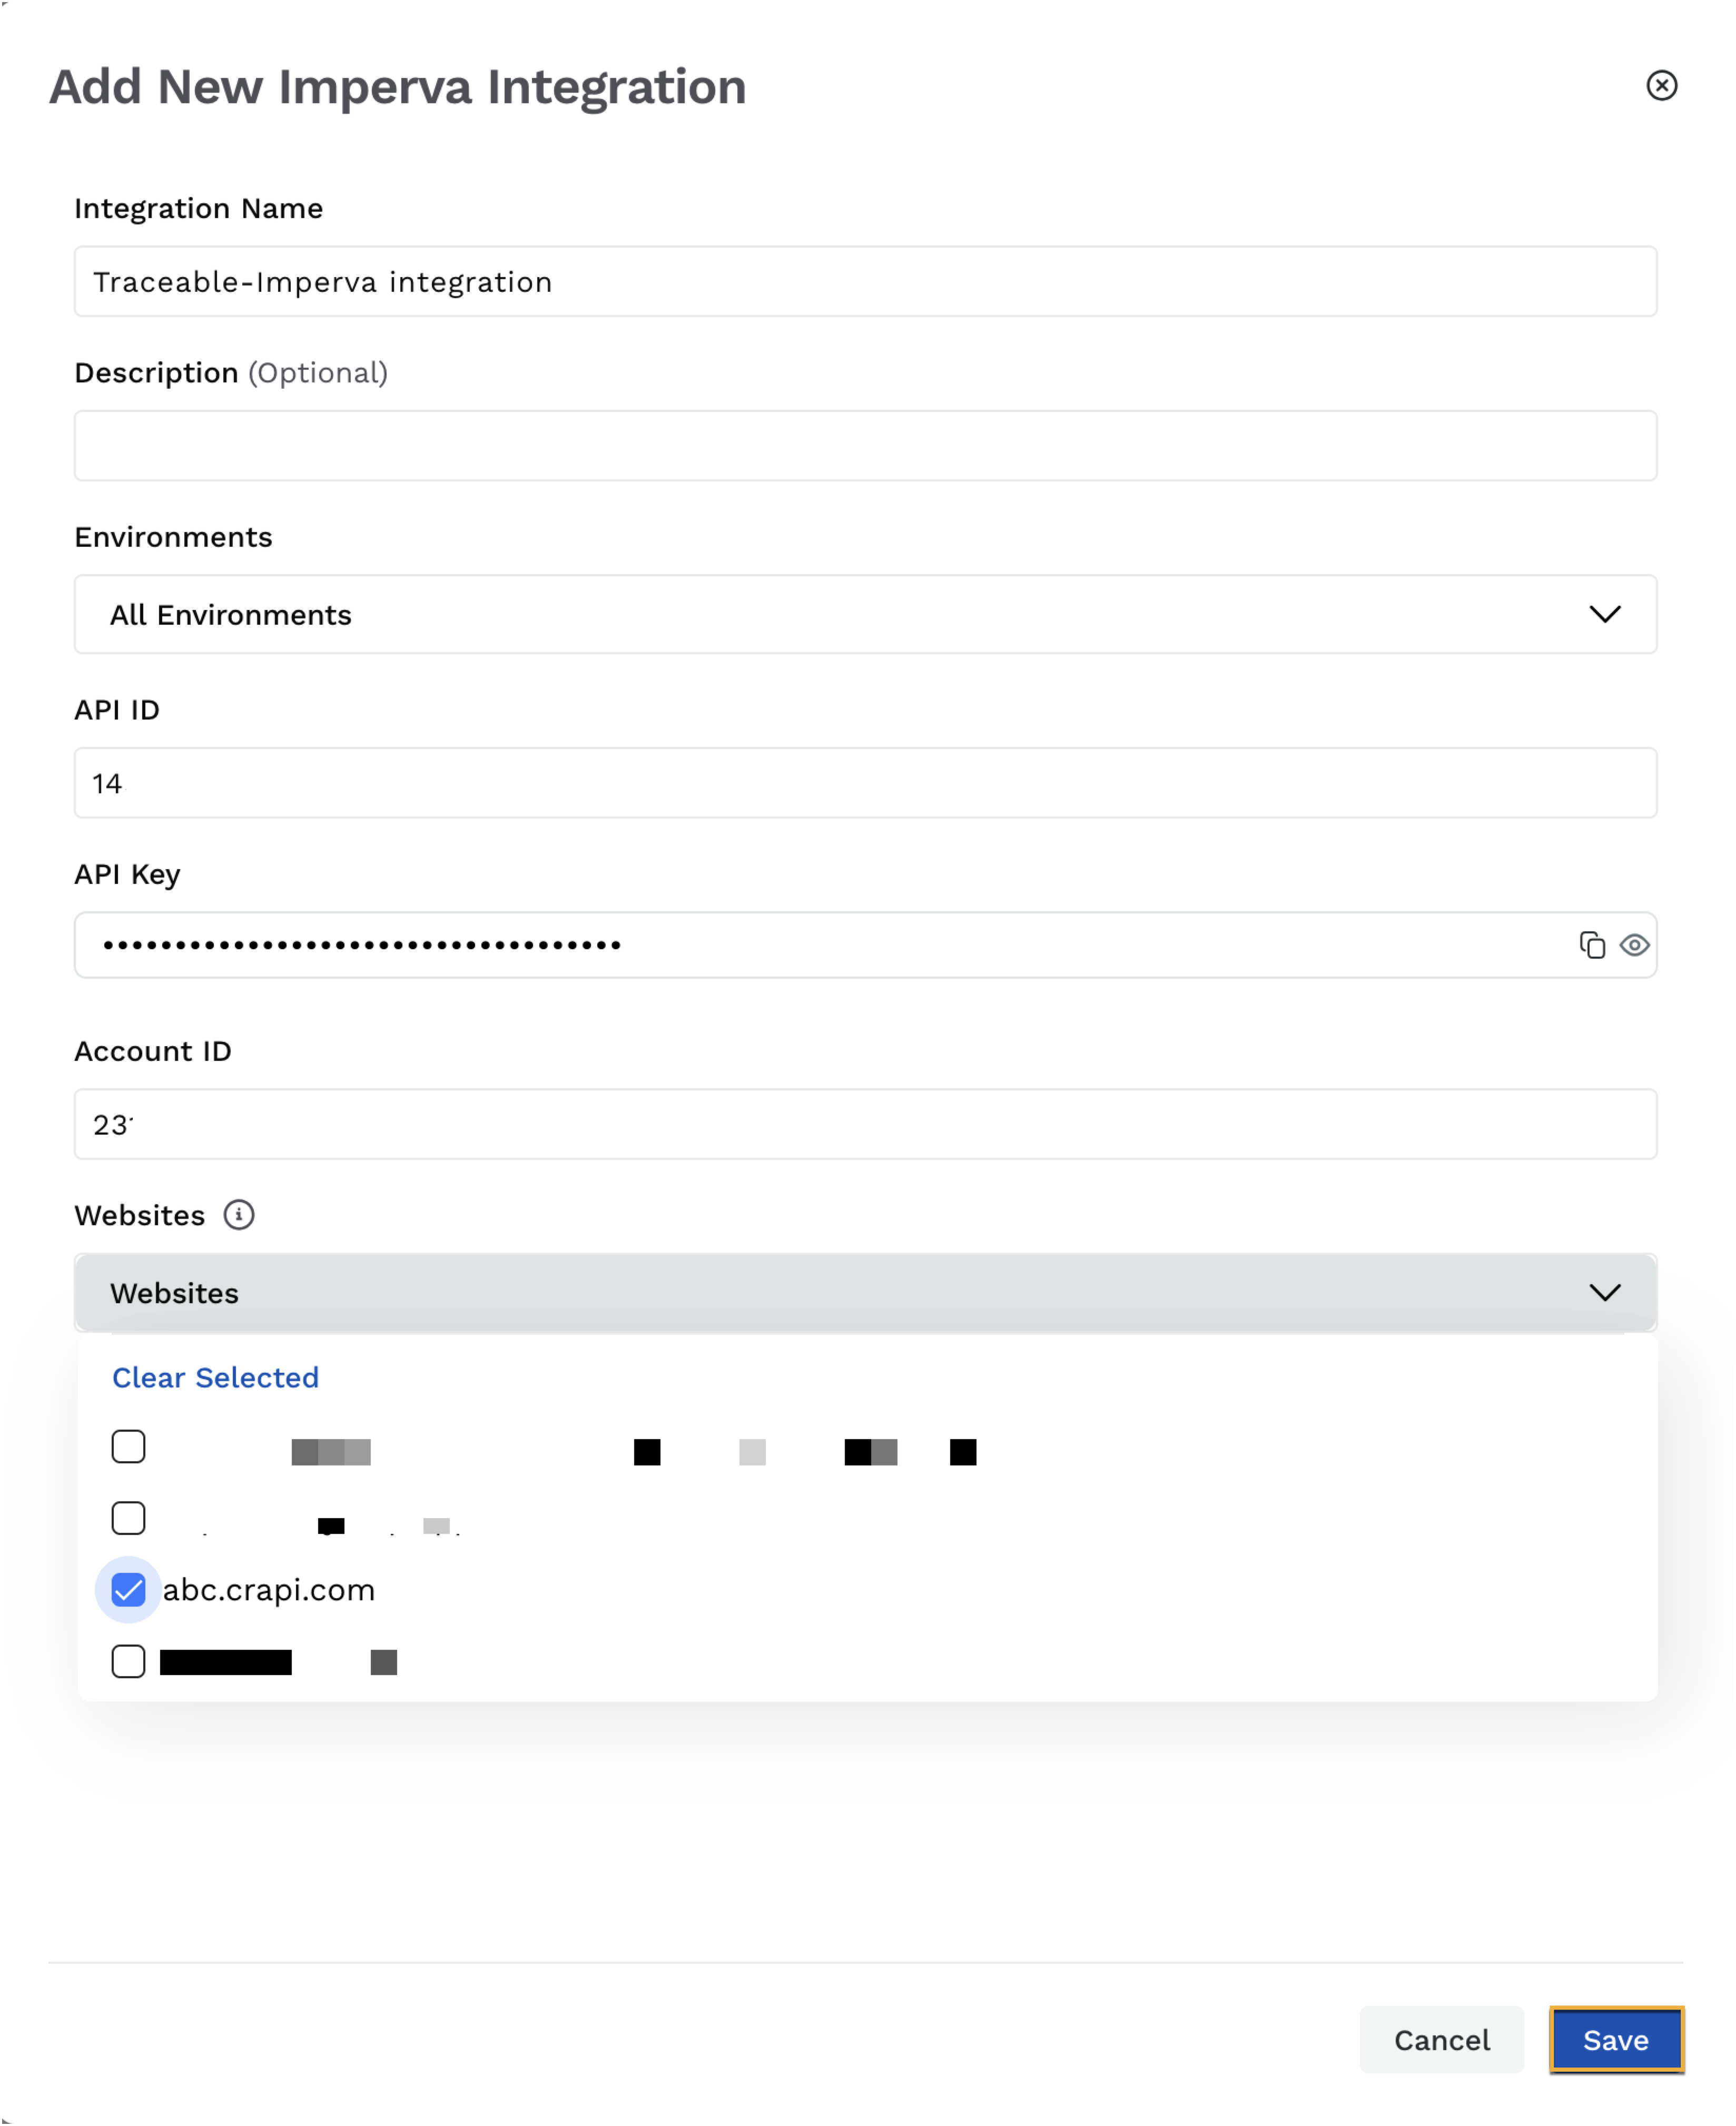
Add New Imperva Integration
Integration Name — A unique name for your integration, for example, Traceable_imperva_integration.
(Optional) Description — A summary of the purpose of the integration.
Environment(s) — The environment for which you wish to configure the integration.
API ID — The API ID that you fetched from Imperva. For more information, see Before you begin.
API Key — The API key that you fetched from Imperva. For more information, see Before you begin.
Account ID — The ID associated with your account. This is a mandatory field.
Note
The Website drop-down (in the next step) is populated only when the right Account ID is provided.
Choose the Websites for which you wish to configure the integration.
Click the Save button.
Manage configured integration
After configuring the integration, you can view it under Configured WAF Integrations. Traceable gives you the flexibility to control how the integration operates. You can choose either of the following actions using the drop-down, according to your requirements:
Enabled — You allow Traceable to actively update the WAF with the latest rules to enforce protection and monitor or block threats. When enabled, Traceable continuously sends new rules and updates to the WAF based on policy activity, helping enforce protections with the latest threat information and block suspicious traffic.
Disabled — You stop Traceable from updating the WAF, so it no longer enforces new protections for that environment or region. When disabled, Traceable stops sending new rules and updates to the WAF for the selected environment or region, while other environments continue using their existing integration settings without impact. The WAF continues to enforce existing rules based on their last applied state, without receiving new updates. Traceable continues to detect and evaluate threats, but it does not enforce them through WAF.
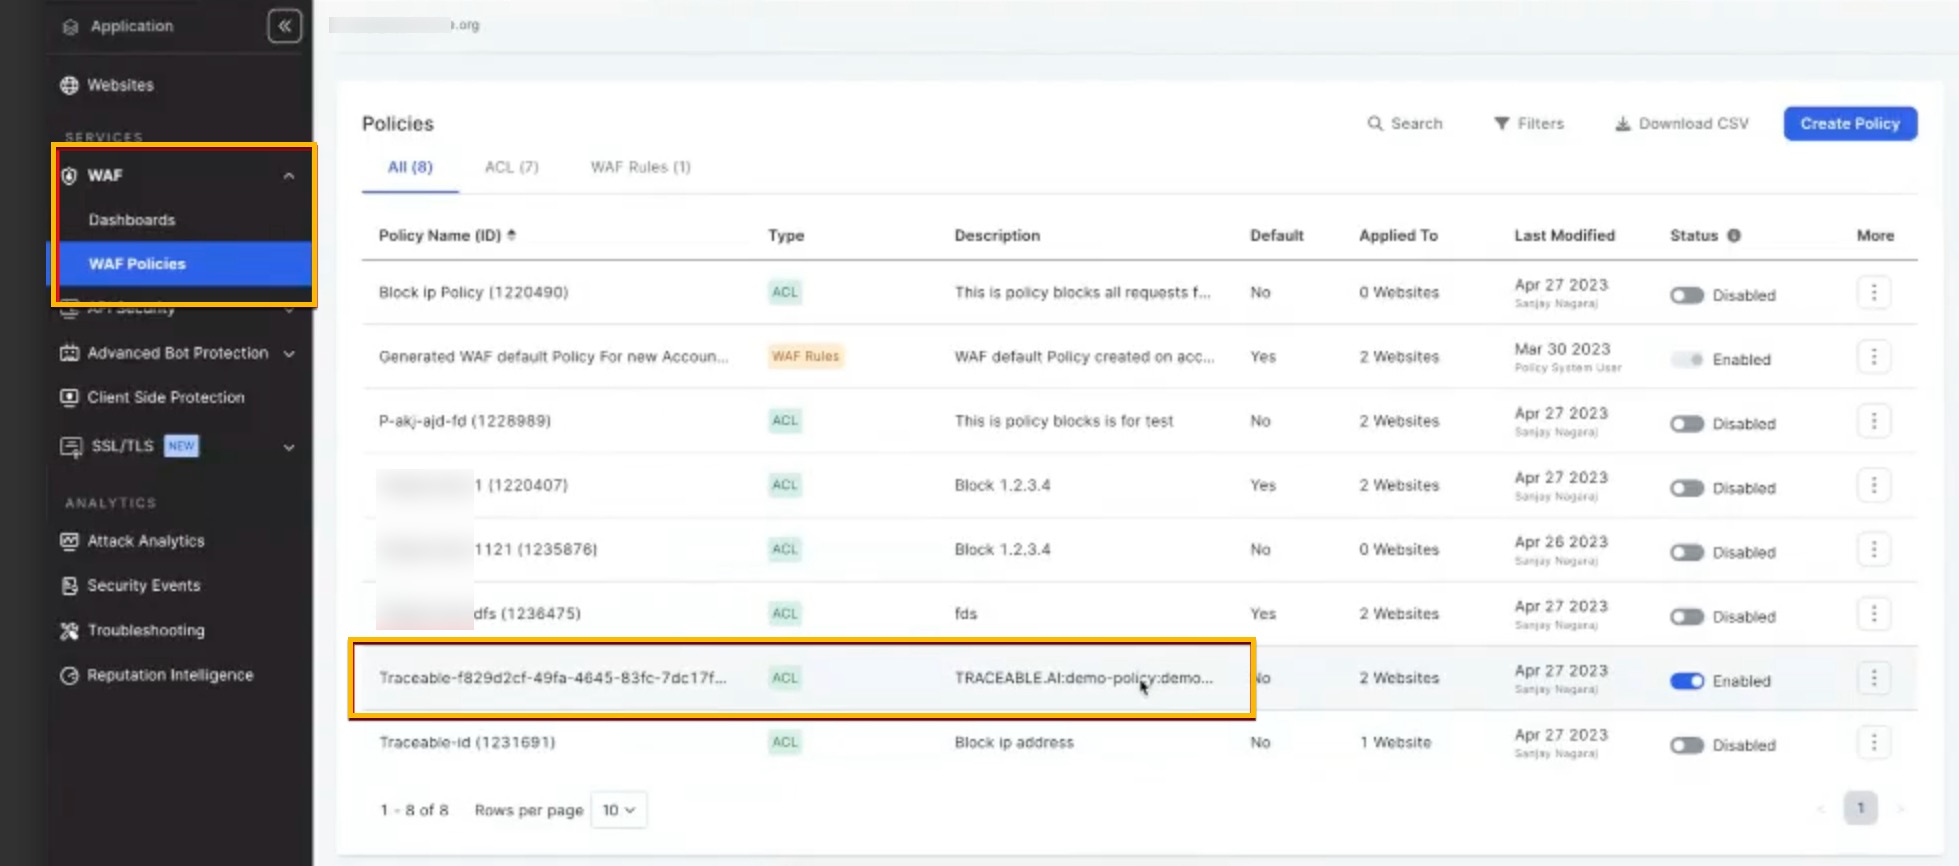
Verify in Imperva
Log in to your Imperva account, navigate to the WAF menu, and click WAF Policies. The policy set by Traceable will be displayed in Imperva.