Updates (July 2026 to September 2026)
September 2026 — Updated the topic to add information about the availability of OIDC Authentication as a method. For more information, see Understand Authentication.
Traceable allows you to invite team members to your Traceable account and assign them roles and scope to control what they can access using the Users tab on the Teams page. Whether you are onboarding a new team member or adjusting access for an existing one, Traceable gives you fine-grained control over login methods, roles, and the environments, endpoints, or services each user can access.
Traceable also allows you to configure which authentication methods are available to you. You can enable local username and password-based access, Google Single Sign-On, or SAML-based authentication for enterprise identity providers, depending on your organization's identity and access management requirements.
What you will learn from this topic
By the end of this topic, you will be able to understand:
How to invite a team member and assign them a role and scope.
The available login types and when to use each one.
How to scope a role to specific environments, endpoints, or services.
How to edit or delete an existing user.
How to configure authentication methods.
Before you begin
Before you add users or configure authentication methods in Traceable, make a note of the following:
Make sure you are the Account Owner or have the necessary Edit permissions at the Team level.
Make sure you have identified or created the role you wish to assign to the user. For more information, see Role-Based Access Control RBAC.
If inviting a user via SAML Auth, SAML authentication has already been configured. For more information, see SAML Configuration.
Make sure you have identified the authentication method according to your organization's requirements. For more information, see Understand Authentication.
Understand authentication
Traceable enables you to control how users join the Platform while ensuring access remains aligned with existing identity and access management processes. The Auth page allows you to define which authentication methods suits you needs. You can enable one or more authentication options, according to your requirements:
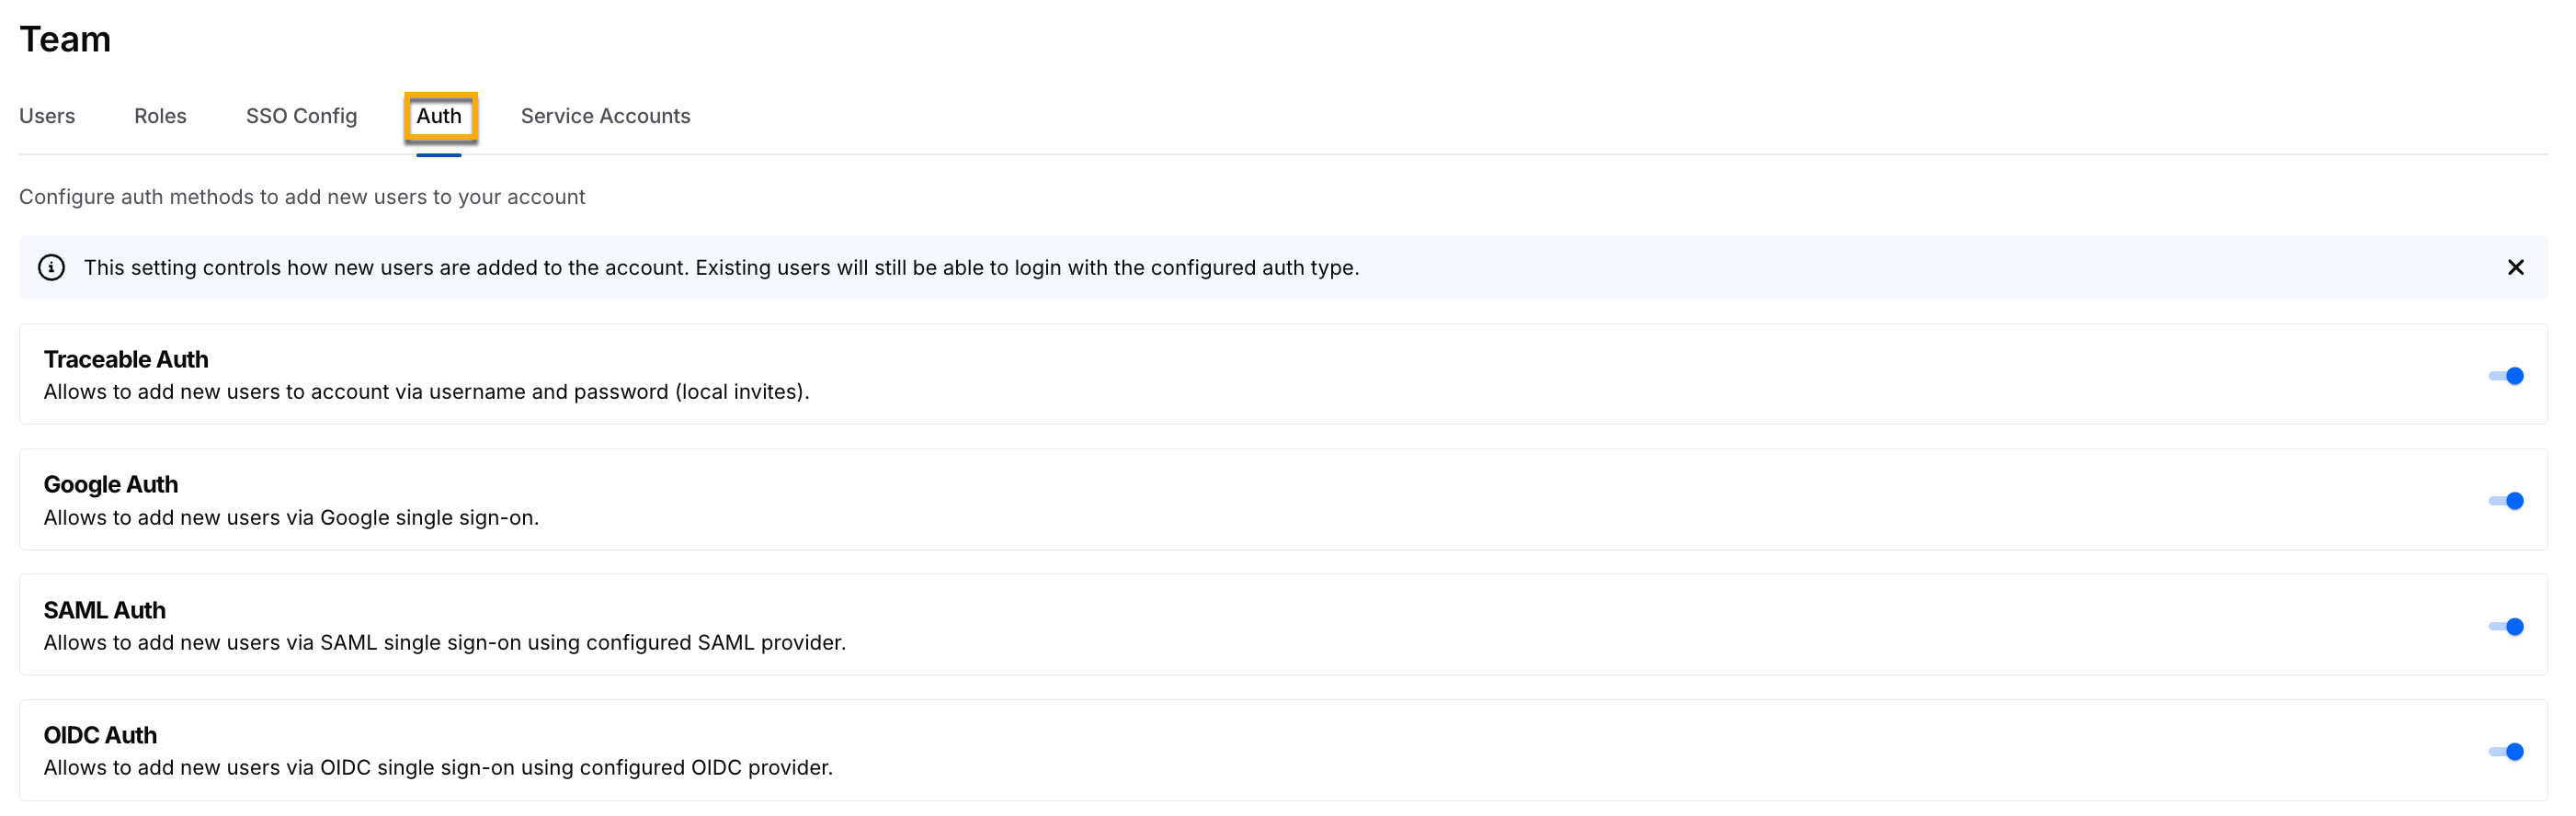
Auth
Traceable Auth — Used for local username and password-based access.
Google Auth — Used for Google Single Sign-On (SSO).
SAML Auth — Used for enterprise identity providers, such as Okta or other SAML-compliant providers.
OIDC Auth — Used for OpenID Connect (OIDC)-based Single Sign-On (SSO) with identity providers that support the OIDC protocol.
By enabling the appropriate authentication methods, you can align user onboarding with existing identity management policies while providing a seamless login experience. The selected authentication methods apply to new user enrollment, allowing you to control how future users gain access to the platform. Existing users continue to authenticate using their previously configured authentication method.
Auth configuration benefit
Benefit | How it helps |
|---|---|
Flexible onboarding | Supports local authentication, social login, and enterprise SSO. |
Reduced administrative effort | Eliminates the need to manually manage multiple authentication workflows. |
Improved security | Leverages trusted identity providers and existing authentication policies. |
Navigation
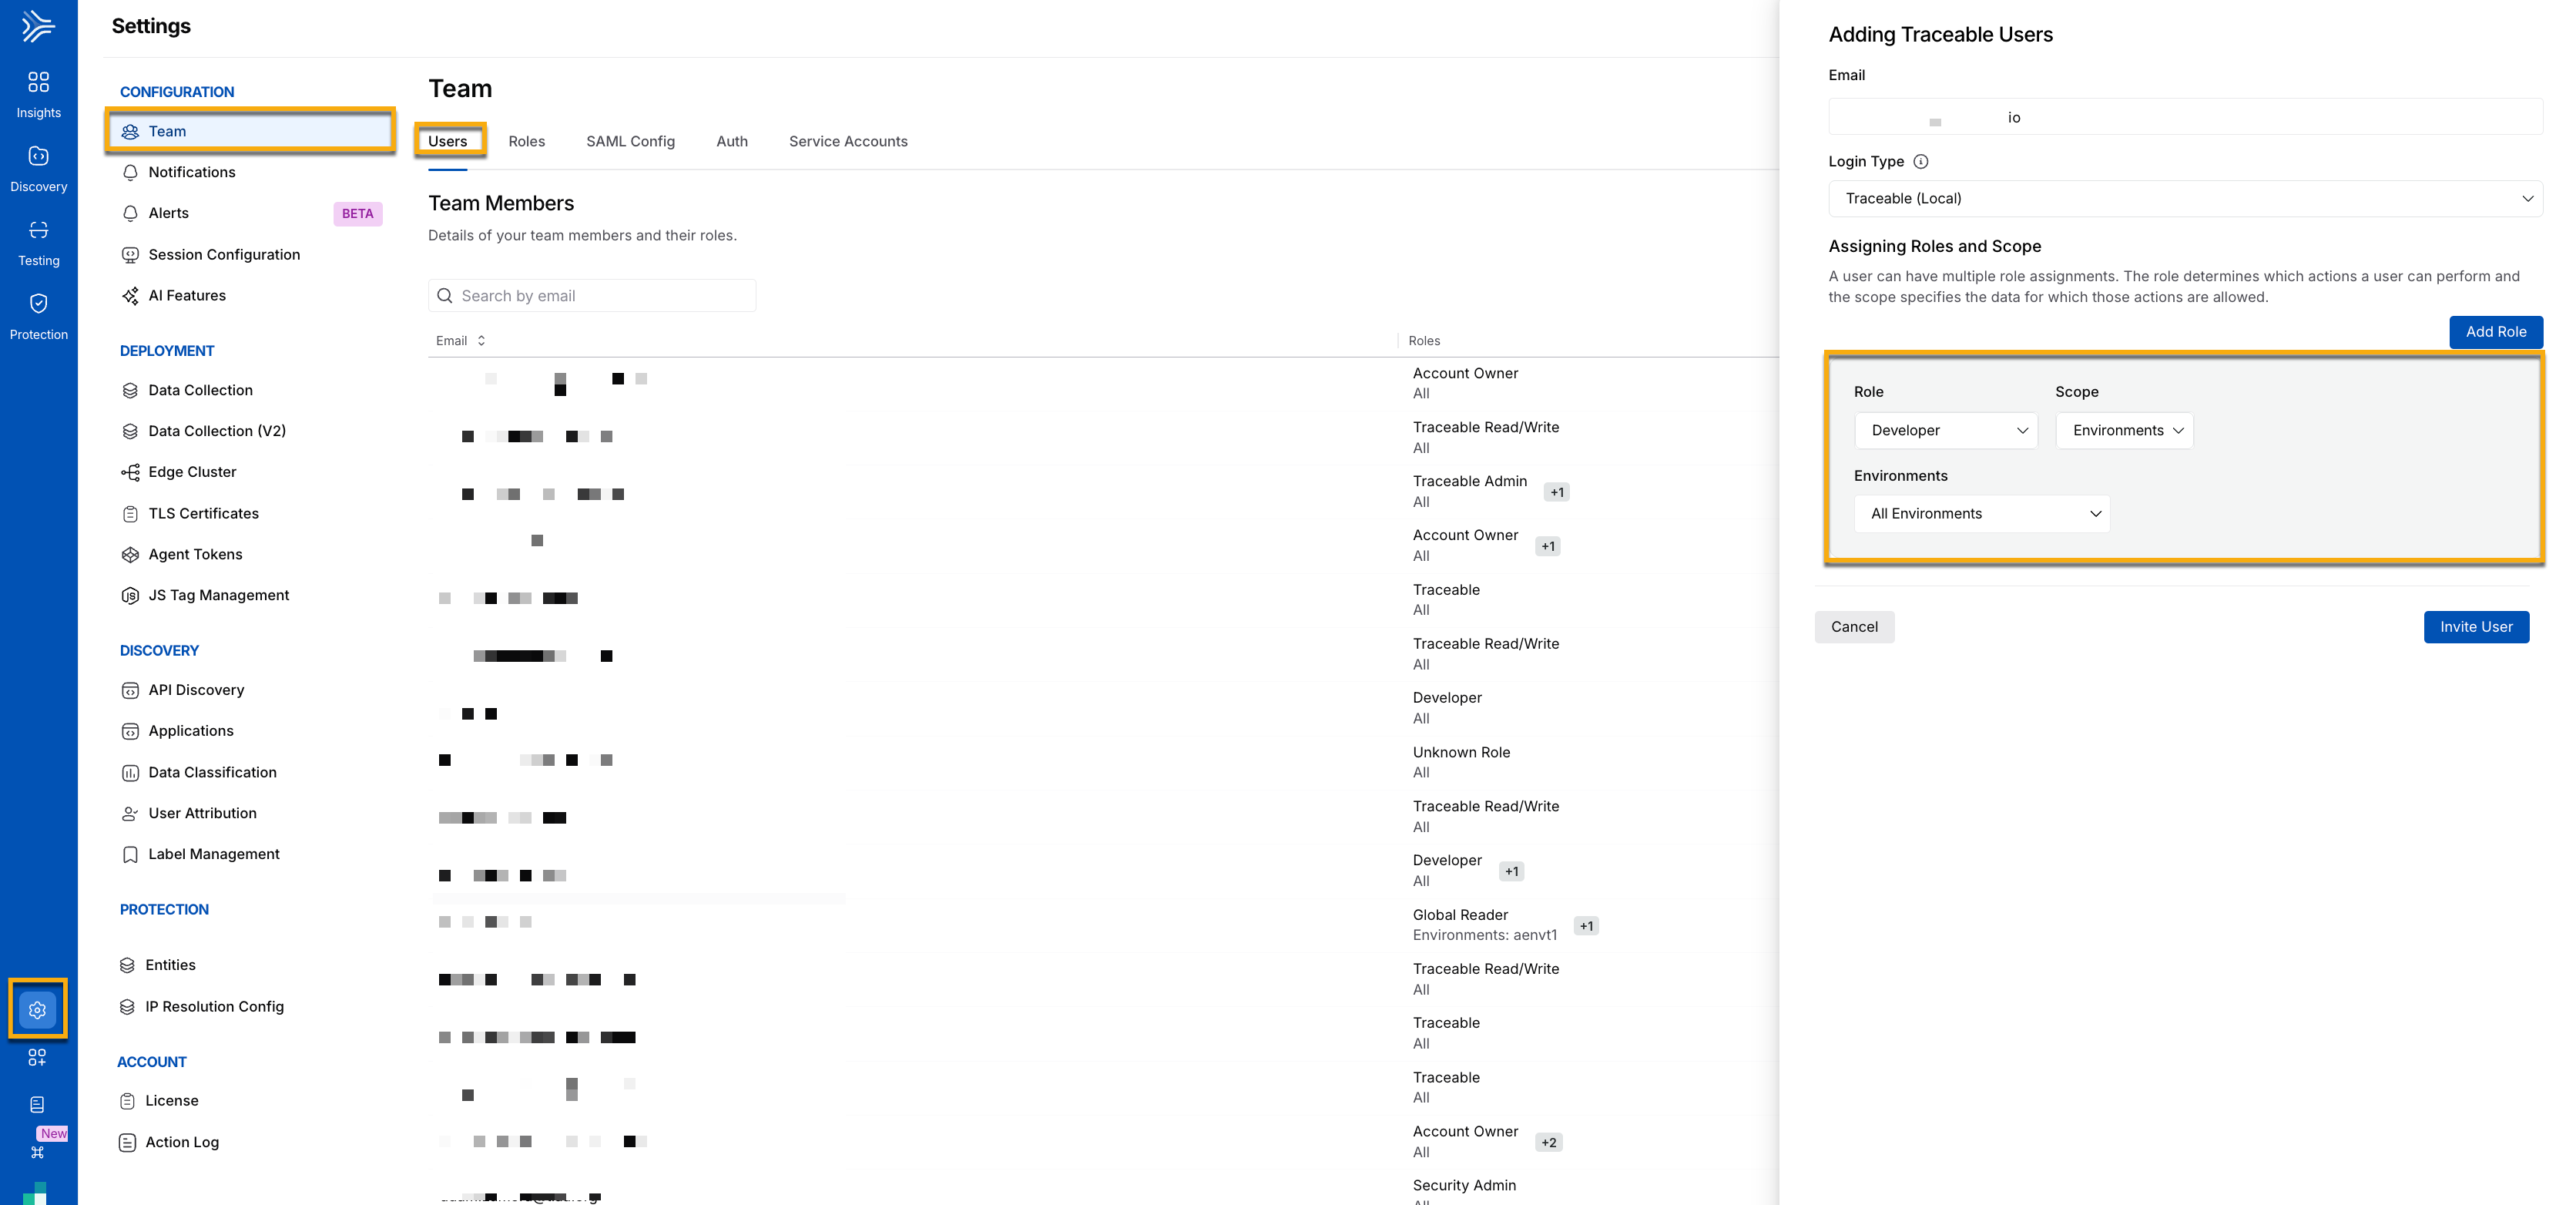
The Users tab on the Team page enables you to create Traceable users and assign them roles and scope for specific environments, as shown below:
Adding Traceable Users
Invite team members and assign roles
Traceable allows you to invite as many team members as you like to your Traceable account. You can add a team member if you are the Account Owner or have the necessary Edit privileges on a Team level. While inviting a team member, you can choose the role you wish to assign and scope them to environments, endpoints, and/or services.
As a first step for inviting team members, Traceable recommends that you identify or create the role you wish to assign to the user. For more information on the roles and their associated permissions, see Roles. Once you have done this, navigate to Settings ( ) → Team → Users tab, click + Invite User, and complete the following steps:
Email — Email address of the user you wish to invite.
Login Type — The login type through which you wish to invite the user. You can choose either of the following types:
Traceable Auth — Used for local username and password-based access.
Google Auth — Used for Google Single Sign-On (SSO).
SAML Auth — Used for enterprise identity providers, such as Okta or other SAML-compliant providers.
OIDC Auth — Used for OpenID Connect (OIDC)-based Single Sign-On (SSO) with identity providers that support the OIDC protocol.
Note
The user will be able to login to the platform only using the login type you select.
Role — The role you wish to assign to the user. The drop-down lists all the roles available under the Roles tab.
Scope — The scope of the role. This limits the role to the specific areas you select. The following options are available for scoping:
All — Allows users to perform actions associated with the role across all environments, endpoints, and services.
Environments — Allows users to perform actions associated with the role only across the environment(s) you select.
Endpoints — Allows users to perform actions associated with the role only across the API endpoint(s) you select.
Services — Allows users to perform actions associated with the role only across the service(s) you select.
Note
The above options may vary for pre-defined and custom roles. For example, all of the above options are available for the Developer role, whereas only the All option is available for Custom roles.
Click Add Role to add multiple roles as needed.
Note
Traceable performs an OR operation in case of multiple roles.
Click Invite User.
Upon invitation, the team member receives an email that they can use to sign up for the Traceable platform. If you are the Account Owner or have the necessary Edit privileges on a team level, you can also perform the following actions for a user:
Edit — Modify the role or scope assigned to a user according to your business requirements.
Delete — Remove the user from the Traceable platform permanently.
To do so, click the Ellipse ( ) icon for the user and select the necessary action.