Updates (April 2026 to June 2026)
May 2026 — Updated the topic to add information about the notification availability of a new category for the notification rule for TLS certificates. For more information, see Create a Notification Rule.
Notifications play an essential role in application protection. Custom notifications also help you streamline the types of notifications you wish to receive and the frequency at which you would like to receive them. Some events also have severity levels, such as High, Medium, or Low. You can choose the severity of events for which you wish to be notified. For example, you can decide to be notified only for high and medium-severity events. Navigate to Settings (![]() ) → Configuration → Notifications page to create custom notifications.
) → Configuration → Notifications page to create custom notifications.
What will you learn in this topic?
By the end of this topic, you will be able to learn:
The steps to create a custom notification.
The list of categories and their respective threat and event types.
Before you begin
Before you proceed to create a notification channel and a custom notification, make a note of the following:
Make sure you have the View and Edit RBAC permissions under Administration→ Notifications to create the channel notifications. For more information, see Team and roles - RBAC.
Create a custom notification
Creating a custom notification is a two-step process.
After creating a channel, you must create a notification rule to select the type of threats or events for which you wish to receive notifications. During this configuration, you must also select the channel you created for Traceable to distribute the notification.
Step 1 — Create a channel
A channel is a group of media or people you want to notify when a type of event is triggered. You can send notifications to one or more of the following channels:
Email Addresses — Sends notifications directly to the specified email address(es), ensuring that users receive alerts in their inbox(es). You can send these alerts to one or more users by adding a comma-separated list of email addresses.
Slack Webhook — Delivers notifications to Slack channels, enabling real-time collaboration and immediate visibility of events within team workflows. For information on creating a Slack webhook, see Sending messages using Incoming Webhooks.
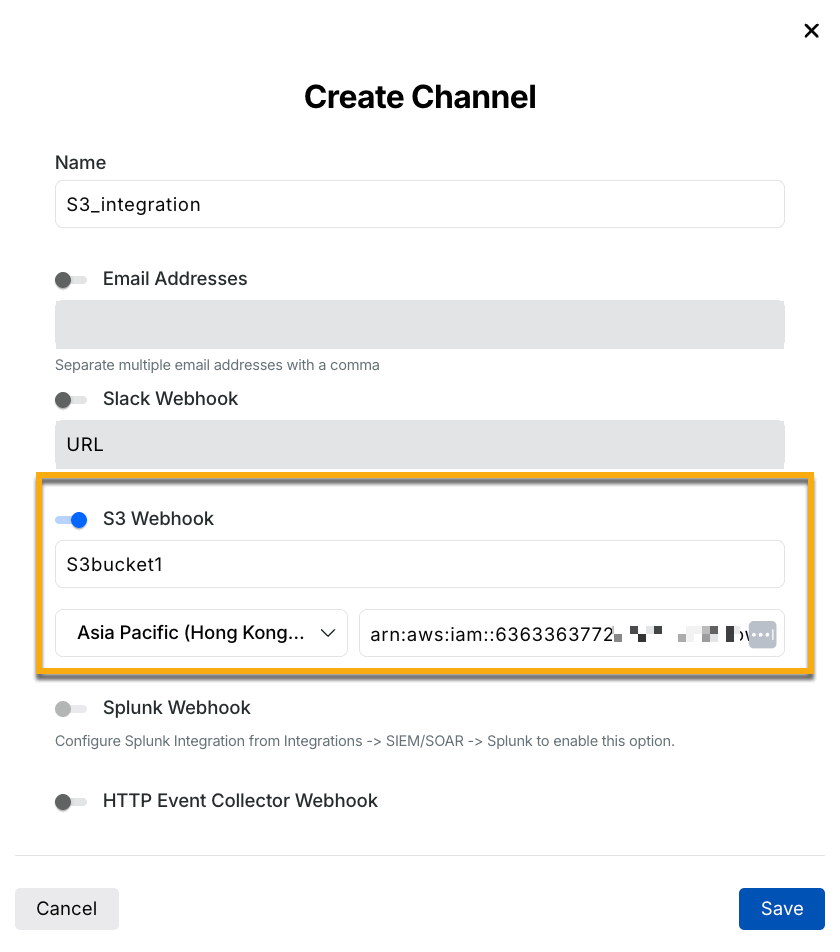
S3 Webhook — Stores notification payloads in Amazon S3, allowing integration according to your requirements for further analysis or compliance. For more information, see S3 Integration.
Note
When configuring an S3 Webhook, ensure that you configure the Audience in your S3 bucket. Contact Traceable's support at support@traceable.ai to obtain the Audience value for configuration in AWS.
Splunk Webhook — Integrate with Splunk to forward notification data, which supports advanced log analysis and monitoring capabilities using its dashboard. For information on the Splunk webhook, see Splunk documentation.
Syslog Server — Sends notifications to a Syslog server, enabling centralized logging and integration with traditional IT operational tools. For more information on the Syslog server, see the Syslog documentation.
HTTP Event Collector Webhook — Once enabled, this sends a notification to the specified channel if any HTTP Event Collector events are triggered on Splunk. For more information, see HTTP Event Collector (HEC) Integration.
Custom Webhook — Provides a customizable endpoint for delivering notifications, allowing integration with third-party systems or workflows according to your requirements.
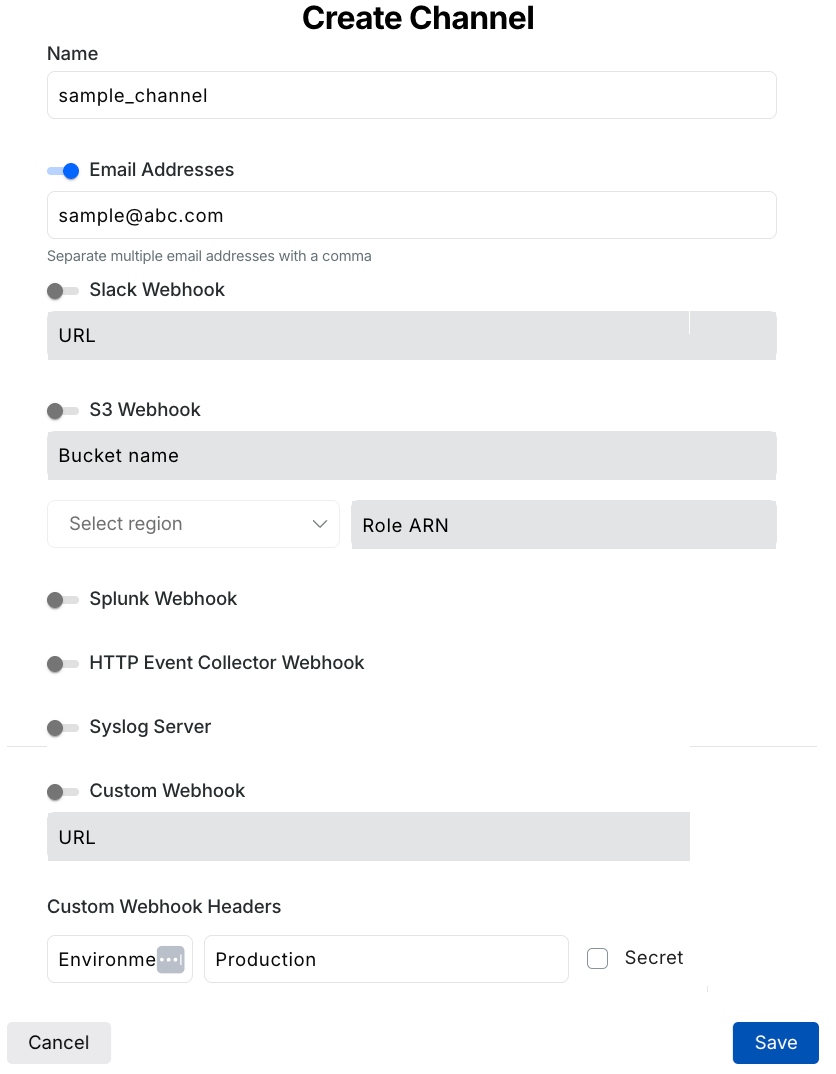
Create Channel
On the Settings (![]() ) → Configuration → Notifications page, click the Create Channel button, and provide the details to configure a channel. You can later edit or delete the channel. Once you have created a channel, the next step is to create a notification rule.
) → Configuration → Notifications page, click the Create Channel button, and provide the details to configure a channel. You can later edit or delete the channel. Once you have created a channel, the next step is to create a notification rule.
Note
You cannot delete a channel associated with a notification rule.
Step 2 — Create a notification rule
A notification is sent through a channel for a specific category of events and a particular event type. To view all events sent through the channel, see the Notification Types and Field Definition. To create a notification rule, click + Create Notification and complete the following steps:
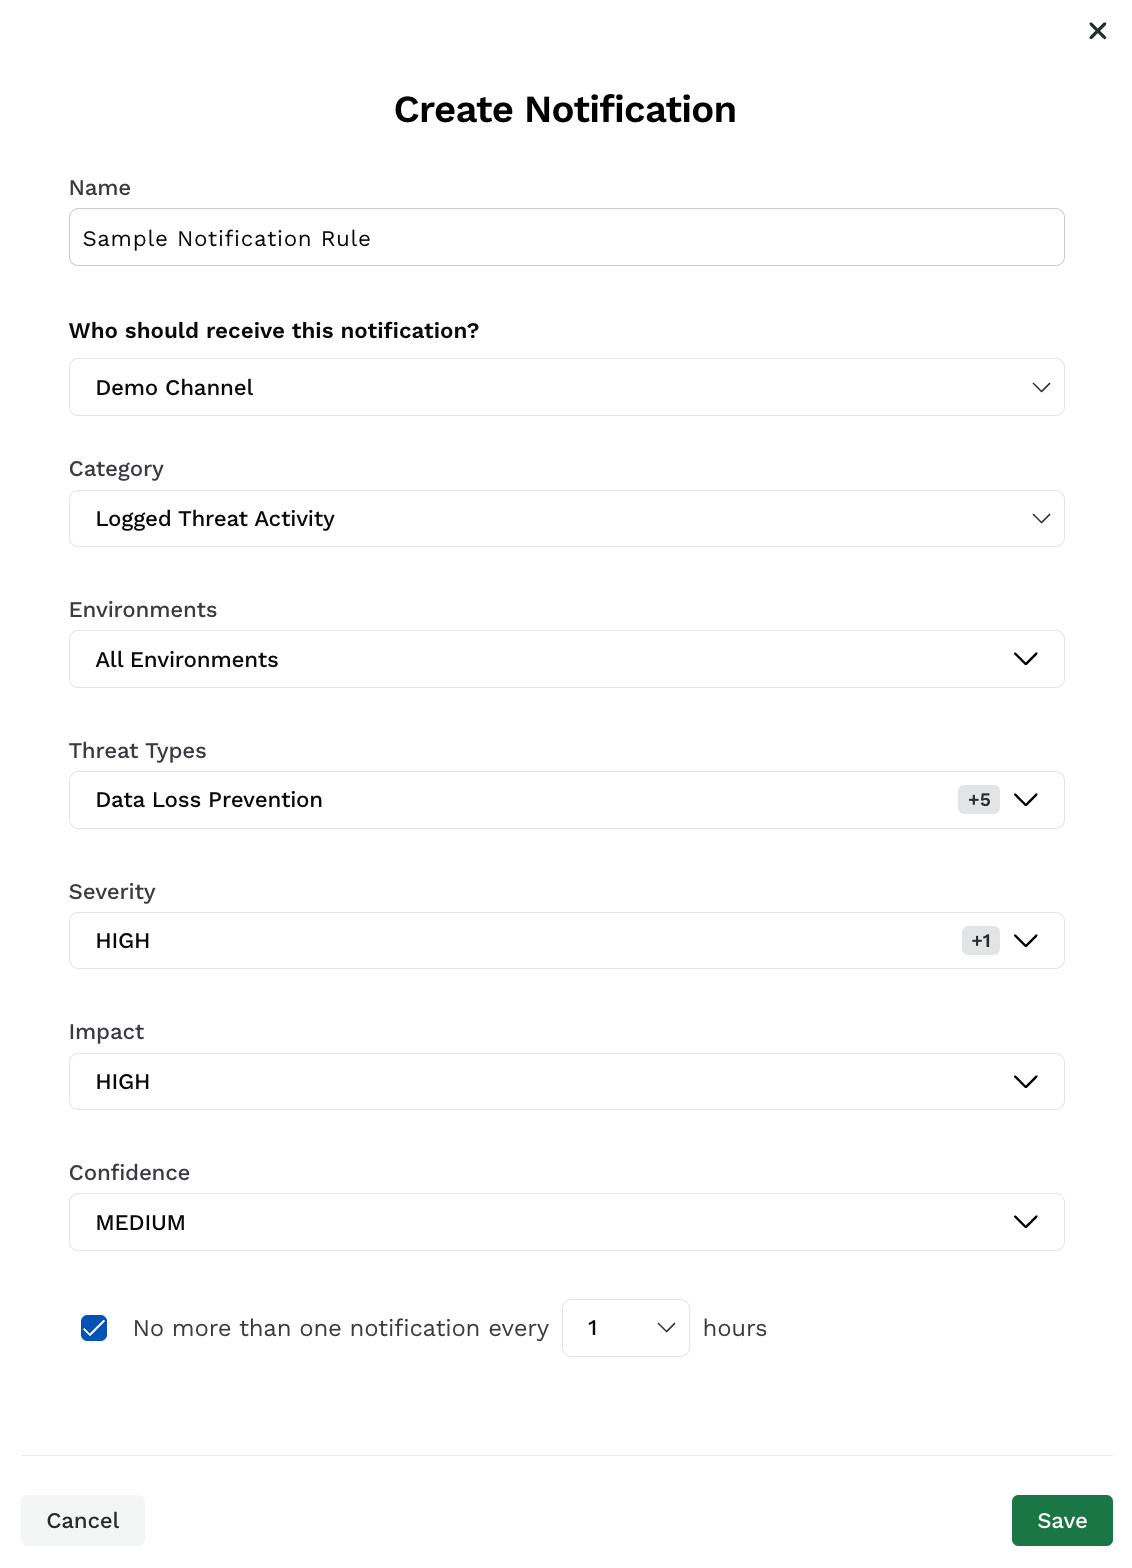
Create Notification
Name — A name for your notification rule, for example, Sample Notification Rule.
Who should receive this notification — A channel where you wish to receive the notification. You can change the channel to which you want to send the notification at any time post-creation. However, a notification can be sent to only one channel.
Category — The category to which the threat or event belongs.
Note
The availability of the fields below depends on the Category you select.
Environment(s) — The environment for which you wish to receive the notification.
Threat Types — The type of event or threat for which you wish to receive notifications. Each category has different threat types or event types. For more information on the availability, see Threat and Event Types.
Severity — The severity of the event that is being notified, for example, High.
Impact — The impact of the threat or event types you wish to receive the notification, for example, you may wish to receive notifications only for threat activities with a High impact score.
Confidence — The confidence of the threat or event types you wish to receive the notification for. For example, you may wish to receive notifications only for threat activities that have a Medium confidence level.
(Optional) Select the frequency of notification from one notification every hour to one notification in 24 hours.
Click Save.
Threat and event types
The following tables list the different category and their corresponding threat types or event types:
Category | Threat Type |
|---|---|
Logged threat activity | Authorization Bypass - Object Level |
Authorization Bypass - User Level | |
Content Size Anomaly | |
Content Type Anomaly | |
Cross-Site Scripting (XSS) | |
Custom Signature | |
Data Loss Prevention | |
Email Domain Malicious Sources | |
Enumeration | |
GraphQL Attacks | |
HTTP Protocol Attacks | |
Invalid Enumerations | |
IP Range Malicious Sources | |
IP Type Malicious Sources | |
Java Application Attacks | |
Local File Inclusion | |
Mass Assignment | |
Missing Field | |
NodeJS Injection | |
Rate Limiting | |
Region Malicious Sources | |
Remote Code Execution | |
Remote File Inclusion | |
Scanner Detection | |
Server Side Request Forgery (SSRF) Signatures | |
Session Fixation | |
SQL Injection | |
Type Anomaly | |
Value Out of Range | |
XML External Entity Injection (XXE) | |
Blocked threat activity | Cross-Site Scripting (XSS) |
Custom Signature | |
Data Loss Prevention | |
Email Domain Malicious Sources | |
Enumeration | |
GraphQL Attacks | |
HTTP Protocol Attacks | |
In-Agent Vulnerable Library | |
IP Range Malicious Sources | |
IP Type Malicious Sources | |
Java Application Attacks | |
Local File Inclusion | |
NodeJS Injection | |
Rate Limiting | |
Region Malicious Sources | |
Remote Code Execution | |
Remote File Inclusion | |
Scanner Detection | |
Server Side Request Forgery (SSRF) Signatures | |
Session Fixation | |
SQL Injection | |
Threat Actor | |
XML External Entity Injection (XXE) |
Category | Event type |
|---|---|
Threat actor status change | Normal |
Threat Actor | |
Resolved | |
Always Allowed | |
Always Denied | |
Suspended | |
Snoozed | |
Threat actor severity state change | Low |
Medium | |
High | |
Critical | |
Protection configuration change | Signature-Based Blocking |
Rate Limiting | |
Data Loss Prevention | |
Enumeration | |
Malicious Sources IP Range | |
Malicious Sources Region | |
Malicious Sources Email Domain | |
Malicious Sources IP Type | |
Custom Signature | |
Detection | |
Exclusions | |
Team activity | Create User |
Update User | |
Delete User | |
Invite User | |
User Accept Invite | |
User Login | |
User Logout | |
Threat scoring configuration change | Anomalous Behavior Score Contribution |
Severity Score Contribution | |
Threat Actor Score Contribution | |
Events Contribution | |
IP Reputation Score Contribution | |
Status Code Contribution | |
Threat Auto Blocking |
You can create notifications for any change made to the notification configurations.
Category | Event Type | Event Category |
|---|---|---|
API naming rule configuration change | Create | — |
Update | ||
Delete | ||
API documentation configuration change | Create | — |
Update | ||
Delete | ||
Exclude rule configuration change | Create | — |
Update | ||
Delete | ||
Label configuration change | Create |
|
Update | ||
Delete | ||
Risk scoring configuration change | Update | — |
Posture event | API Discovery | — |
Risk Score Change | ||
Sensitive Data Discovery | ||
Sensitive Data Shared With Third Party | ||
Service Discovery | ||
Vulnerability Discovery | ||
Notification configuration change | Create |
|
Update | ||
Delete | ||
Data classification configuration change | Create |
|
Update | ||
Delete | ||
Integration configuration change | Create config | — |
Update config | ||
Delete config | ||
Certificate Configuration Change | Create | — |
Update | ||
Delete | ||
Expiry | ||
Renewal |
Additionally, you can create notifications for data collection activities to stay informed when an agent comes online or goes offline.
Category | Agent activity type |
|---|---|
Data Collection Activity | New agent deployed |
No data in the environment | |
Agent status change |