OIDC group mapping enables you to assign Traceable roles to users automatically, based on the claim information your OIDC provider sends during single sign-on. Instead of assigning roles to each user manually, you map an OIDC claim to one or more Traceable roles, and Traceable applies those roles whenever a user signs in through that claim name.
What you will learn from this topic
By the end of this topic, you will be able to:
Understand how OIDC group mapping assigns Traceable roles to users based on OIDC claims.
Configure an OIDC group mapping and assign one or more Traceable roles and scopes to the group.
Before you begin
Before you proceed to configure an OIDC group mapping, make a note of the following:
Make sure you are the Account Owner or have the necessary Edit permissions at the Team level.
Make sure that OIDC authentication is configured for your account. For more information, see Auth.
Make sure that you know which Traceable roles and scopes you want to assign to the group.
Make sure that you know the exact claim name your identity provider uses to send group information.
Configure an OIDC group mapping
You can create an OIDC group mapping by navigating to Settings → Team → SSO Config tab, and clicking + Add group. To configure an OIDC group mapping, complete the following steps:
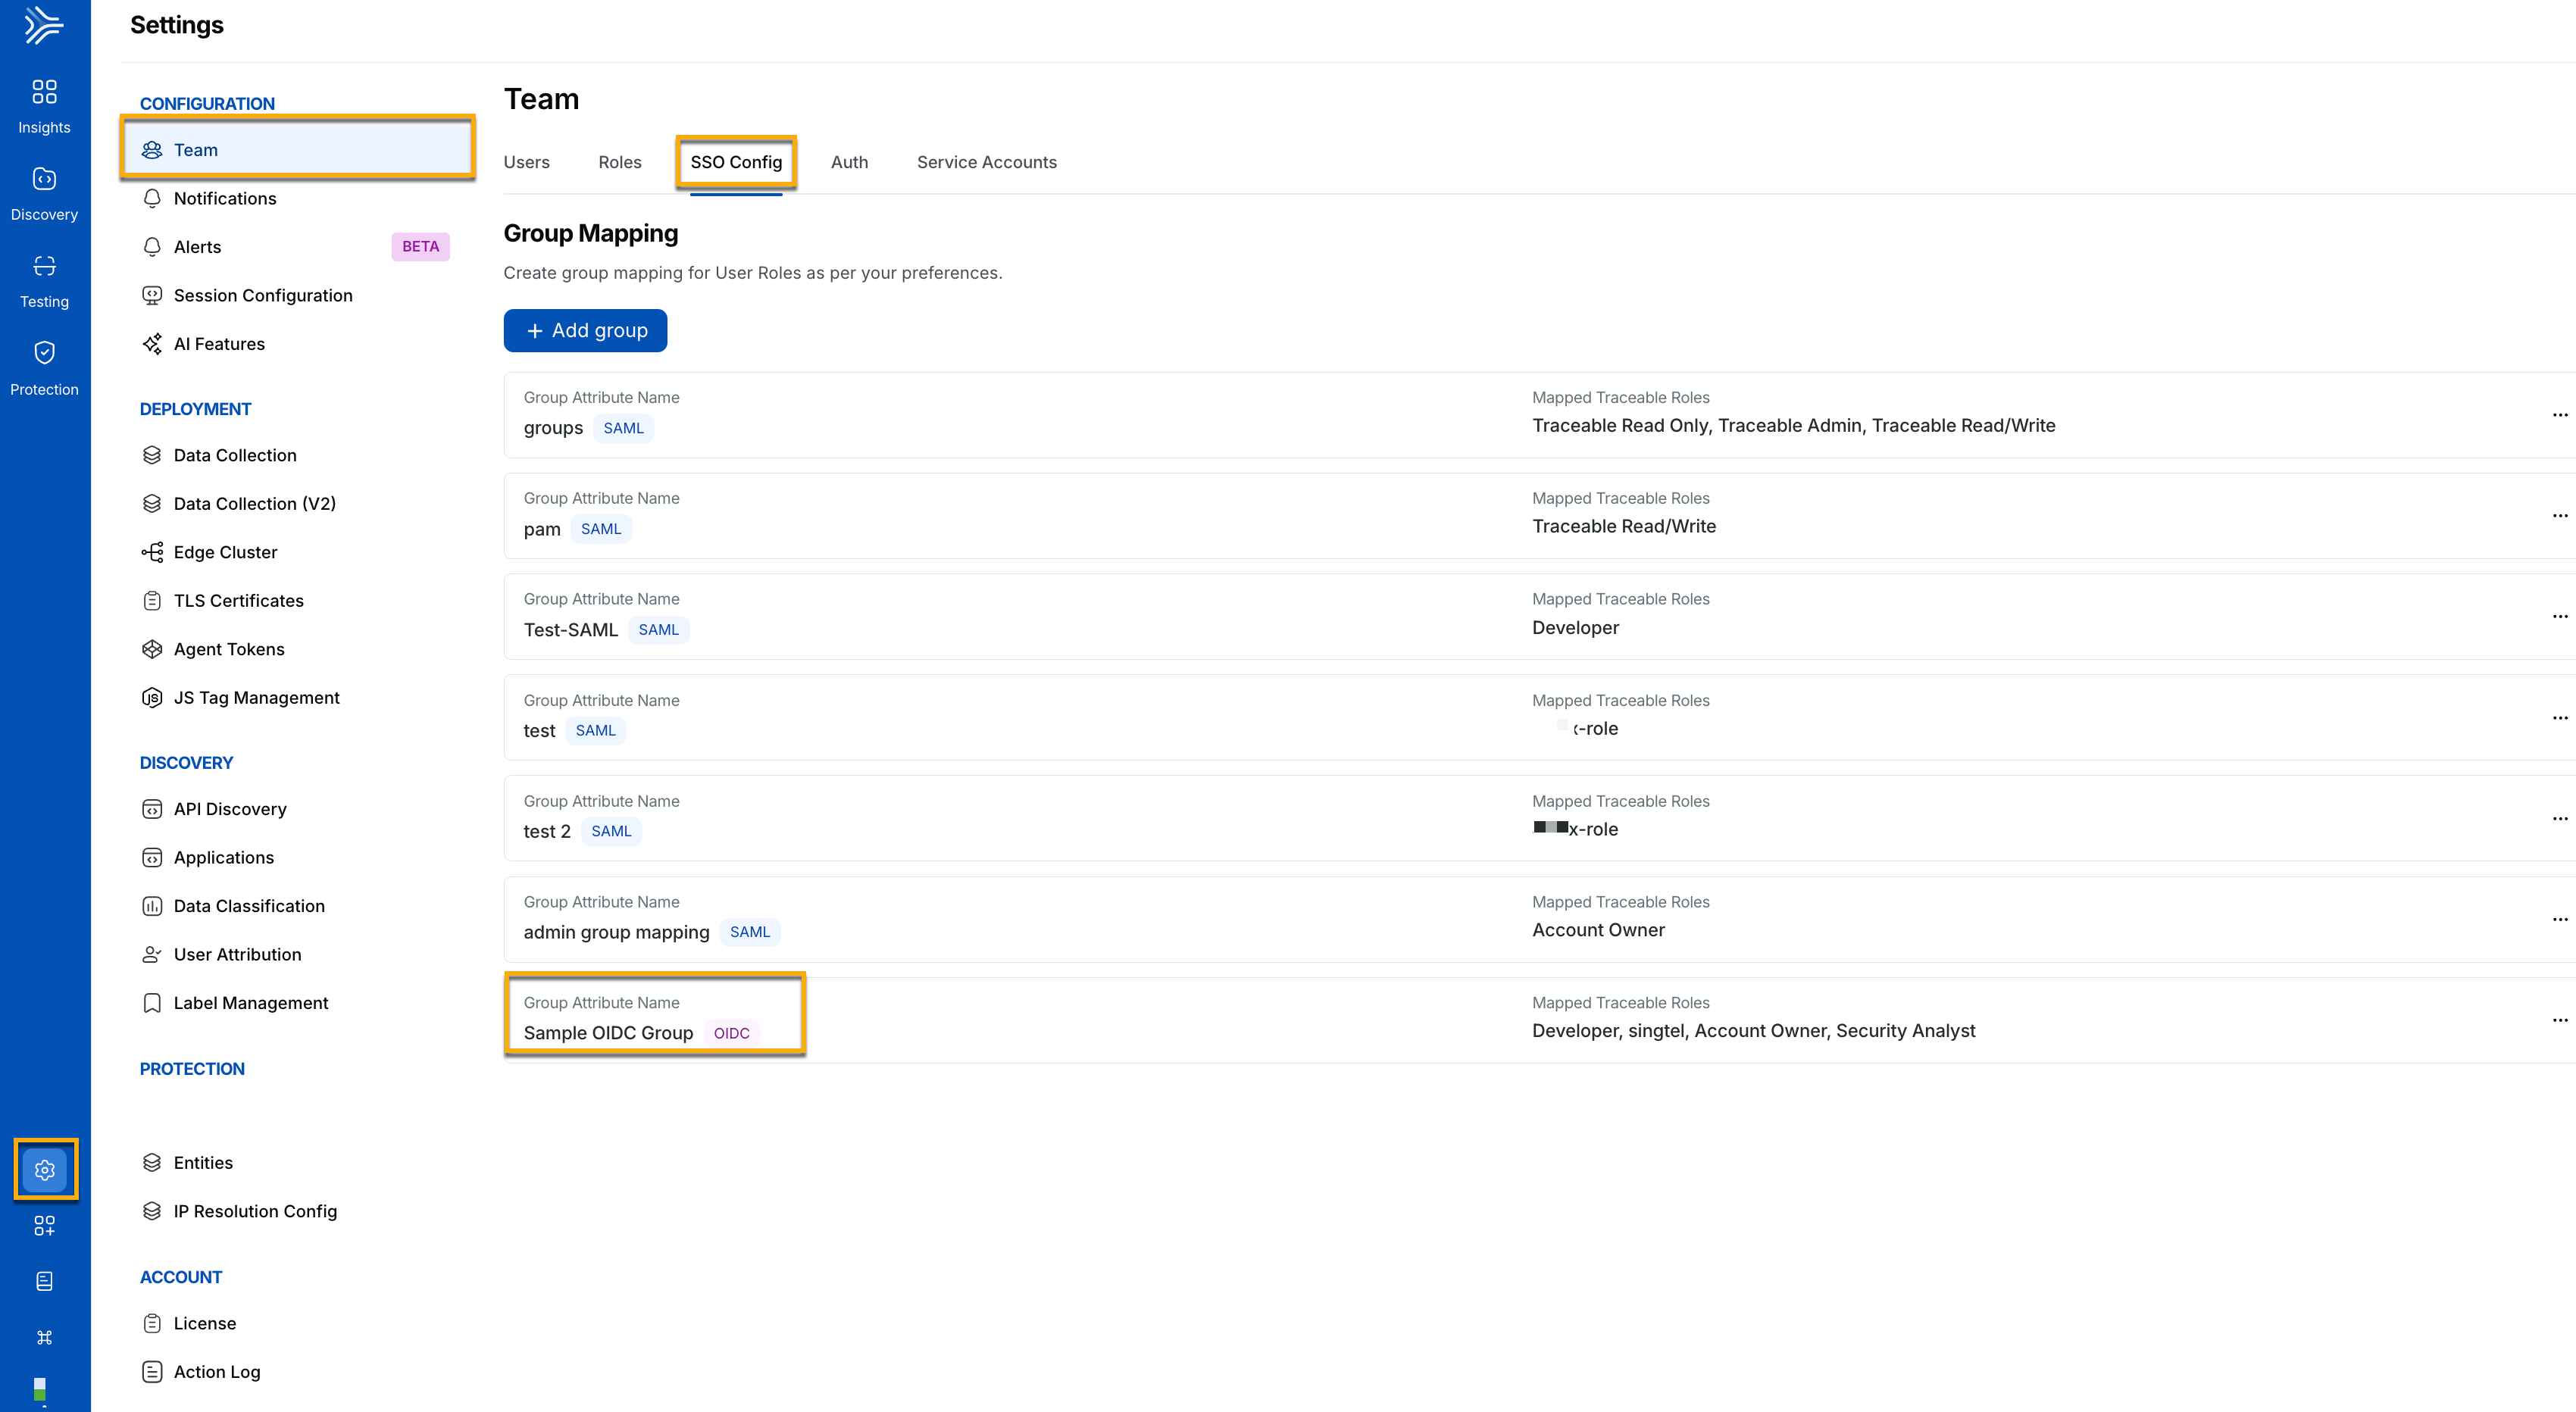
SSO Config Navigation
OIDC group mapping automatically assigns Traceable roles to users based on the groups your identity provider assigns them when your organization authenticates via OIDC. Configuring this mapping removes the need to manually assign a role to every user who logs in through SSO.
Create an OIDC group mapping
To create an OIDC group mapping, complete the following steps:
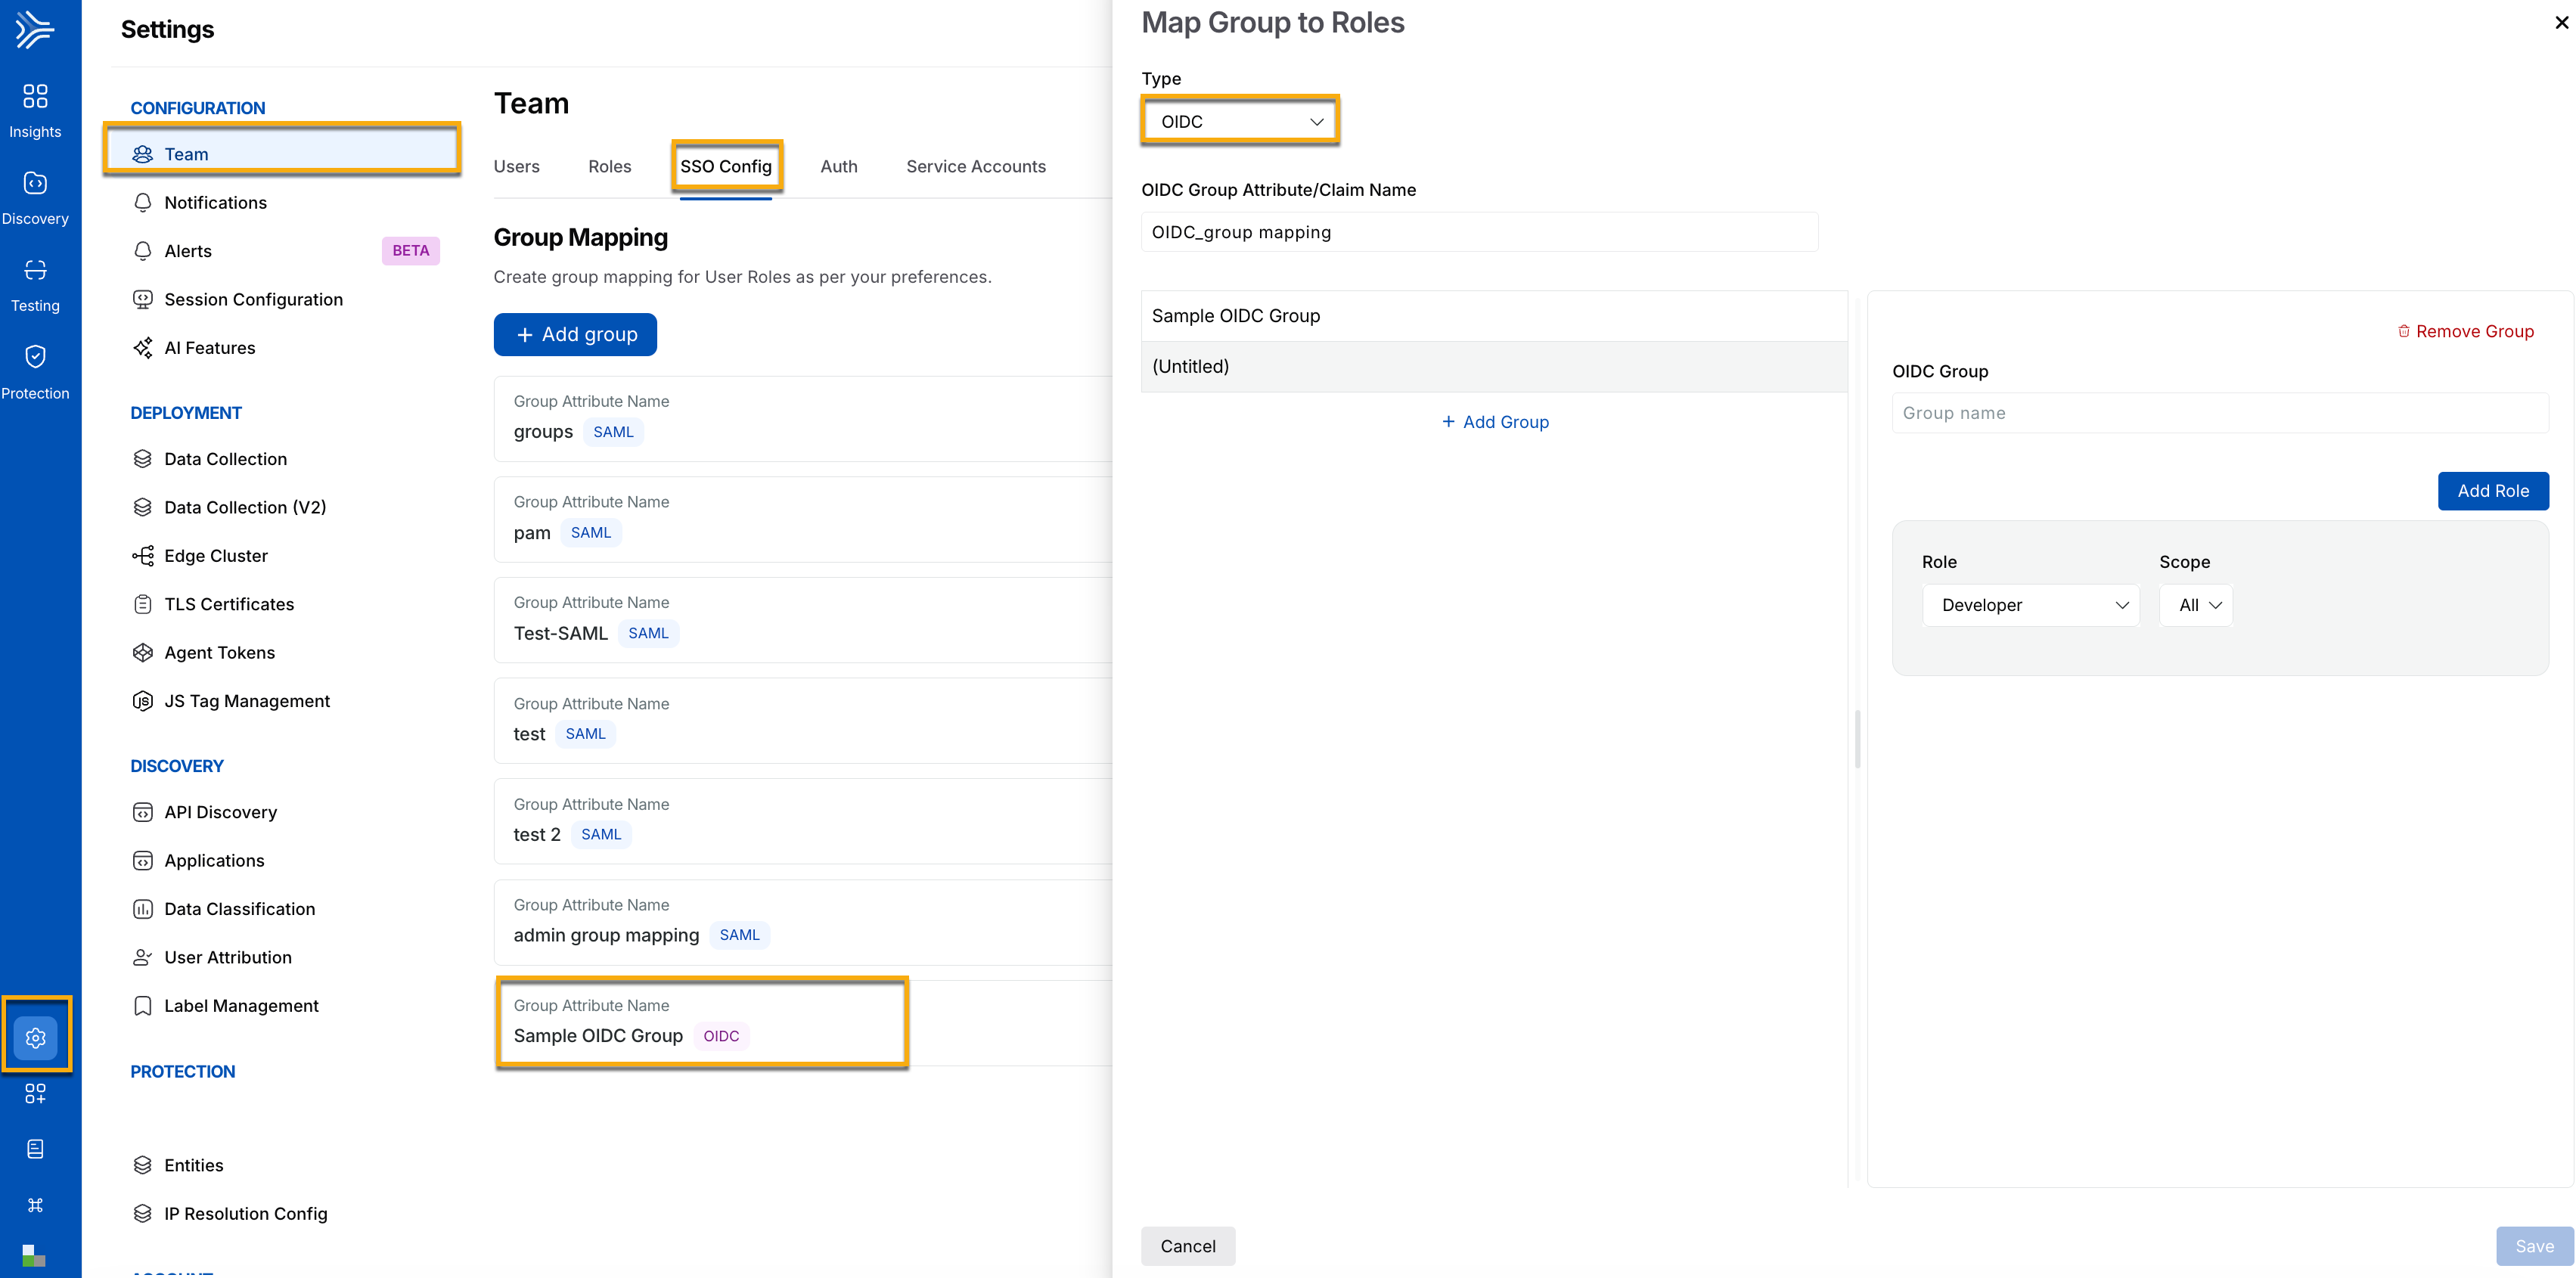
OIDC mapping
Click + Add group.
In the opened slide-out panel, Map Group to Roles from the Type dropdown, select OIDC.
In the OIDC Group Attribute/Claim Name field, specify the exact claim name configured on your identity provider, for example, OIDC_group_mapping.
In the OIDC Group name field, specify the exact group name as it exists in your identity provider, for example, Sample OIDC Group.
Click Add Role.
From the Role dropdown, select the Traceable role to assign, for example, Developer.
From the Scope dropdown, select the scope the role applies to according to your requirements.
Remove a group mapping
Navigate to Settings → Team → SSO Config tab.
Locate the group mapping row you want to remove, and click the Ellipse (…) icon, or open the mapping and click Remove Group.