Updates (October 2025 to December 2025)
October 2025 — Updated the topic to add build steps added in the integration step - Run Traceable XAST with Jenkins. For more information, see Run Traceable XAST with Jenkins.
Jenkins is an open-source automation server that facilitates continuous integration and delivery (CI/CD) for software projects. It provides a platform for building, testing, and deploying applications in an automated and efficient manner. Traceable integrates with Jenkins by running security scans in staging environments. Traceable helps you find issues (vulnerabilities) in the early stages of SDLC, giving developers and product security engineers more time and context to prioritize mitigating vulnerabilities and build secure APIs. The topic explains how to configure and use Traceable CI/CD integration, as well as how to run the scan during the build step and view the scan summary report.
What will you learn in this topic?
By the end of this topic, you will be able to understand :
The steps to integrate Traceable with Jenkins. For more information, see Integrate Traceable XAST with Jenkins.
The Jenkins Reports. For more information, see Reports.
Before you begin
Make a note of the following before proceeding with the integration:
Make sure that you have a functioning Jenkins setup.
Make sure that you have the required permissions to add and manage new plugins.
Make sure that you create an API token that will be required during AST extension configuration. For more information, see API Tokens.
Make sure that you already have a scan suite configured in AST. For more information, see Scans. The name of this suite is required later to configure the AST extension in your pipeline. For more information, see Run Traceable XAST with Jenkins.
Plugin access
To access Traceable's plugin for Jenkins, contact Traceable's support team at support@traceable.ai.
Integrate Traceable XAST with Jenkins
Integrating Jenkins with Traceable consists of two steps:
Step 1 — Deploy the plugin
Complete the following steps to deploy Traceable's plugin for Jenkins:
Navigate to your Jenkins Dashboard and click on Manage Jenkins.
Under System Configurations, click Plugins.
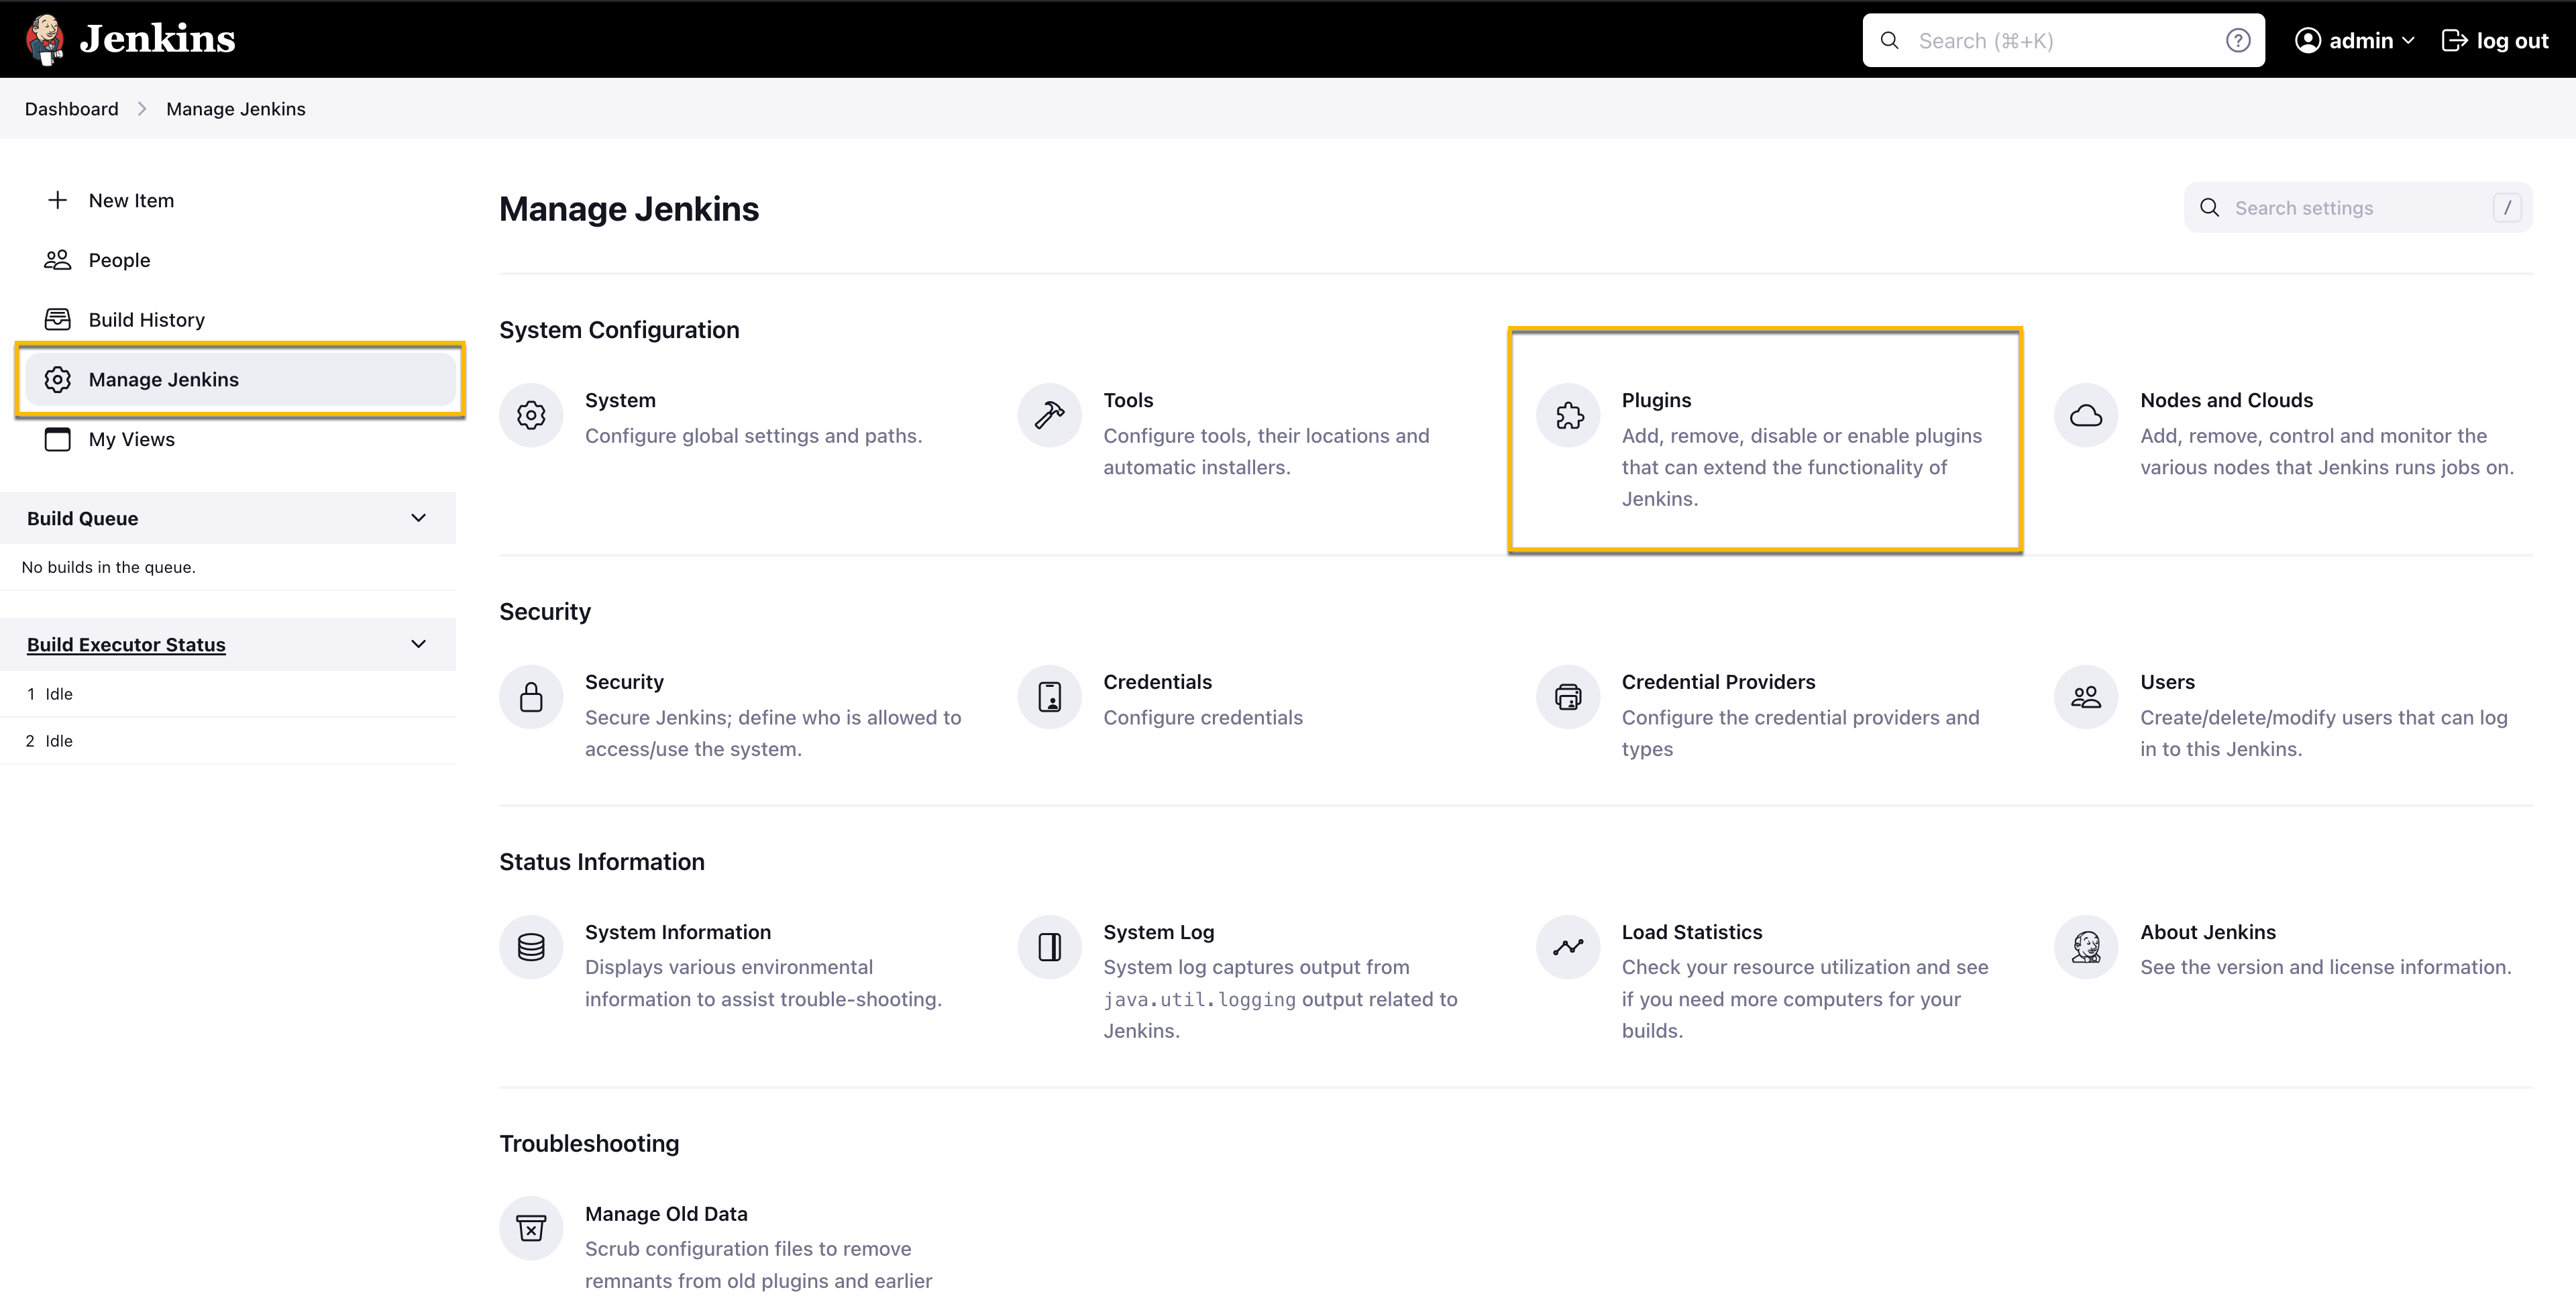
Plugins
Click Advanced settings, and navigate to the Deploy Plugin section.
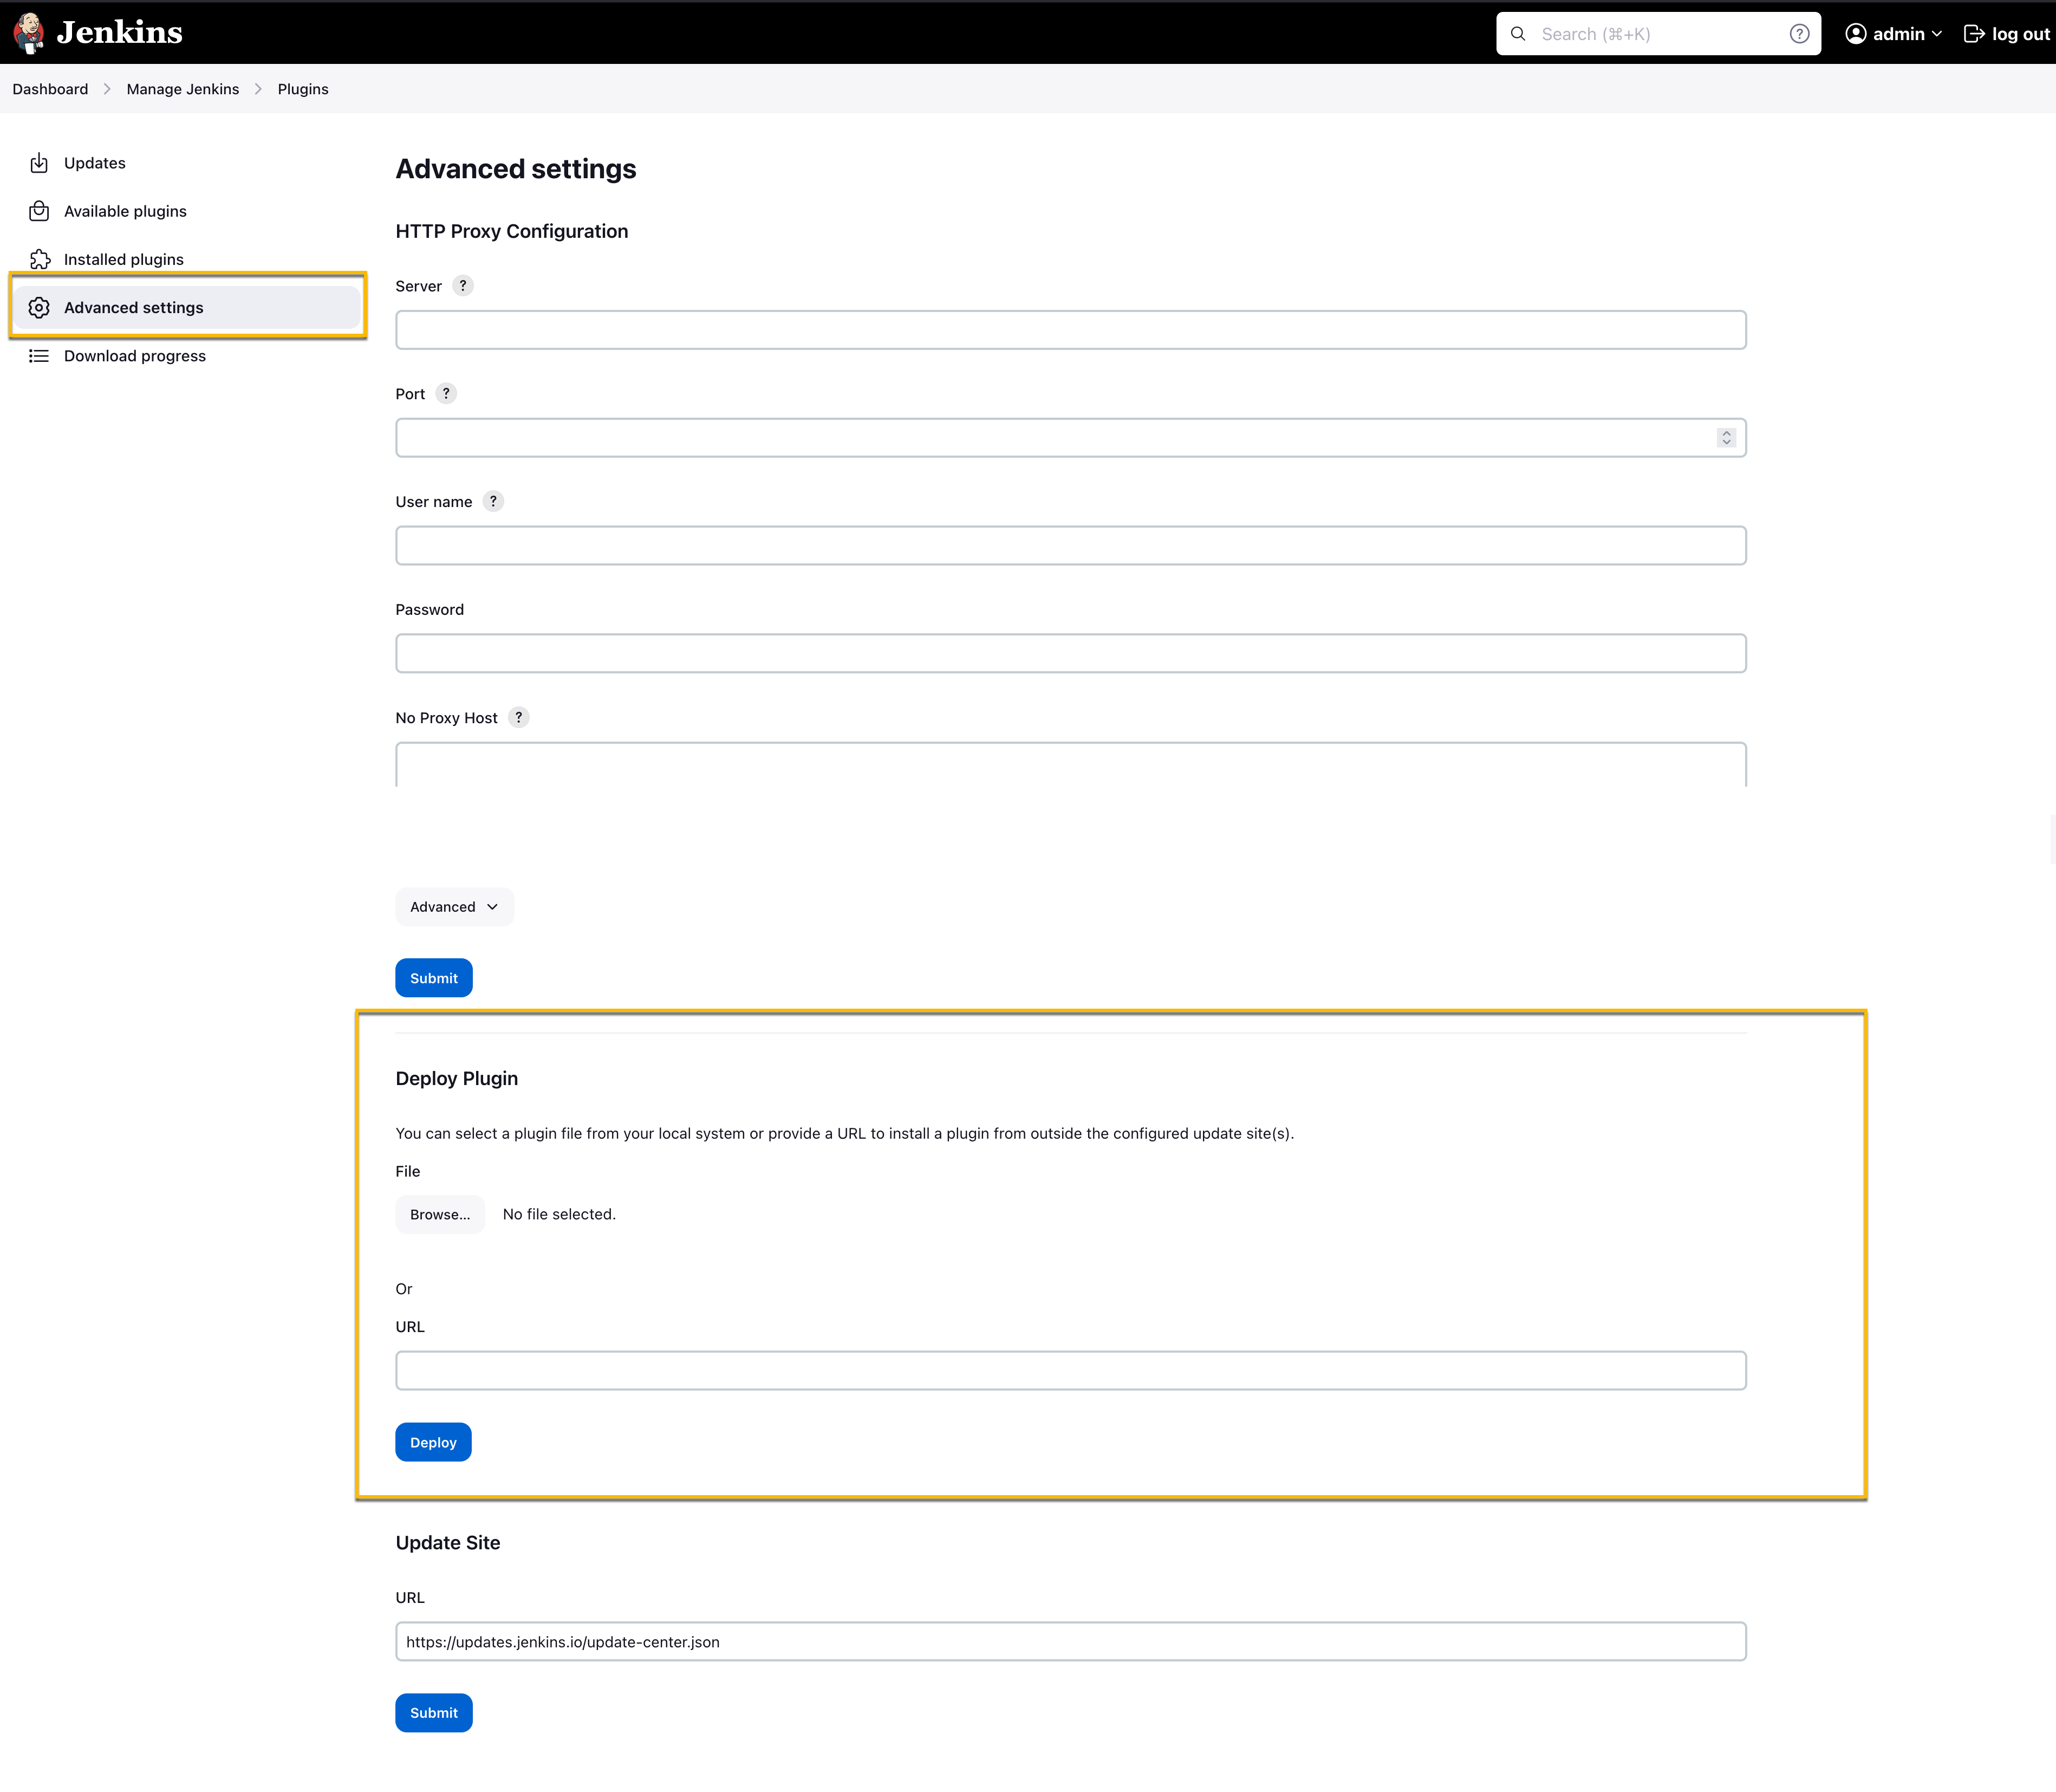
Deploy Plugin
Click Browse and select the
traceable.hpifile provided by Traceable, and click Deploy. To receive thetraceable.hpifile, reach out to Traceable's support team at support@traceable.ai.
Step 2 — Run Traceable XAST with Jenkins
To run Traceable XAST with Jenkins, log in to your Jenkins platform and complete the following steps:
Click New Item on the Jenkins dashboard.
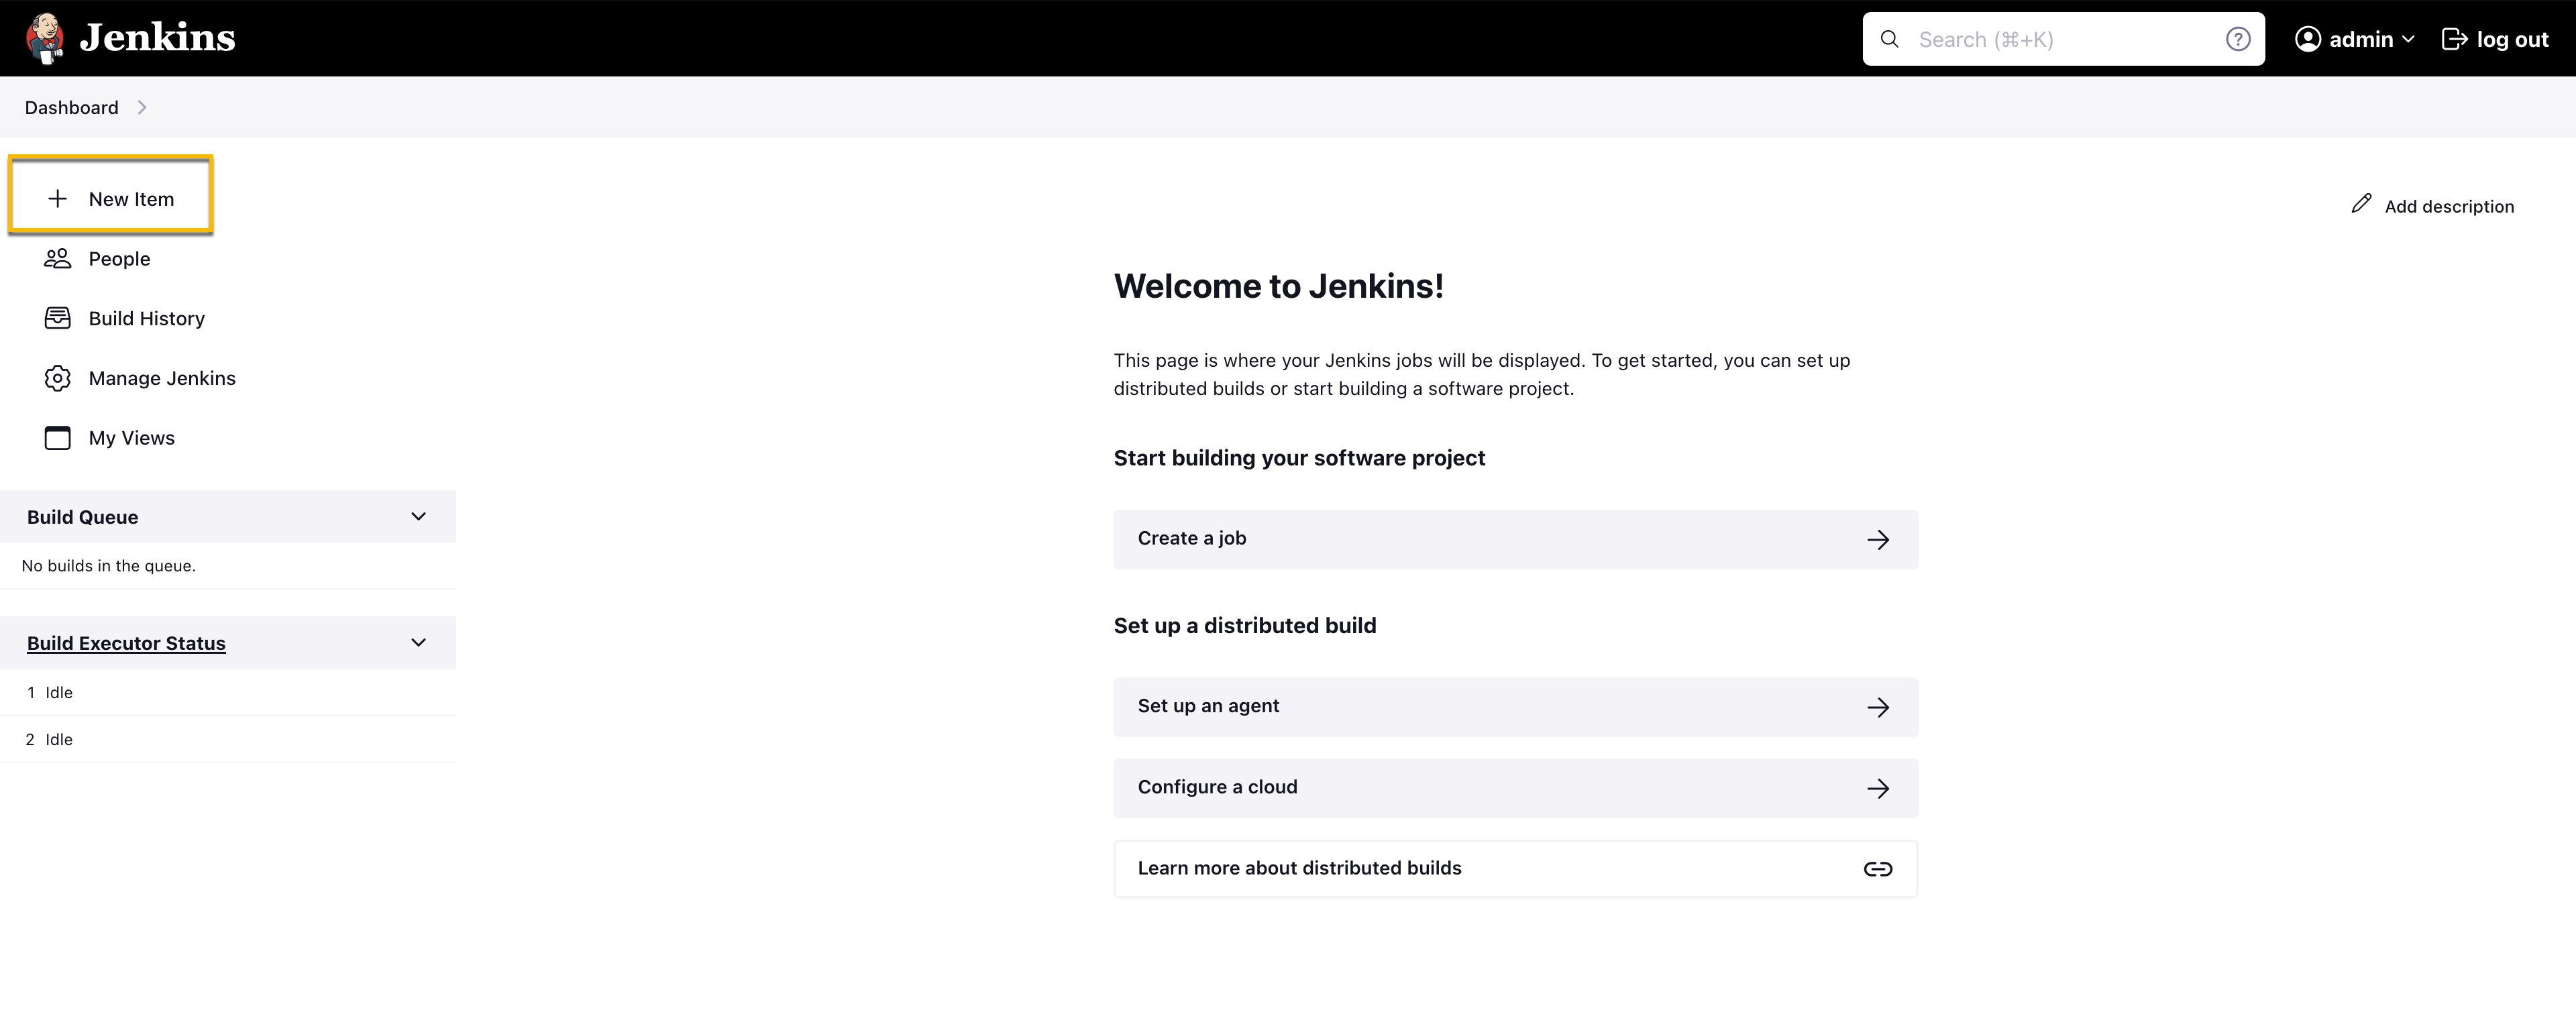
New Jenkins Item
Specify an item name by which you can identify the job containing Traceable XAST.
Select the Freestyle project and click Ok. You can also add this as a build step in the existing Freestyle Job.
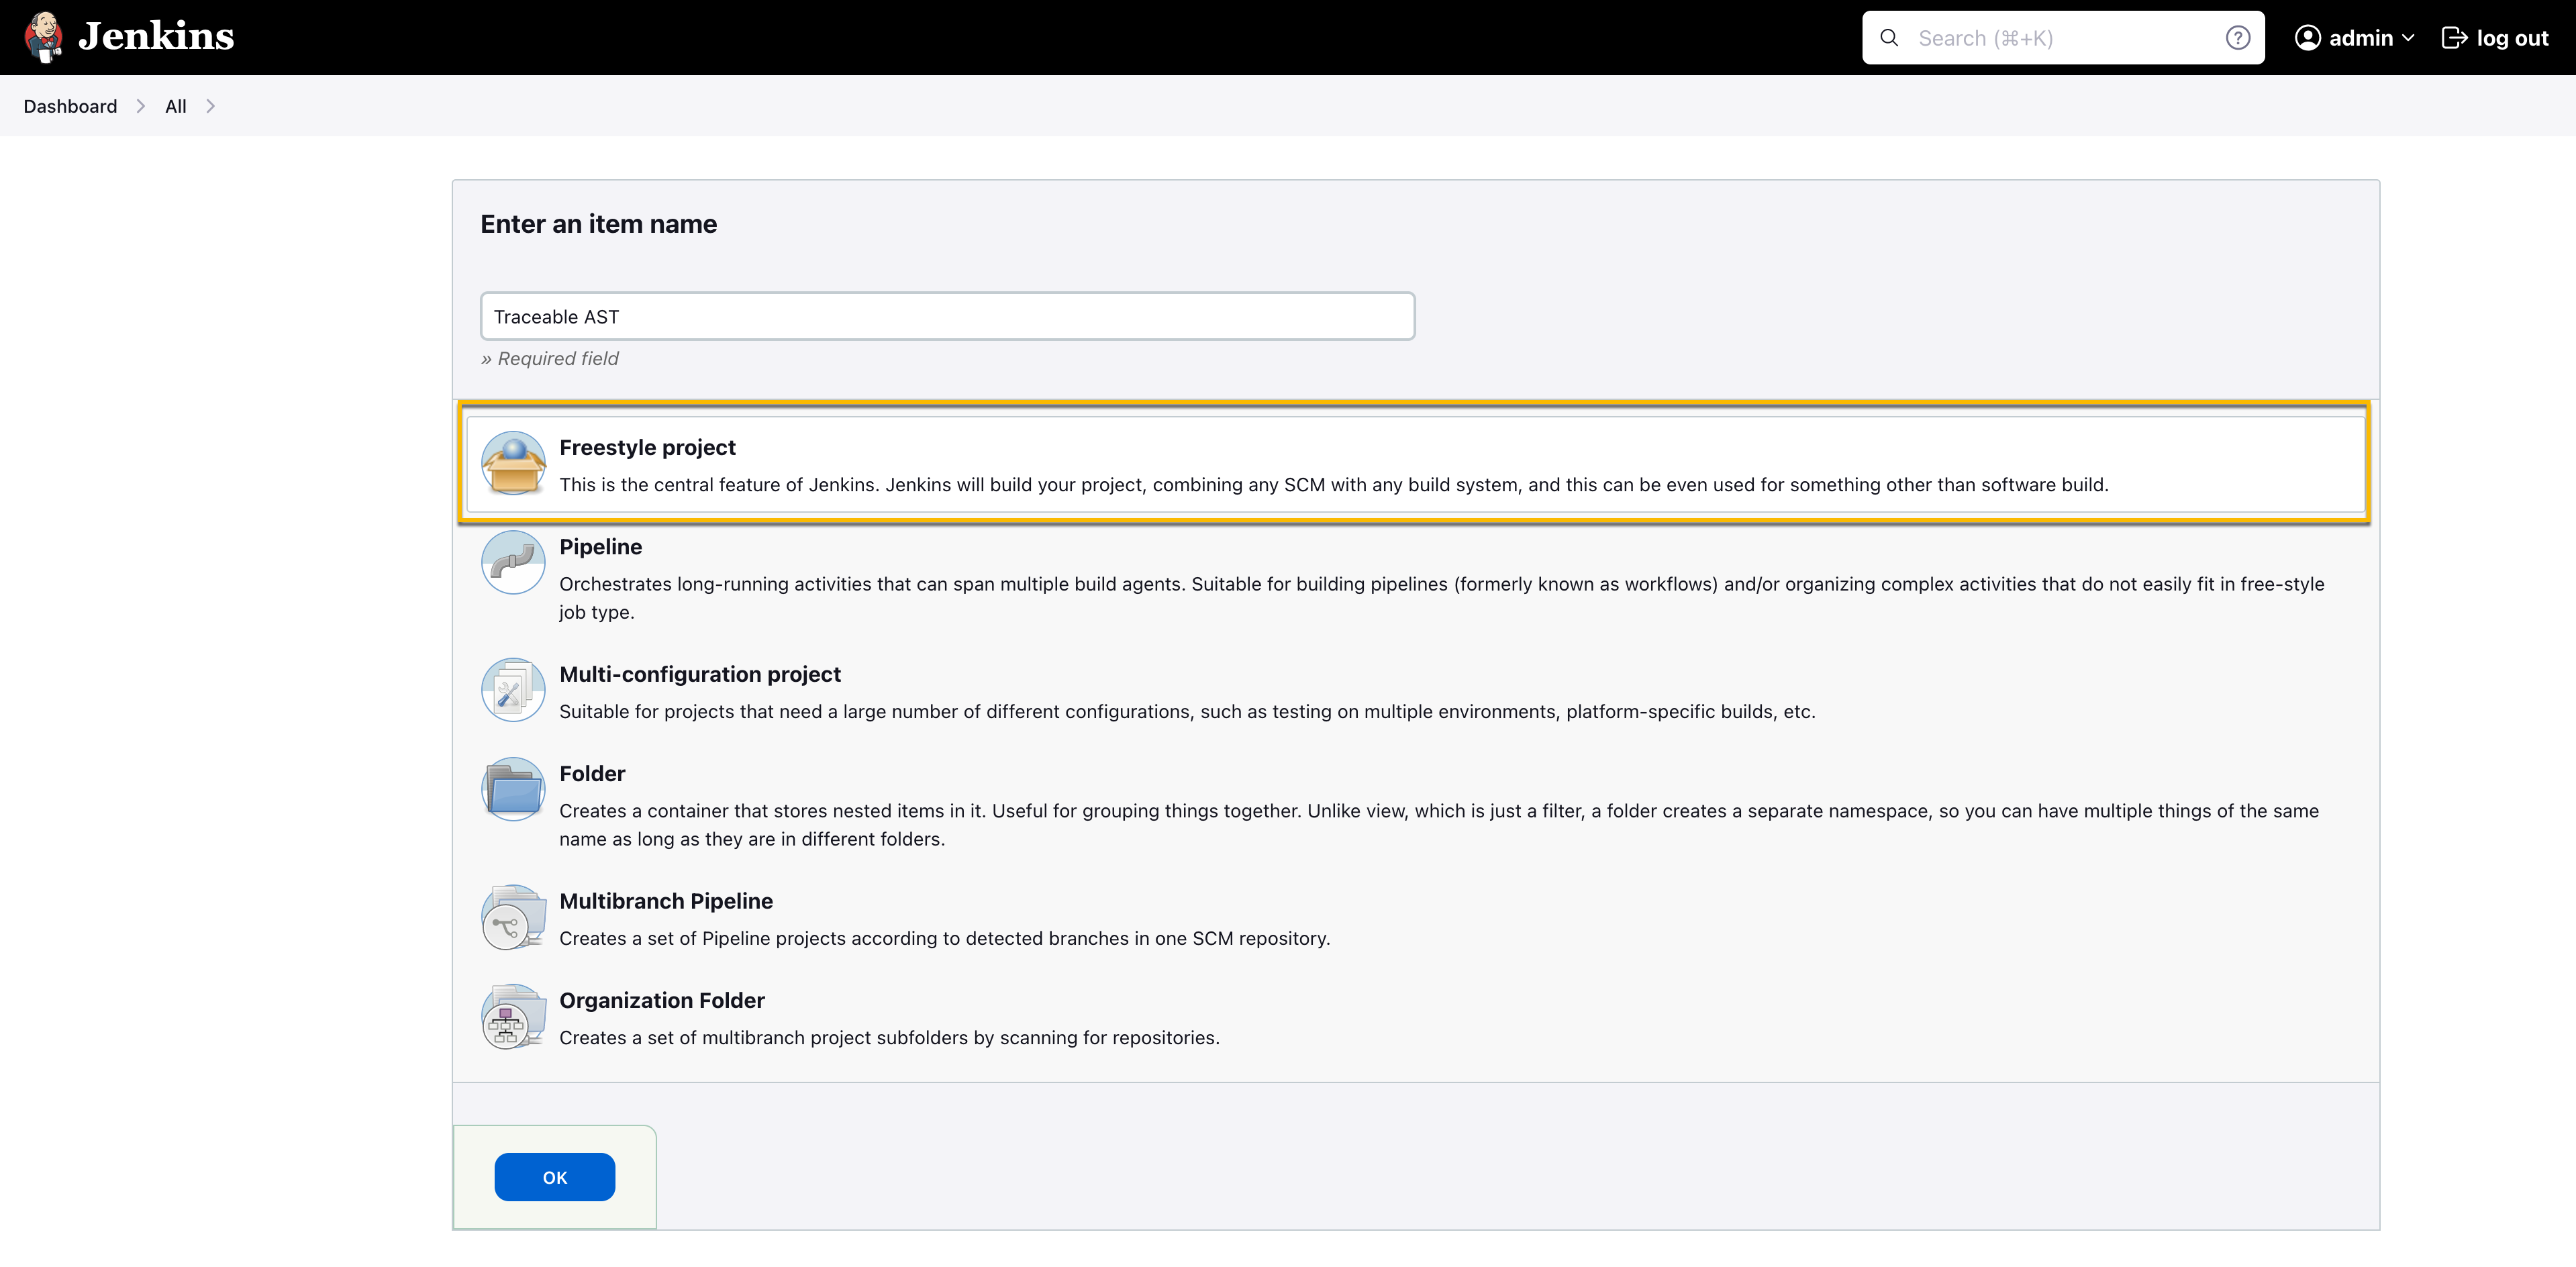
Project Selection
Navigate to Configure → Build Triggers, and in the Build Steps drop-down list, select the following:
Traceable AST - Generate Scan Result.
Traceable AST - Initialize.
Traceable AST - Initialize and Run.
Traceable AST - Run.
.png)
Specify the Scan Name.
(Optional) Specify the Test Environment.
Specify the Client Token. For more information, see Step 1 in Public APIs.
(Optional) Specify the Attack Policy.
Specify the Suite name.
Note
If you are using a Suite name in the Build, you must specify only the Scan Name and Client Token fields.
.png)
Click Save and Apply.
.png)
This job gets triggered whenever the build trigger condition is satisfied.
Reports
To view the reports, complete the following steps:
Open the Freestyle Job in which you are running Traceable XAST.
Select the build job you wish to view the report for from the list of builds in the build menu.
Click Traceable AST Report.
It generates the following sample report containing the following details:
Plugin Categories — Plugin category, subcategory, such as SQL Injection, Authentication.
Severity levels — Different severity levels of each vulnerability, such as, High, Critical, or Unspecified.
Vulnerability summary — Number of vulnerabilities found in the particular category.
Jenkins report helps Traceable confirm scan execution and timing, prioritize and remediate critical vulnerabilities, track trends across builds, and use scan IDs and timestamps for audit and compliance reporting.
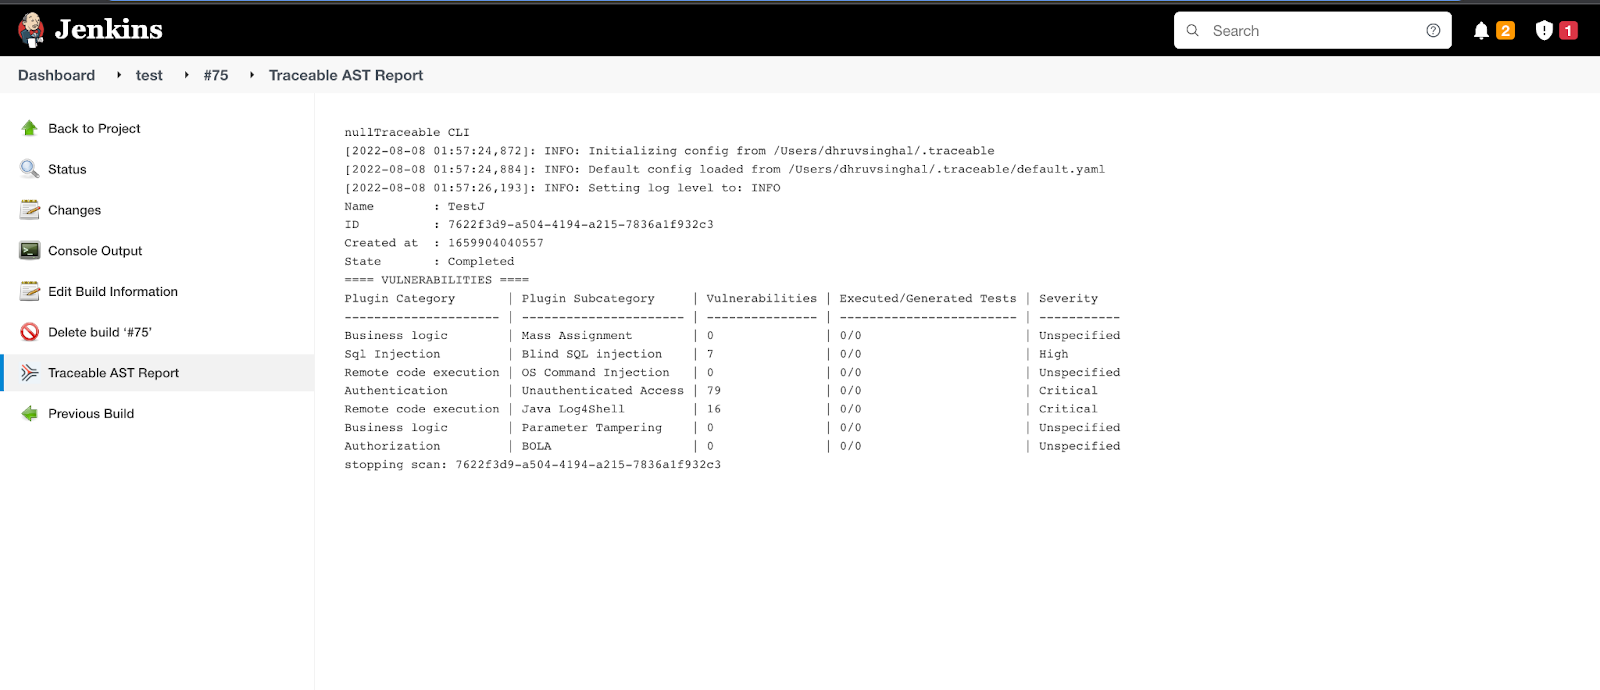
Sample Report