Azure DevOps is a comprehensive set of development tools and services by Microsoft designed to help teams plan, build, test, and deliver software efficiently. It supports the implementation of DevOps practices by enabling seamless collaboration between development and IT operations teams and automates key parts of the software delivery lifecycle. It integrates with Azure cloud services and various third-party tools and platforms.
How does the Azure DevOps Extension Help?
Traceable’s Azure DevOps extension enables you to scan your build pipelines for active vulnerabilities and receive comprehensive reports. The scan result highlights the vulnerabilities and their severity levels based on the CVSS and CWE scores. This enables you to categorize issues accurately and understand the security impact of new code changes in the relevant builds.
What are the Benefits of using this Extension?
The key benefits of integrating the Traceable extension in your CI/CD pipeline include:
Seamless security integration — Execute security tests and functional tests in the same pipeline, providing complete automation.
Live traffic-based test generation — Leverage live functional traffic to generate targeted security tests based on real payloads, increasing test accuracy.
How does the Extension Work?
The extension operates in the following sequence after you set up the AST scan, ensuring accurate execution. The following steps highlight the detailed working of the extension:
Fetching the Input — The extension retrieves the configuration parameters you define in Step 2 below.
Input Validation — The configuration parameters are verified for completeness, formatting, and accuracy. This prevents scanning based on invalid configurations.
Downloading CLI — Traceable downloads the required CLI based on the specified CLI version (default: latest). This ensures that the scans are executed on the specified or default version.
Generating Commands — Based on the inputs, Traceable generates the appropriate CLI command to execute the desired scan operation.
Command Execution — The command generated above is executed according to the defined configuration. This step is repeated until all steps are executed.
Report Publishing — Once the scan is complete, Traceable sends the results to the platform. These include detected vulnerabilities, status, and metadata.
The following flowchart shows the working of the extension:

Working with the Azure DevOps Integration
Before you begin
Make a note of the following before you proceed with the integration:
Make sure that you have the required permissions to add the Traceable extension and the various configurations.
Make sure that your CI/CD pipeline is already available.
Make sure that you have identified the repository to which you wish to add the Traceable extension.
The topic assumes that you have reasonable knowledge of Azure DevOps and know the different functions and features.
The Platform API Token is required during the AST extension configuration. To generate the token, navigate to My Account → My Preferences → API Tokens.
Make sure that you already have a suite configured in AST. The name of this suite is used later to configure the AST extension in your pipeline.
Configuration
Configuring the Traceable extension in your Azure DevOps pipeline requires the following two steps:
Adding Traceable extension from the Azure marketplace
Adding API Testing scan task to the pipeline
Step 1 — Add the Traceable Extension
This section highlights the steps to add the Traceable AST scan task extension to your Azure DevOps account. This helps you set up your scan pipeline.
Complete the following steps:
Log in to your Azure DevOps account.
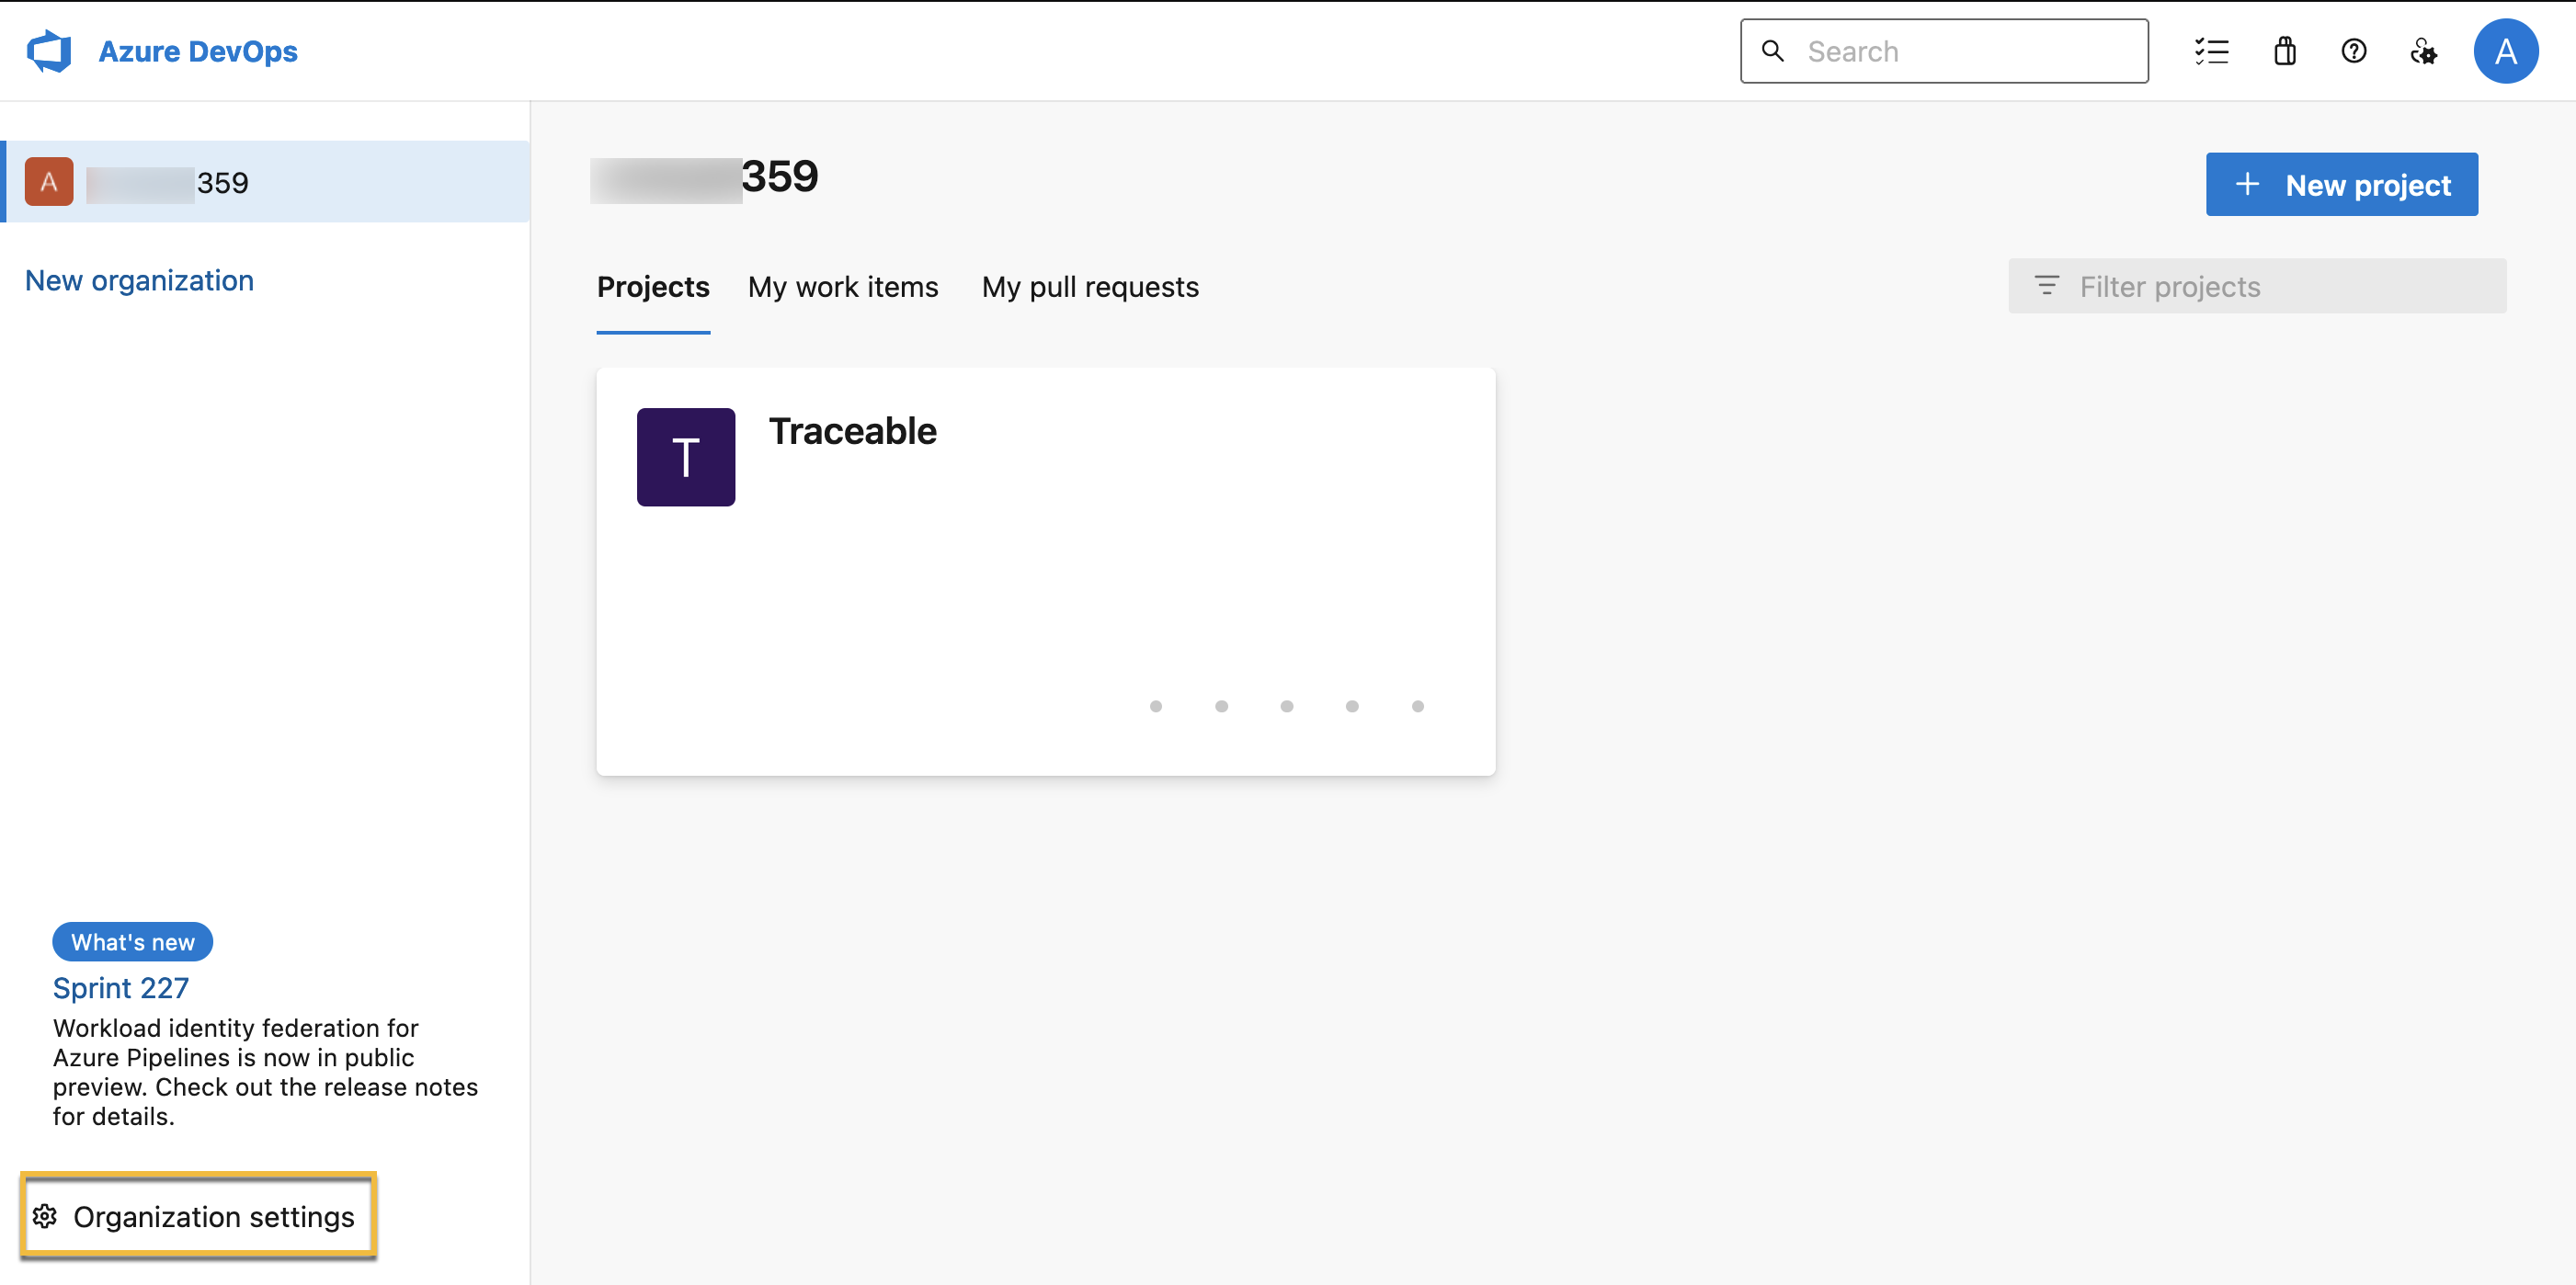
Navigate to your organization's homepage.
In the page’s bottom left corner, click Organization Settings.
On the Overview page, left navigation bar, click Extensions.
.png)
In the page’s top right corner, click Browse marketplace.
In the Azure marketplace, search for the AST extension and click the Traceable AST scan task widget.
.png)
Click Get it free to add it to your organization.
From the drop-down, select an Azure DevOps organization and click Install.
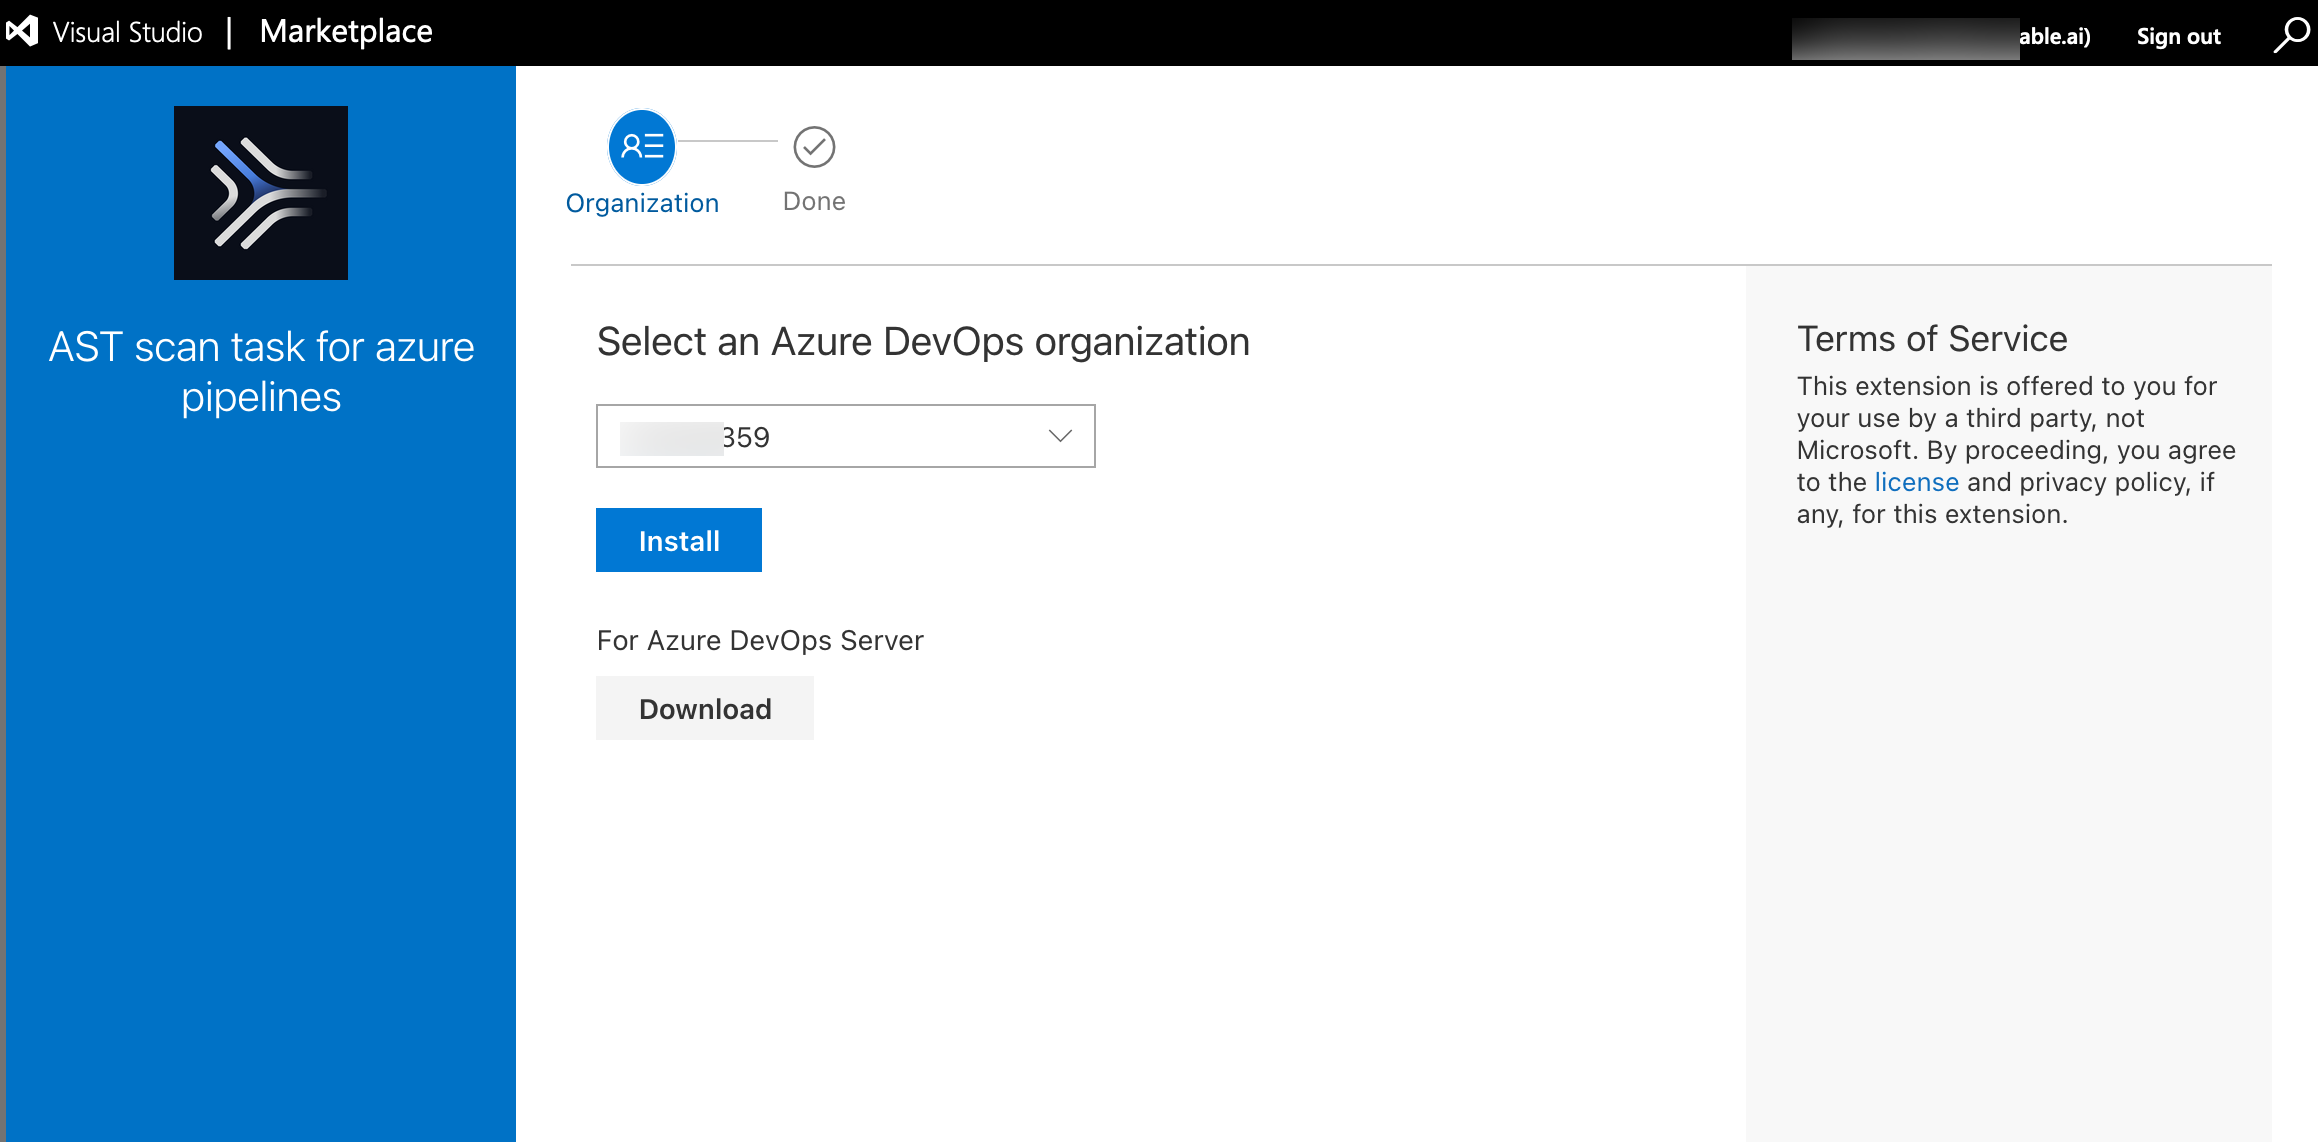
Azure DevOps shows the extension on the Extensions page, Installed tab.
.png "traceable_azure_devops_add_extension_5(1).png")
Step 2 — Add the AST Scan Task to the Pipeline
This section highlights the steps to set up the AST scan in your Azure DevOps account. Once the scan is set up, Traceable executes it and shows the scan results on the Traceable platform.
Complete the following steps:
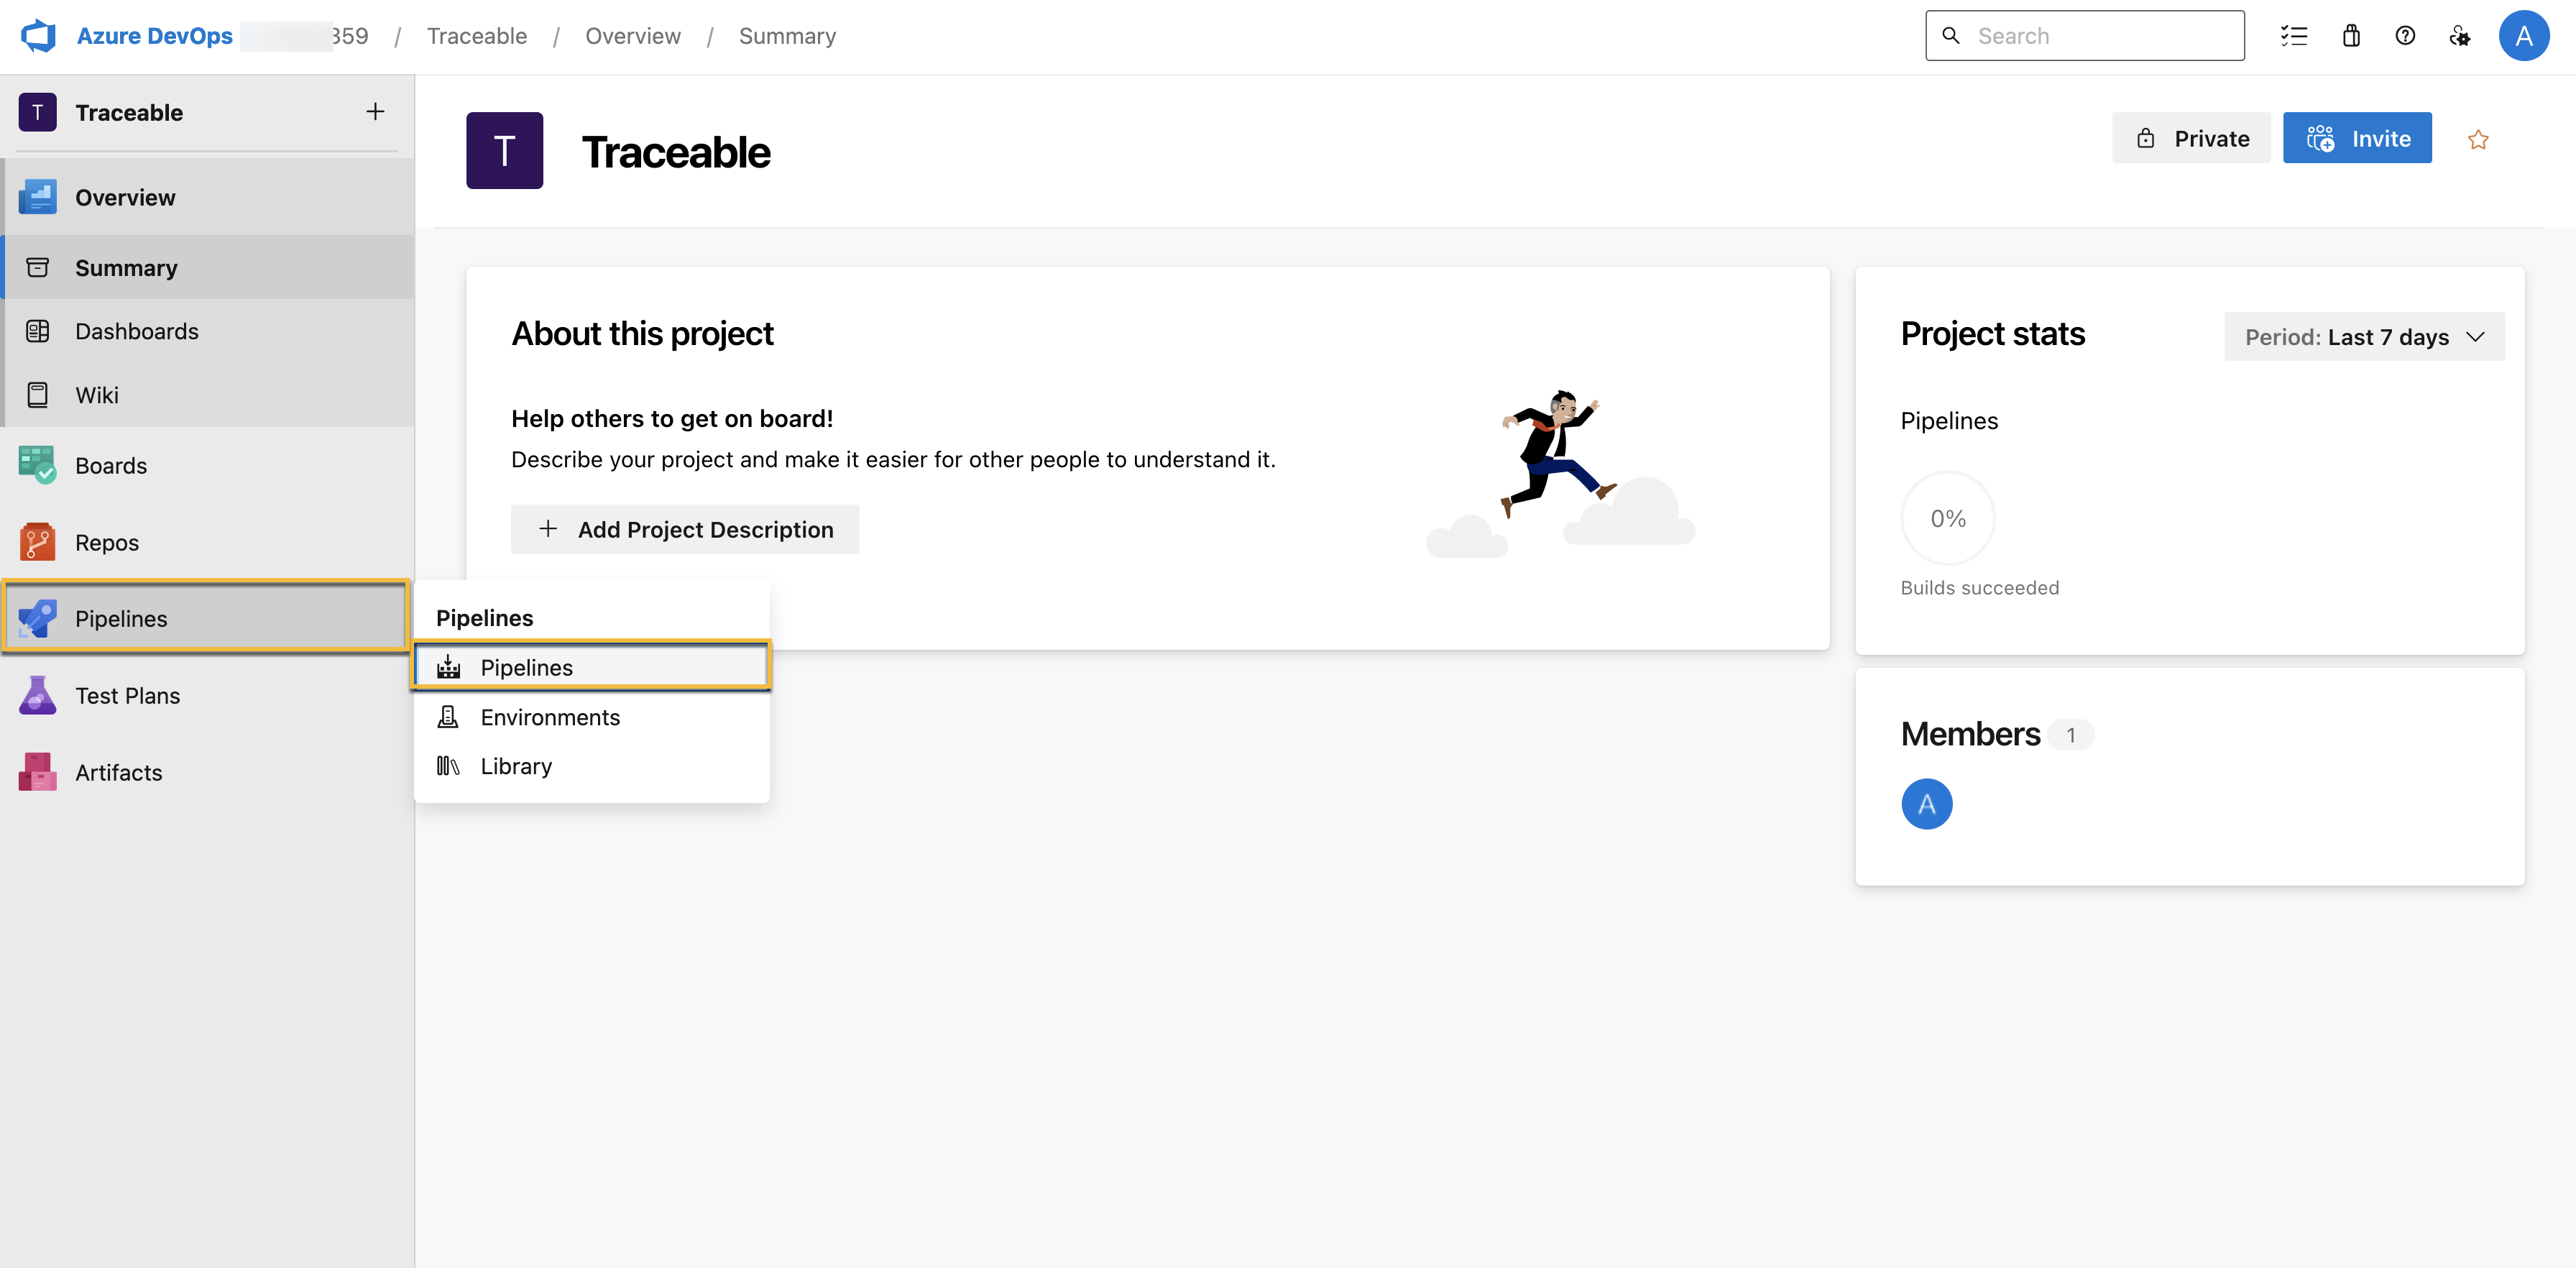
Navigate to your organization's homepage and click a project.
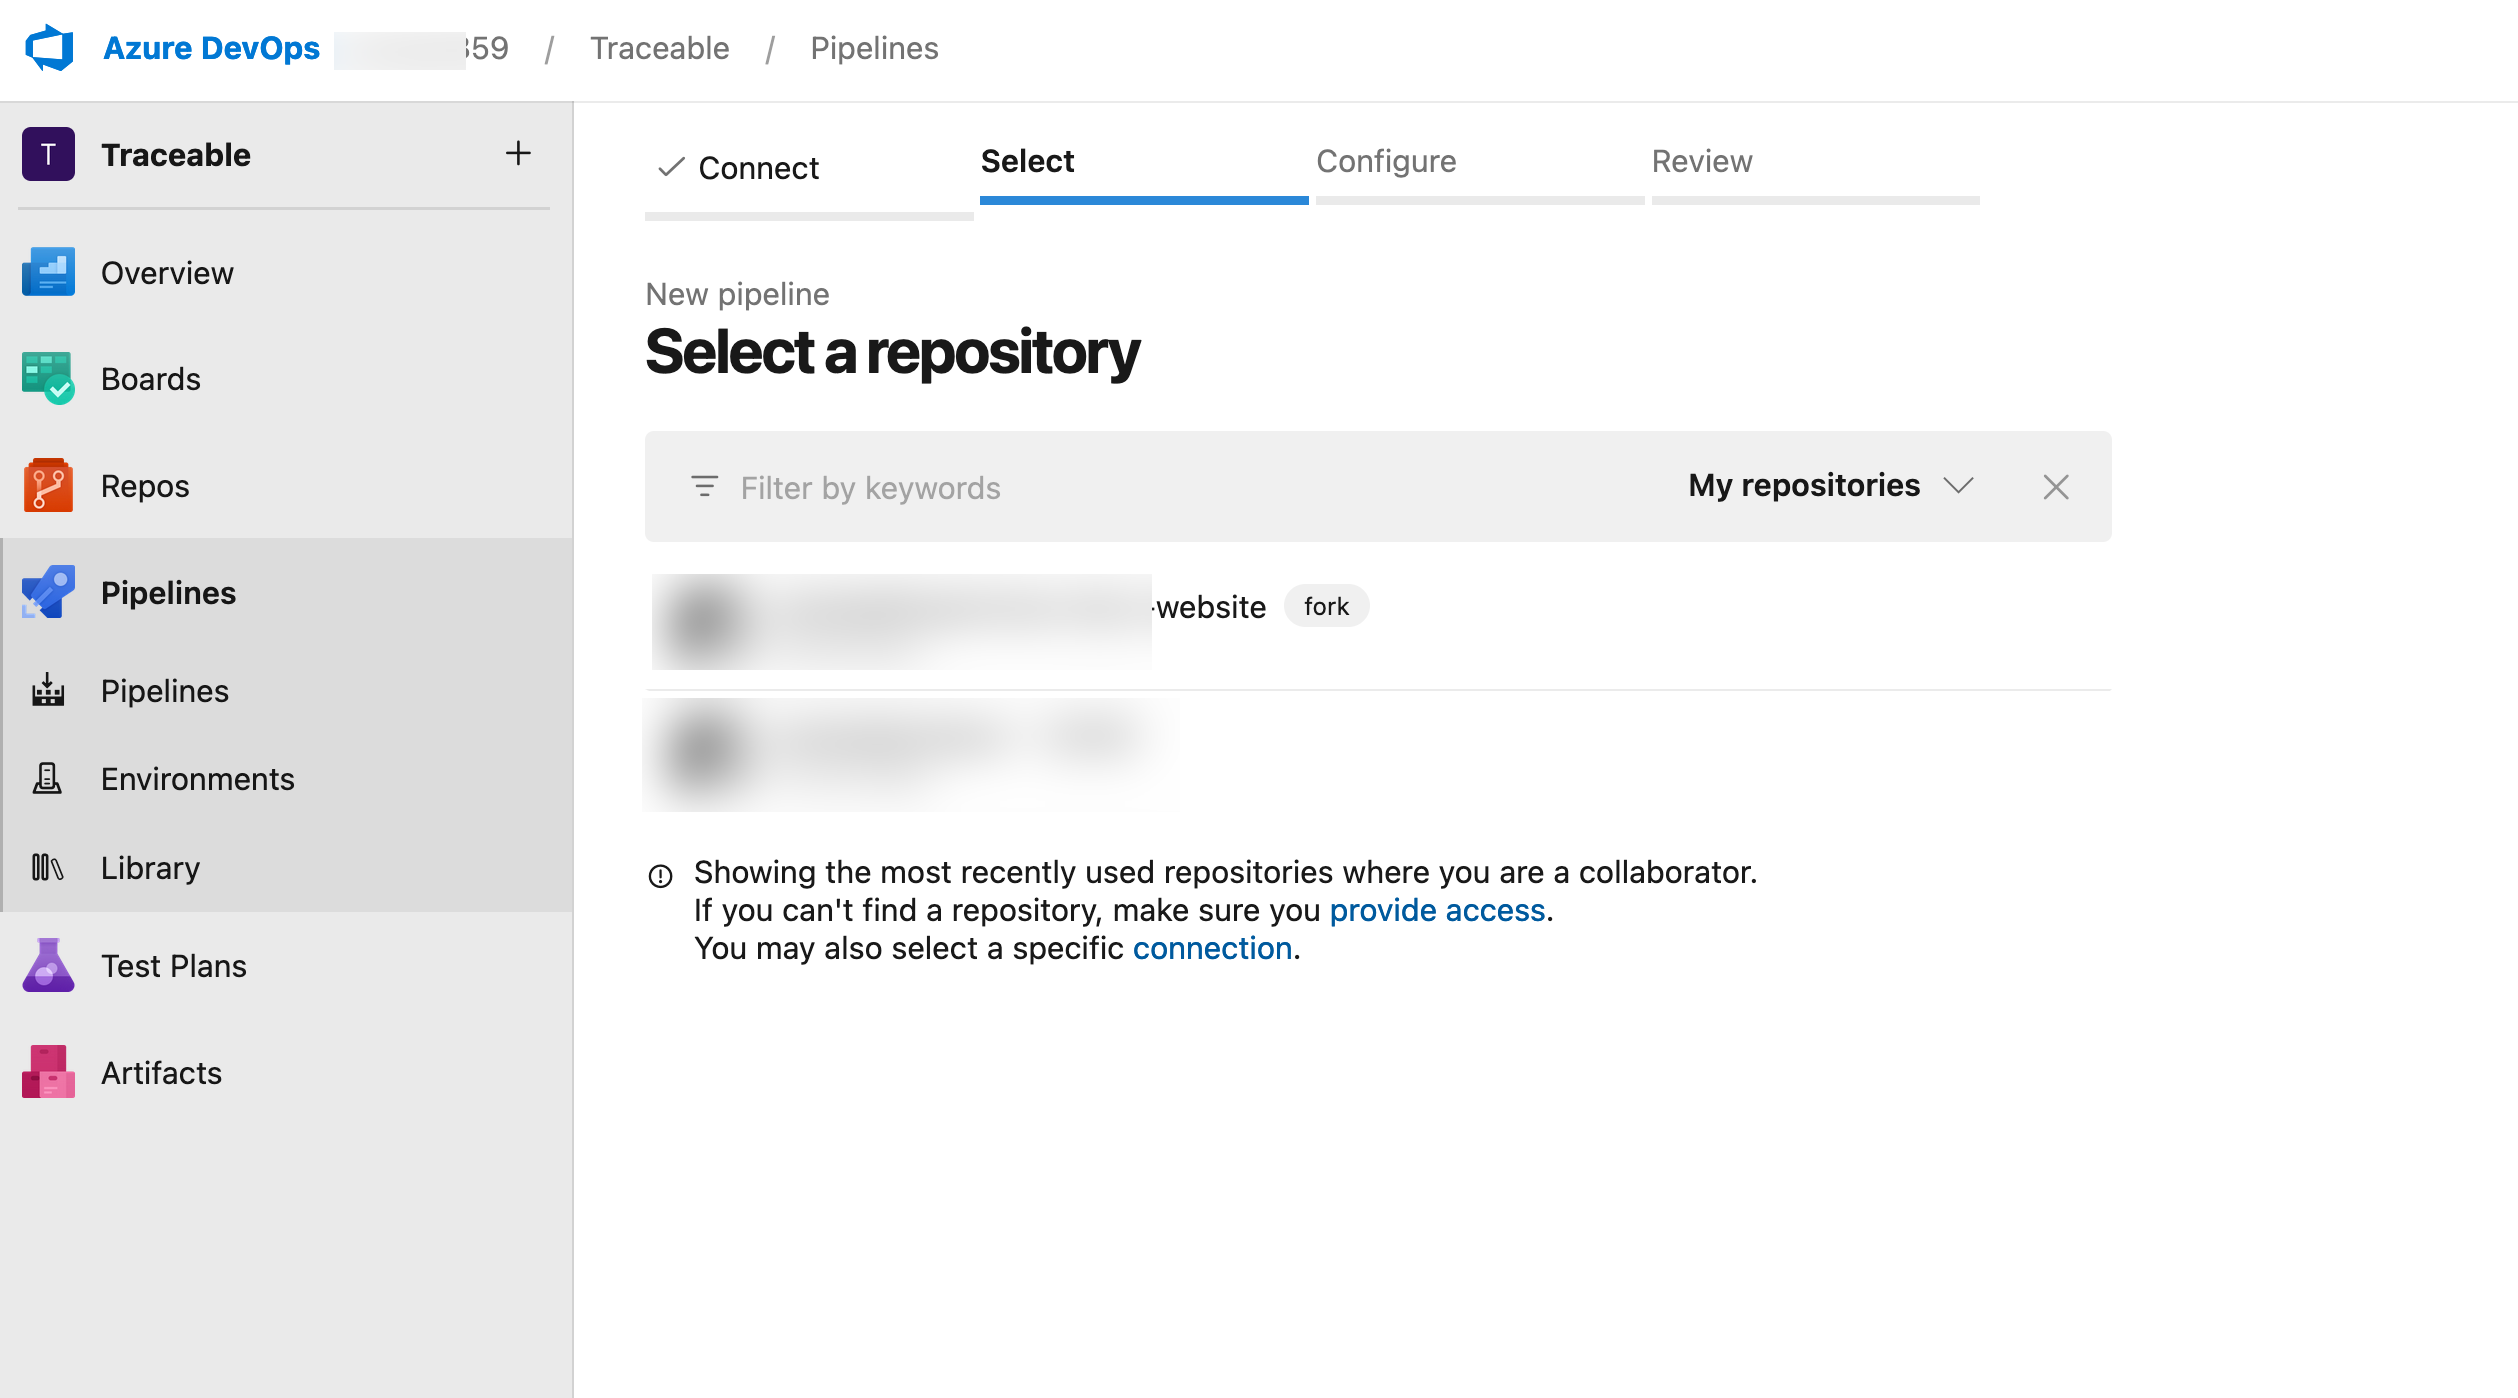
In the left navigation bar, click Pipelines.
If you have an existing pipeline, select from one of them. Else, click Create Pipeline to create a new pipeline.
Select the Repository Type where your code resides, for example, GitHub.
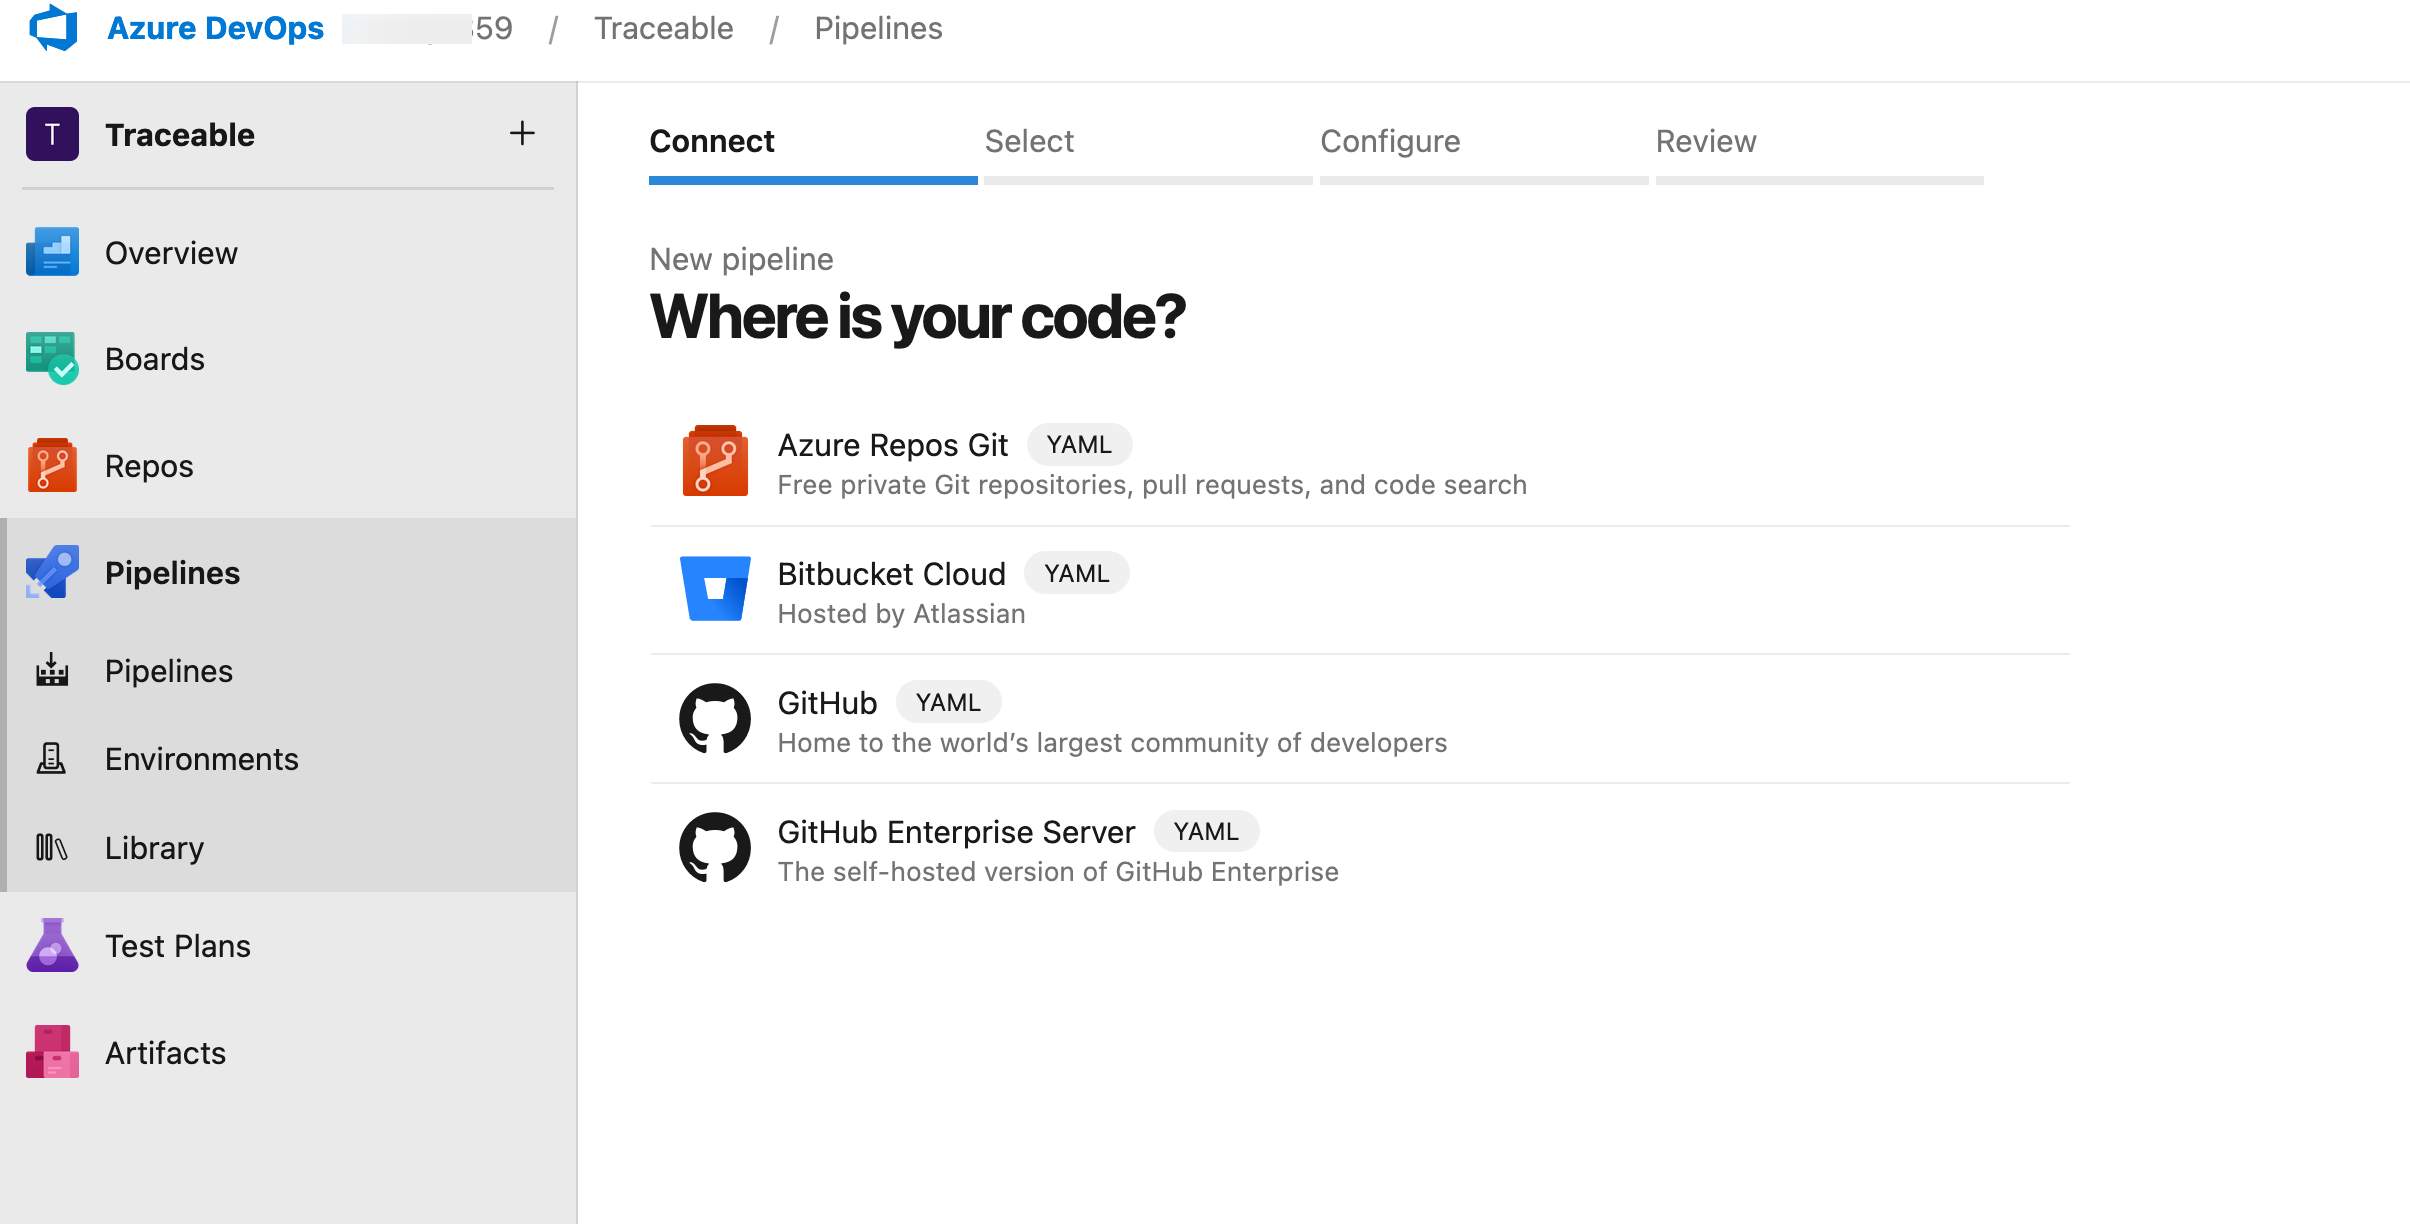
Select a Repository from the list of repositories.
Click Show assistant and search for and click AST scan task.
(1).png "traceable_azure_devops_add_ast_job_4(1)(1).png")
Set up your AST task in either of the following ways:
Using YAML (Recommended)
Set up the AST Scan
You can set up your AST scan using either the YAML or the AST scan task user interface.
Option 1 — Using YAML (Recommended)
Copy and paste the following YAML into the codespace.
trigger:
- main

pool:
  vmImage: ubuntu-latest

variables:
  AST_TOKEN: $(token)

jobs:
- job: AST_action
  steps:
  - task: Scan@0
    inputs:
      stepName: 'initAndRun'
      suite: 'open-api'
      token: $(AST_TOKEN)
      traceableServer: 'api.traceable.ai'

  - task: Scan@0
    condition: always()
    inputs:
      stepName: 'stop'
      token: $(AST_TOKEN)
The following table explains the components of the above YAML:
Parent Component | Sub-Component | Description |
|---|---|---|
|
| Executes the pipeline every time a commit is pushed to the |
|
| Specifies the build agent pool as the latest Ubuntu ( |
|
| Defines a variable AST_TOKEN that stores the Traceable API token. For information on setting this up, see Add the Token as a Variable. This token is used when adding an AST scan task. |
|
| Defines a job named |
|
| Defines a Traceable scan task using the Traceable DevOps extension. |
|
| Initiates and runs the scan using the suite you mentioned below. |
| Specifies the suite name you wish to use for the scan. | |
| Authenticates the scan using the defined token. | |
| Specifies the Traceable server for scan execution. | |
|
| Ensures that this step is executed even if the previous one fails. |
|
| Stops the scan post-execution. |
| Authenticates the step using the token. |
Now, modify the YAML code based on the components mentioned above. Once you have modified the code, in the page’s top right corner, click Save and run.
Once the scan is executed, you can see the scan results on the Traceable platform, under Testing → Suites.
Option 2 — Using AST Scan Task UI
Complete the following steps to set up an AST scan:
In the AST scan task section, add a step to set up a new scan. To do so, complete the following:

(Recommended but Optional) Under Step Name, click Init and Run.
(Optional) Specify the Scan Name.
Specify the Token that you copied from the Traceable platform. This token is visible as plain text in the pipeline and logs. To prevent this, you can add the token as a variable. For the steps to do this, see Add the Token as a Variable.
Specify the Suite where you wish to see the scan results in the Traceable platform.
Click Add.
Traceable generates the YAML based on the above details.
In the AST scan task section, add a step to stop a scan. This prevents scans from running for an infinite duration. To do so, complete the following:
Under Step Name, click Stop.
(Optional) Specify the Scan Name.
Specify the Token that you copied from the Traceable platform. This token is visible as plain text in the pipeline and logs. To prevent this, you can add the token as a variable. For the steps to do this, see Add the Token as a Variable.
Specify the Suite where you wish to see the scan results in the Traceable platform.
Click Add.
Traceable updates the YAML with the above details.
In the page’s top right corner, click Save and run.
Once the scan is executed, you can see the scan results on the Traceable platform, under Testing → Suites.
Add the Token as a Variable
In the above steps, when you add a token, it is visible as plain text in the pipeline and logs. To avoid this, you can add the token as a variable. To do so, complete the following steps:
Click Variables.
.png "traceable_azure_devops_add_token_as_variable_1(1).png")
In the Variables window, click on New variable.
In the New Variable window, complete the following:
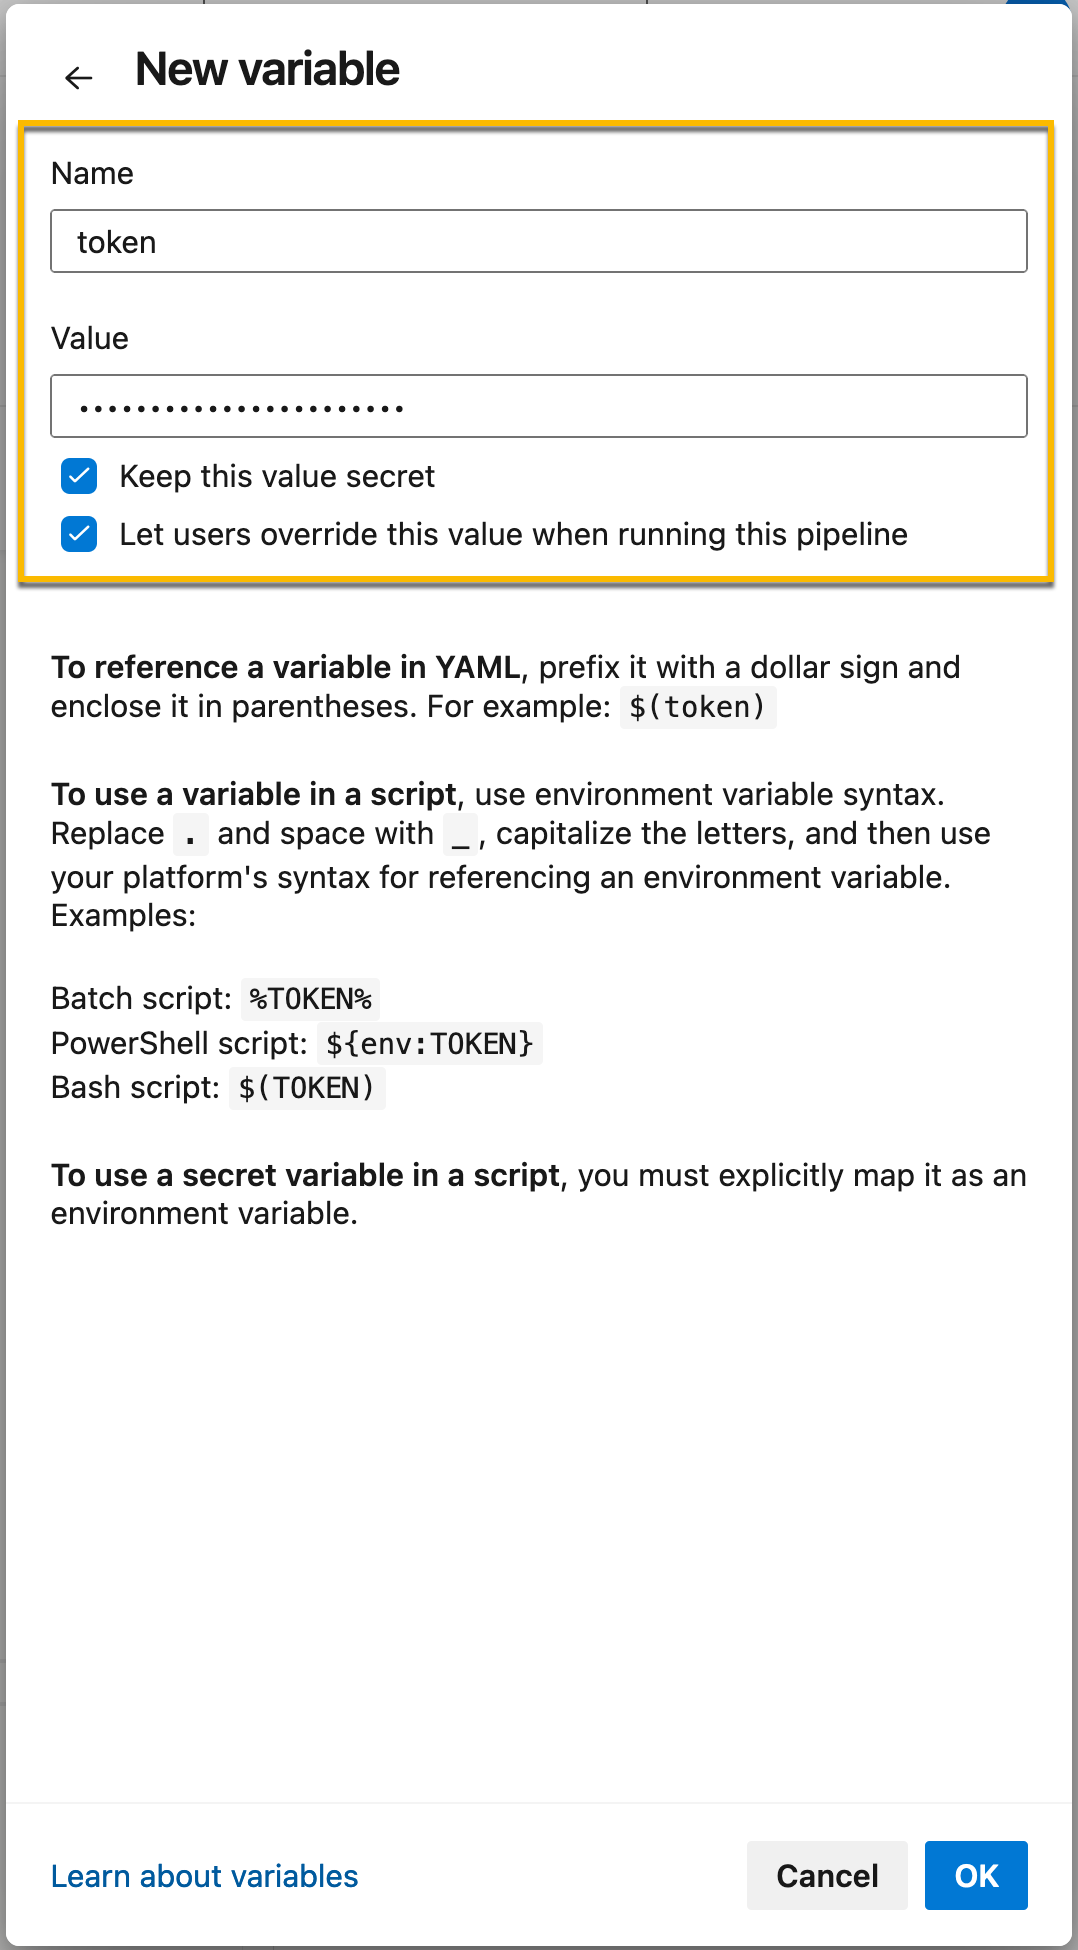
In the Name field, specify the variable name, for example, token.
In the Value field, specify the token that you copied from the Traceable platform.
Select the checkboxes as shown above.
Click OK.
You can define this variable in your pipeline. For more information, see Option 1 — Using YAML.