F5 Networks is a company that specializes in application delivery networking technology. They provide a variety of products and services that are used to improve the availability, security, and performance of applications and data center infrastructure. One of their main products is the BIG-IP platform, which is a family of hardware and virtual appliances that provide application delivery services such as load balancing, traffic management, and security. These appliances can be used to improve the availability and performance of web applications, as well as to secure them from various types of attacks.
Traceable provides a mirroring agent for capturing or mirroring data packets passing through your F5 setup. Since this is a mirroring or a completely out-of-band setup, it does not affect your current deployment or interfere with your data flow.
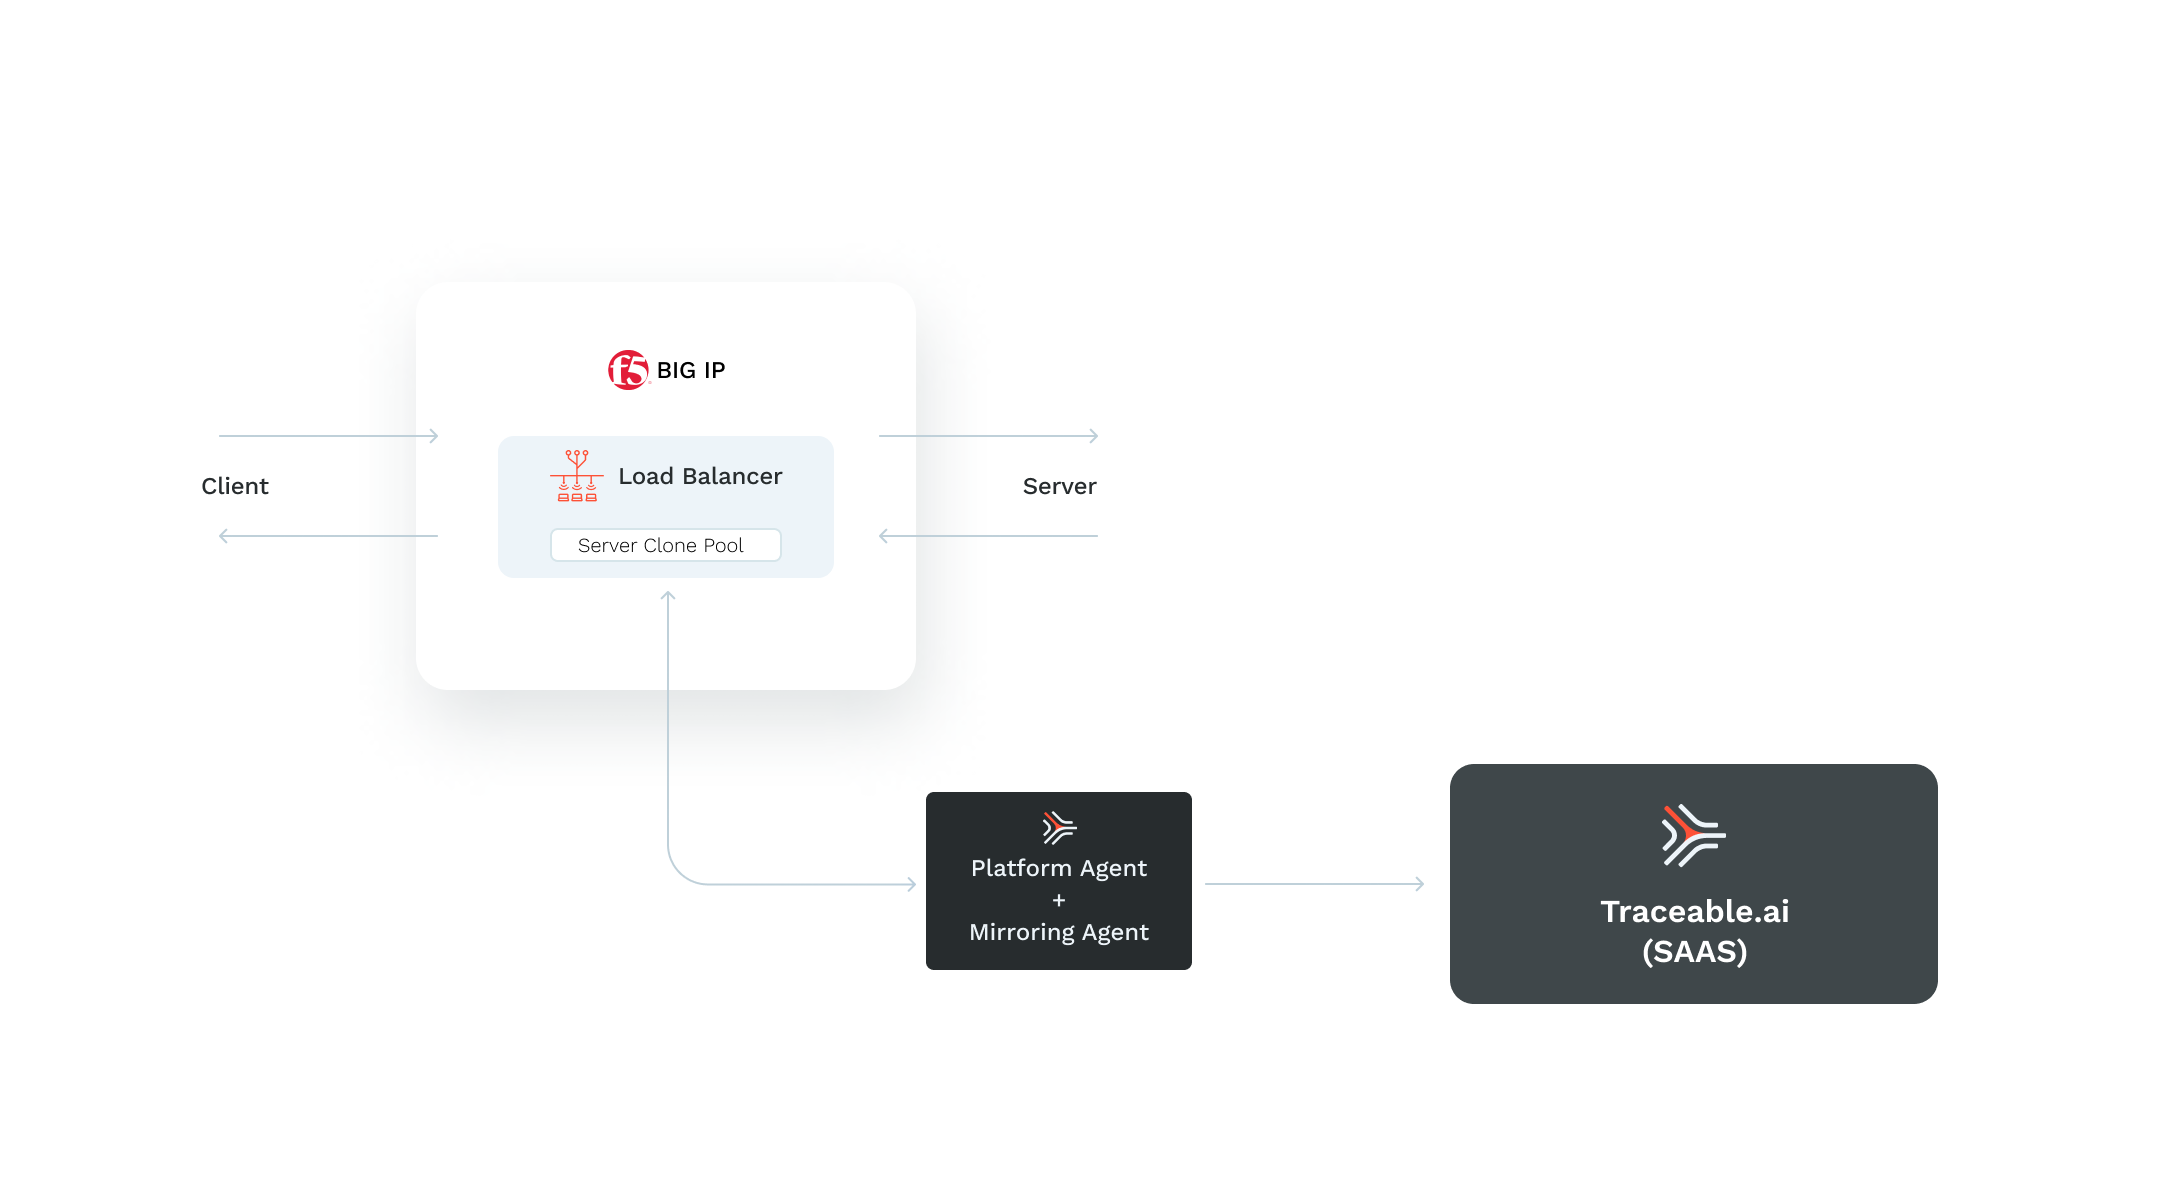
The client sends the traffic to the external network interface of the virtual load balancer. The traffic is then sent to the backend server through the load balancer's internal network interface. Traceable captures the data packet from the internal network interface. The captured data packet is sent to the Traceable mirroring agent from the server clone pool. To configure the setup, add the IP address of Traceable's mirroring agent to the server clone pool.
The F5 mirroring deployment consists of deploying a Traceable mirroring agent on a VM and configuring your F5 setup for mirroring.
Before you begin
Make a note of the following points before configuring mirroring for F5.
Traceable supports BIG-IP software 11.x and later.
Make sure that mirroring is enabled in F5.
Save Traceable agent token. Navigate to Traceable's platform and navigate to Settings (
 ) → Account → Access Tokens → Agent Token. Copy and save the token. It would be required in the Traceable agent installation process.
Knowledge of BIG-IP software.
Deployment
F5 mirroring deployment with Traceable agent consists of the following steps:
Deploy Traceable agent
Install Traceable mirroring agent
Configuring mirroring in F5 BIG-IP.
Step 1 - Deploy Traceable agent
You can deploy the Traceable agent on a VM, ECS container, or in a Kubernetes environment. The Traceable agent is installed on a CentOS 7 VM in the following steps. You can also choose to install it on Amazon Linux 2 or Ubuntu. You can choose to deploy a Traceable agent by following either of the two topics:
Note the Traceable Platform agent's IP address or hostname. In the next step, you will use this information to configure the mirroring agent.
Step 2 — Install mirroring agent
Install the Traceable mirroring agent using the mirroring agent install script. For complete set of instructions to install, see the Mirroring on Linux machine topic.
Step 3 - F5 Configuration
Before configuring mirroring for Traceable agent, make sure that mirroring is enabled in F5. For more information, see K13392: Configuring the BIG-IP system to send traffic to an intrusion detection system (11.x - 15.x).
Complete the following steps:
Log in to F5 management UI.
Create a pool- Add a node to the node group. After adding the node to the node group, configure it with the secondary interface’s IP of the VM that is hosting the Traceable Platform agent.
Navigate to Main > Local Traffic > Pools
Create a new pool:
Add a new node to the node group with the Traceable platform agent instance’s secondary interface’s IP address.
Leave the port as *.
.png)
Clone pool - Make sure that the virtual server is using this pool, by editing the virtual server’s setting to use the newly created server pool as Clone Pool (server).
Navigate to Main > Local Traffic > Virtual Servers > Virtual Server List. Select any of existing virtual server.
Change configuration from
basictoadvanced.Scroll down to select Clone Pool (Server).
Select mirror-pool from the drop-down list.
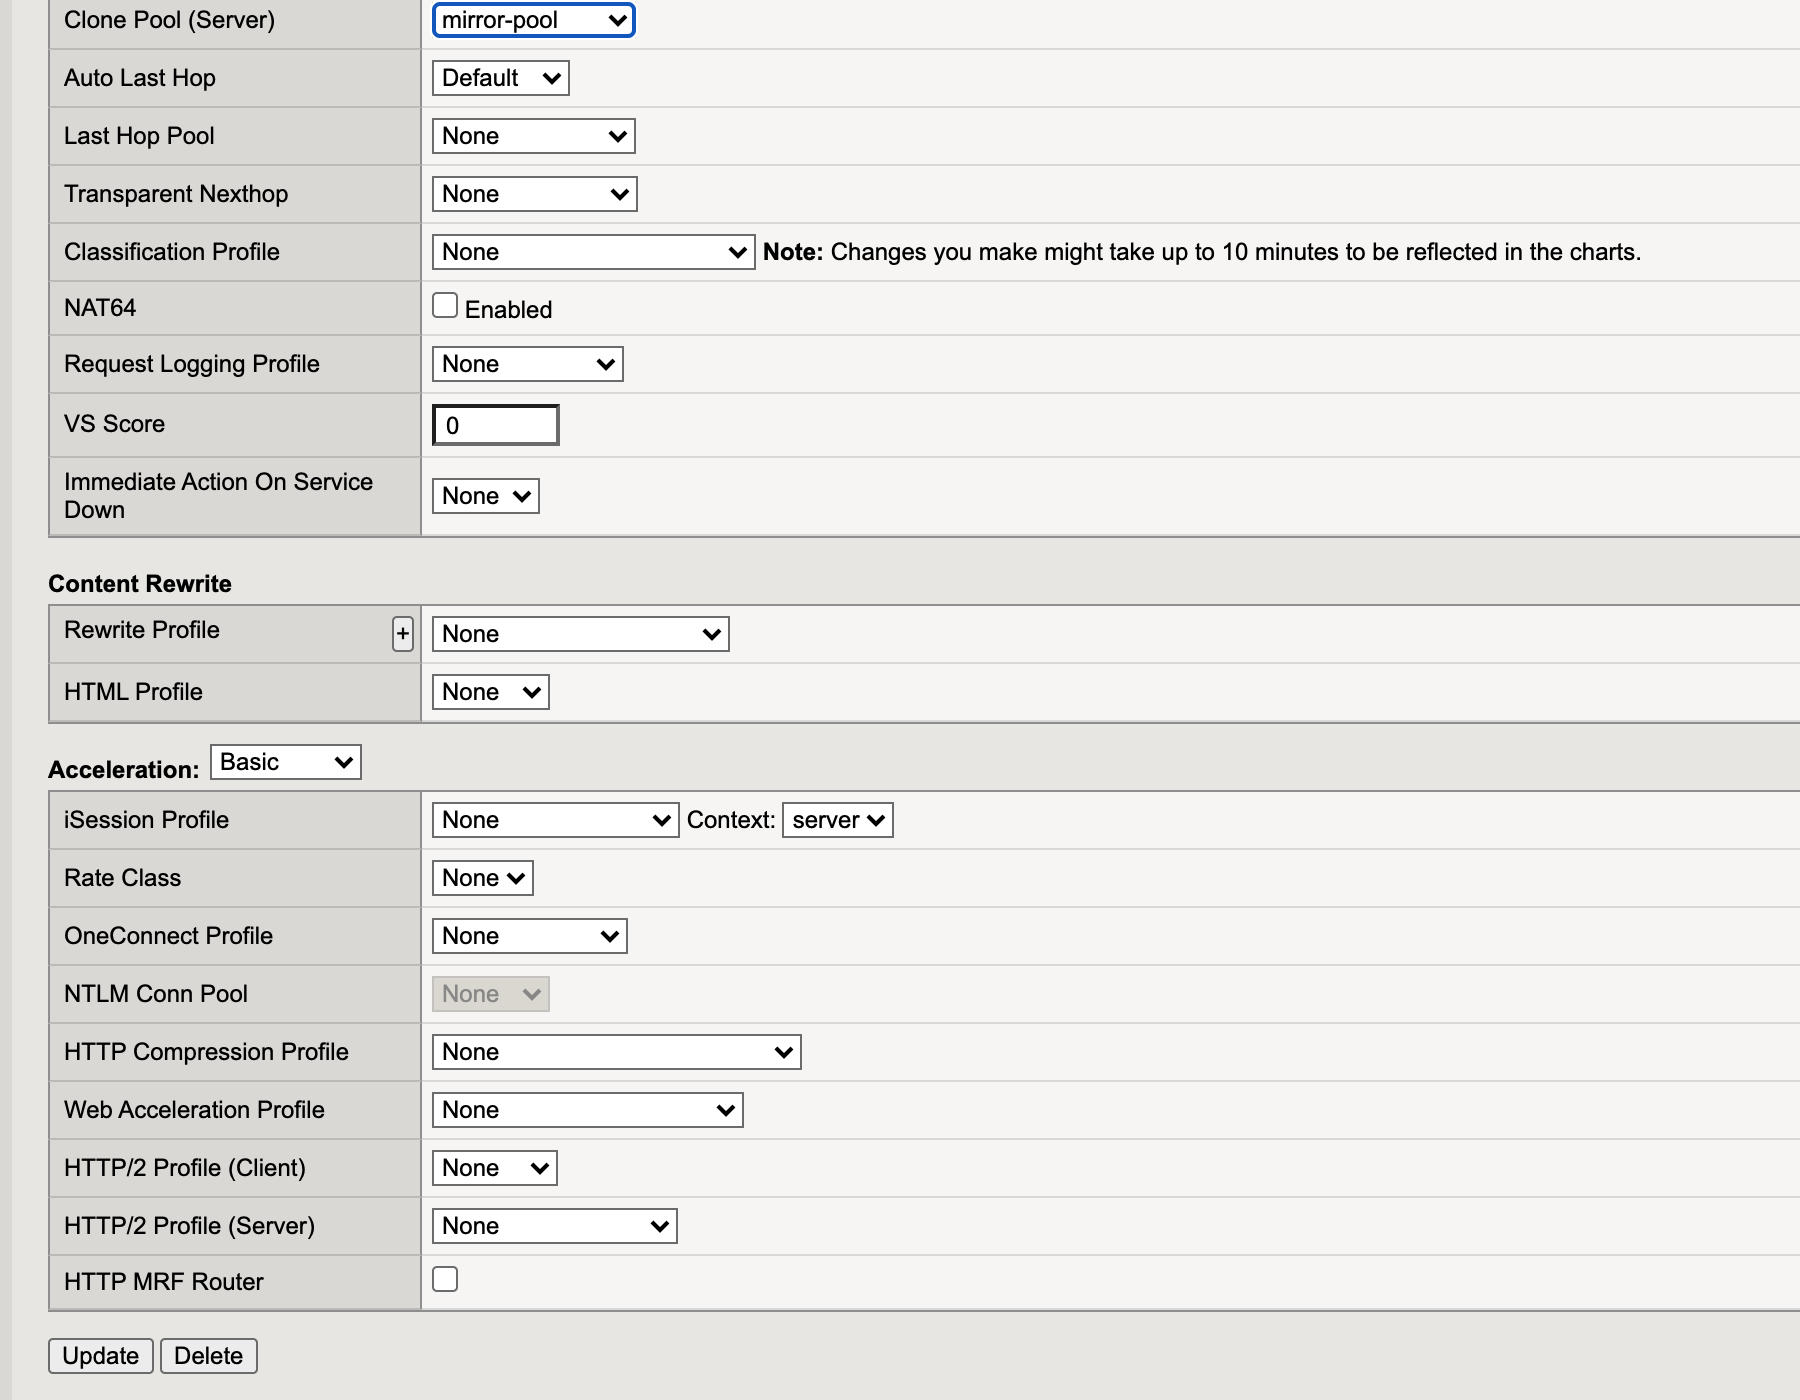
Update virtual server.
Verification
Send some traffic through your F5 BIG-IP and verify that the traces are reaching Traceable platform. 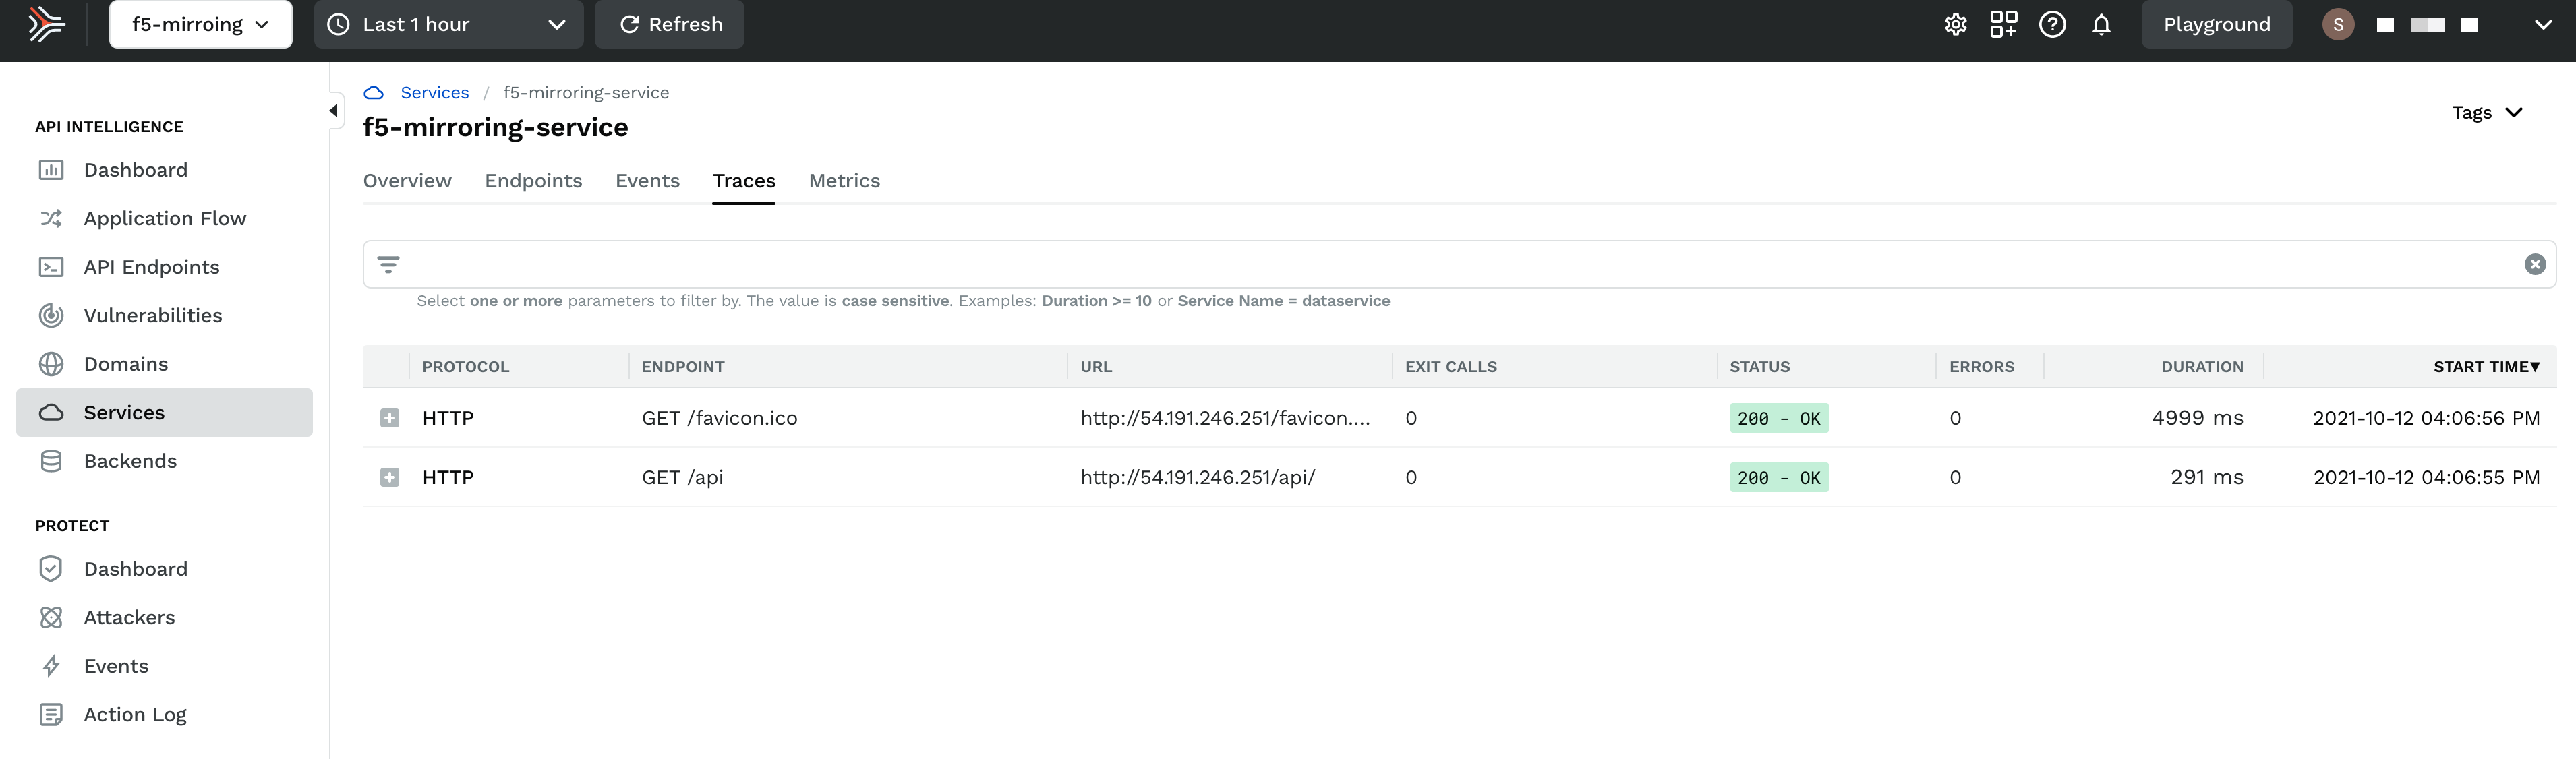
Upgrade
To upgrade the Traceable agent, download and rerun the install.sh script. The scripts pulls the latest Traceable Platform agent and installs it.
Uninstall
To uninstall, delete the VM on which the Traceable agent was installed. Also, remove the mirroring configuration from F5.
Troubleshooting
Spans not reporting to the Traceable platform
Enter the following command to analyze network traffic:
sudo tcpdump -i eth1If you do not see any traffic, then:
Disable the source/destination check on BIG-IP > Network Interfaces.
Try to disable security policy by navigating to Virtual Server List > serverMain > Security settings > Policies >
disablethe Application Security Policy.