IBM DataPower Multiprotocol Gateway (MPGW) is a component within IBM DataPower systems that acts as a flexible, highly configurable endpoint for managing, transforming, and routing various types of network traffic and data formats. IBM DataPower is a family of purpose-built appliances designed to simplify, secure, and accelerate the delivery of applications and services. The Multiprotocol Gateway is a versatile intermediary that can handle various tasks.
Traceable integrates with the Multiprotocol gateway by providing two sets of request and response policies, one for request blocking and another for non-blocking. You can download these policies from Traceable’s download site.
Before you begin
Make sure that Traceable’s Platform agent is installed. For more information on installing the Platform agent, see Platform agent installation.
The topic assumes you already have a Multiprotocol Gateway (MPGW) setup.
You must have a working knowledge of Multiprotocol Gateway.
Make sure that you have downloaded the policies from Traceable’s download site. Navigate to agents → ibm-datapower and navigate to the latest numbered folder. The downloaded zip file has the following three files:
traceable-request-policy.jstraceable-response-policy.jshealthcheck.js
Passthrough
Before you proceed with the configuration, make sure that the request and response are not passthrough. Passthrough is used when you wish to use MPGW as a routing agent, load balancer, etc. Navigate to the General tab in your MPGW and make sure that the request and response Passthrough option is not selected, as shown in the screenshot below.
.png "traceable_ibm_mpgw_rq_res_passthrough(2).png")
The topic is divided into the following sections:
Setting up SSL client profile
Configure health check
Configuring non-blocking policy
Configuring API-specific policy
Setting up SSL client profile
SSL Client Profile is a configuration object that defines the settings and parameters for SSL/TLS (Secure Sockets Layer/Transport Layer Security) connections. It determines how DataPower establishes secure connections, specifying aspects like encryption protocols, certificate verification, and client authentication. This section applies to all the following sections in the topic.
Complete the following steps to create an SSL client profile:
Navigate to Objects → Crypto configuration → SSL profile. Click on New to create a new profile.

Provide the correct Ciphers and protocols (TLS version 1.0, 1.1, 1.2). If you do not have the proper certificates, uncheck the Validate server certificate check box.
Apply the changes.
This SSL client profile is used in the following steps.
Configure health check
Traceable provides a health check policy to verify whether the Traceable Platform agent is available or offline. Configuring the health check is a mandatory step. The health check is configured using healthcheck.js, a file that is part of the policy zip you downloaded from Traceable’s download site. Open the healthcheck.js file and configure the following two before proceeding with setting the health check in MPGW:
Traceable agent endpoint point
SSL client profile that you configured in the previous section.
.png)
Complete the following steps in MPGW to configure the health check:
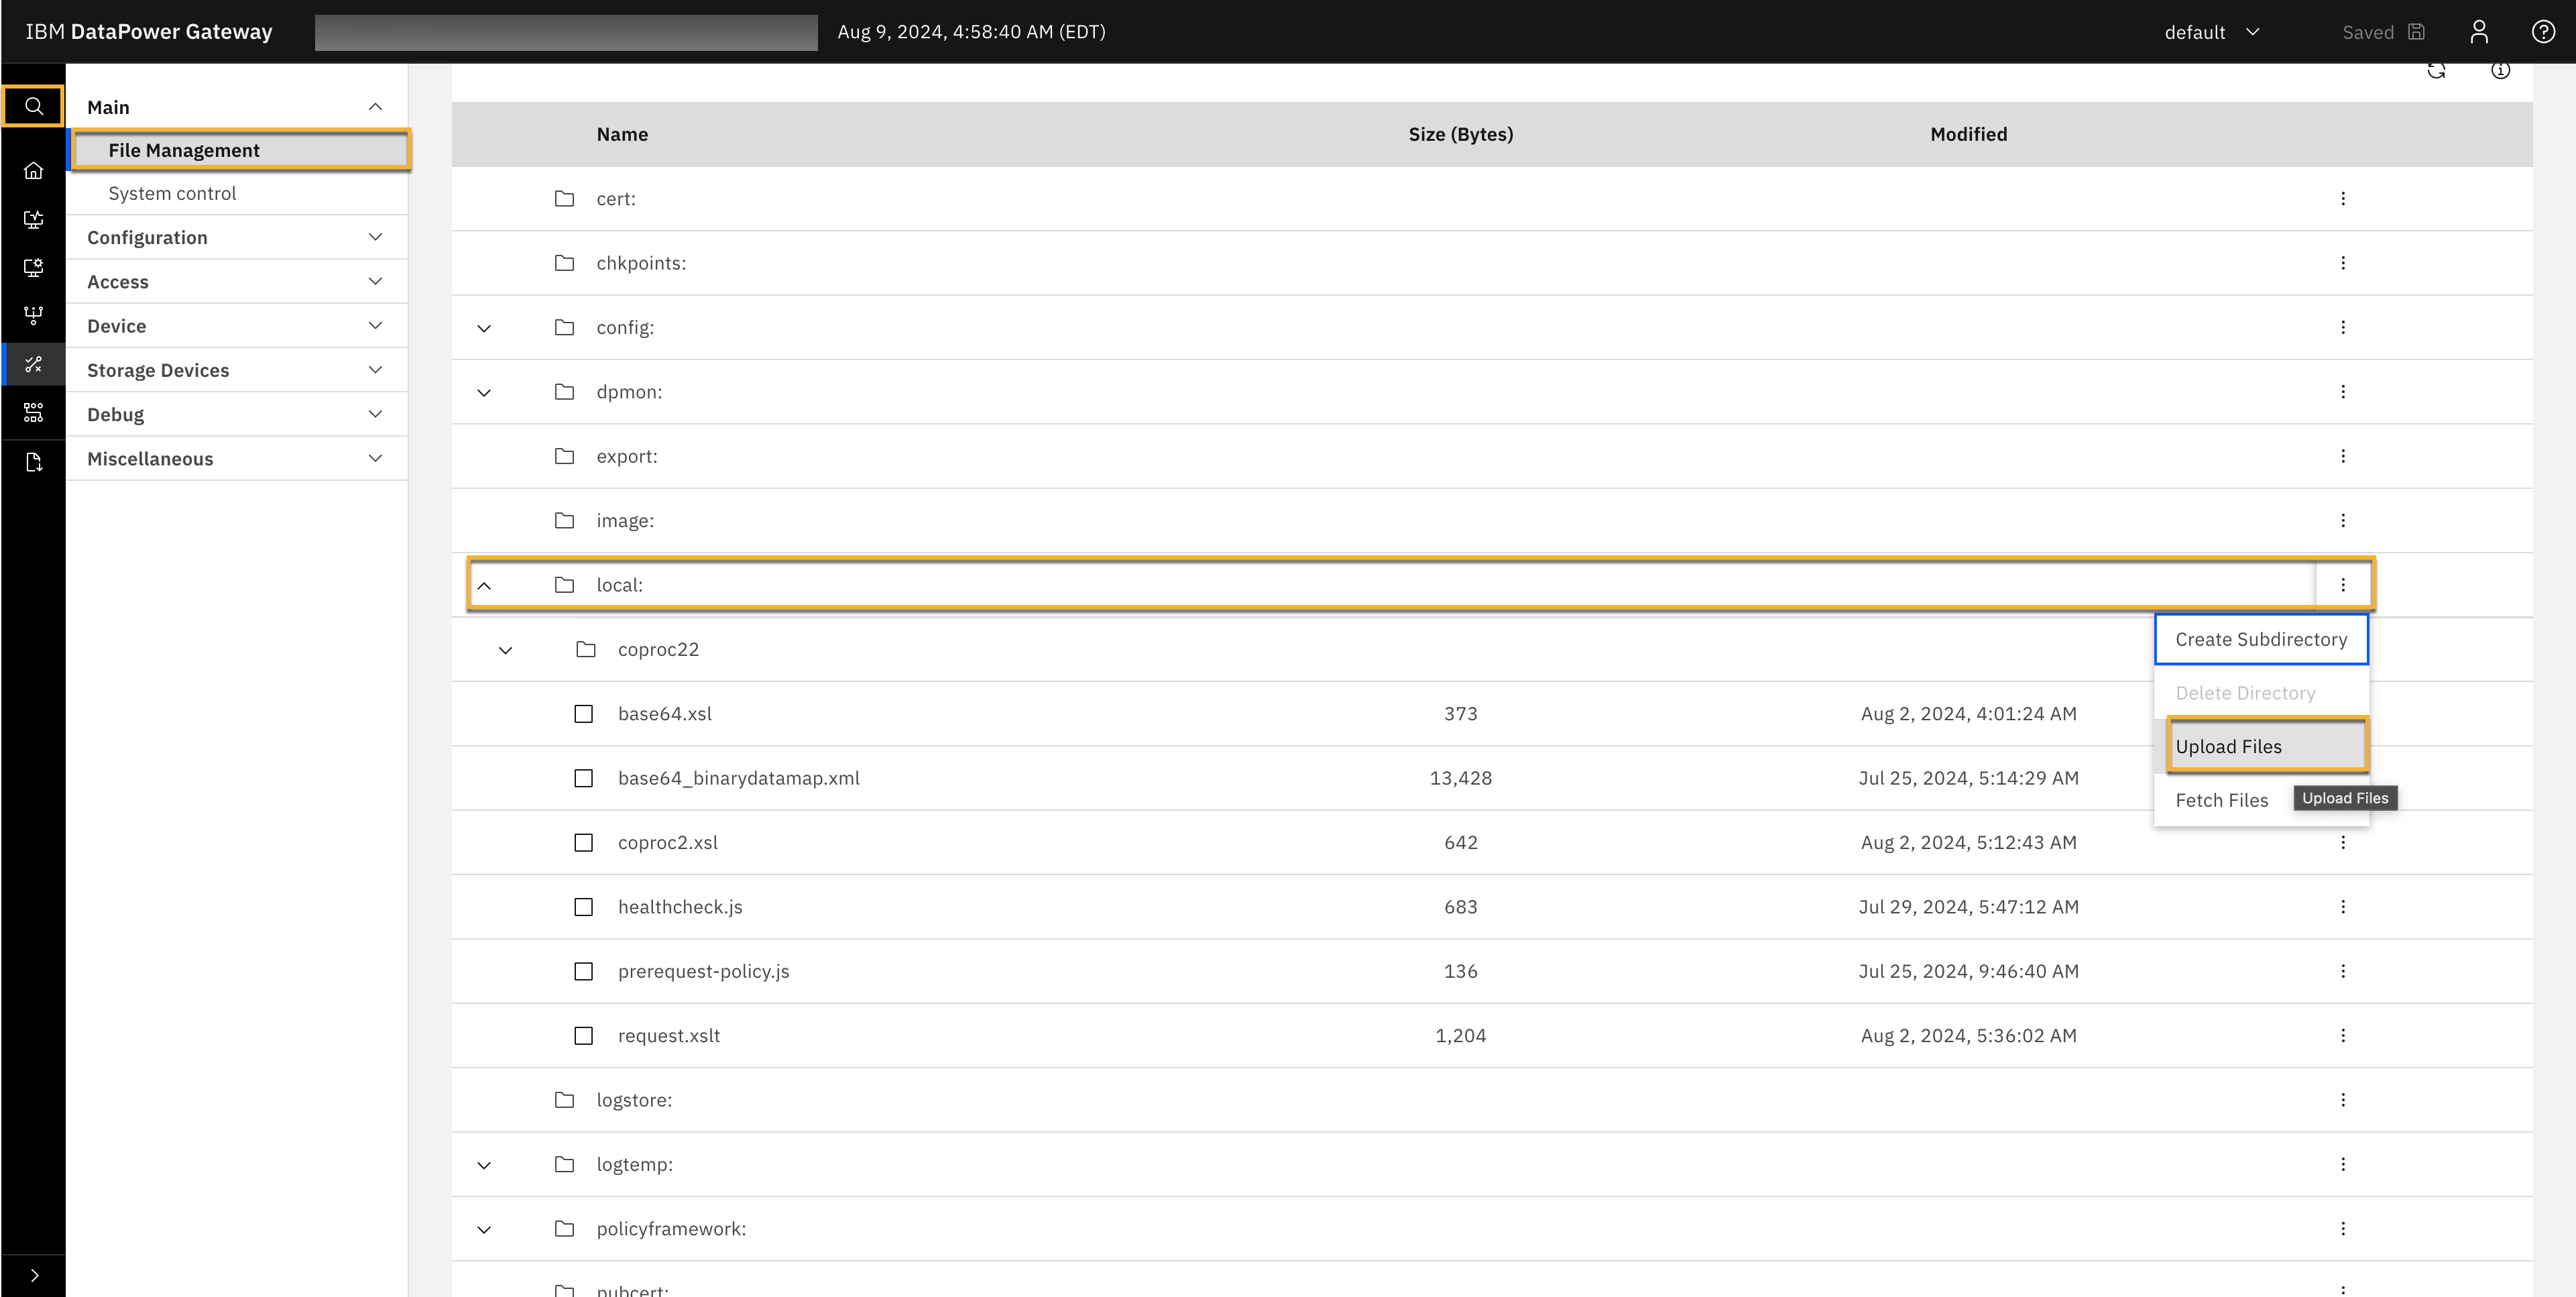
Upload the healthcheck.js file that you configured above.
Search for File management in the search.
Click Local and upload the file.
Create a processing action.
Search for Processing action in search and click Add.
Configure the following values:
Provide a name.
Action type —
GatewayScriptInput —
INPUTGatewayScript file —
local:///healthcheck.jsOutput —
NULL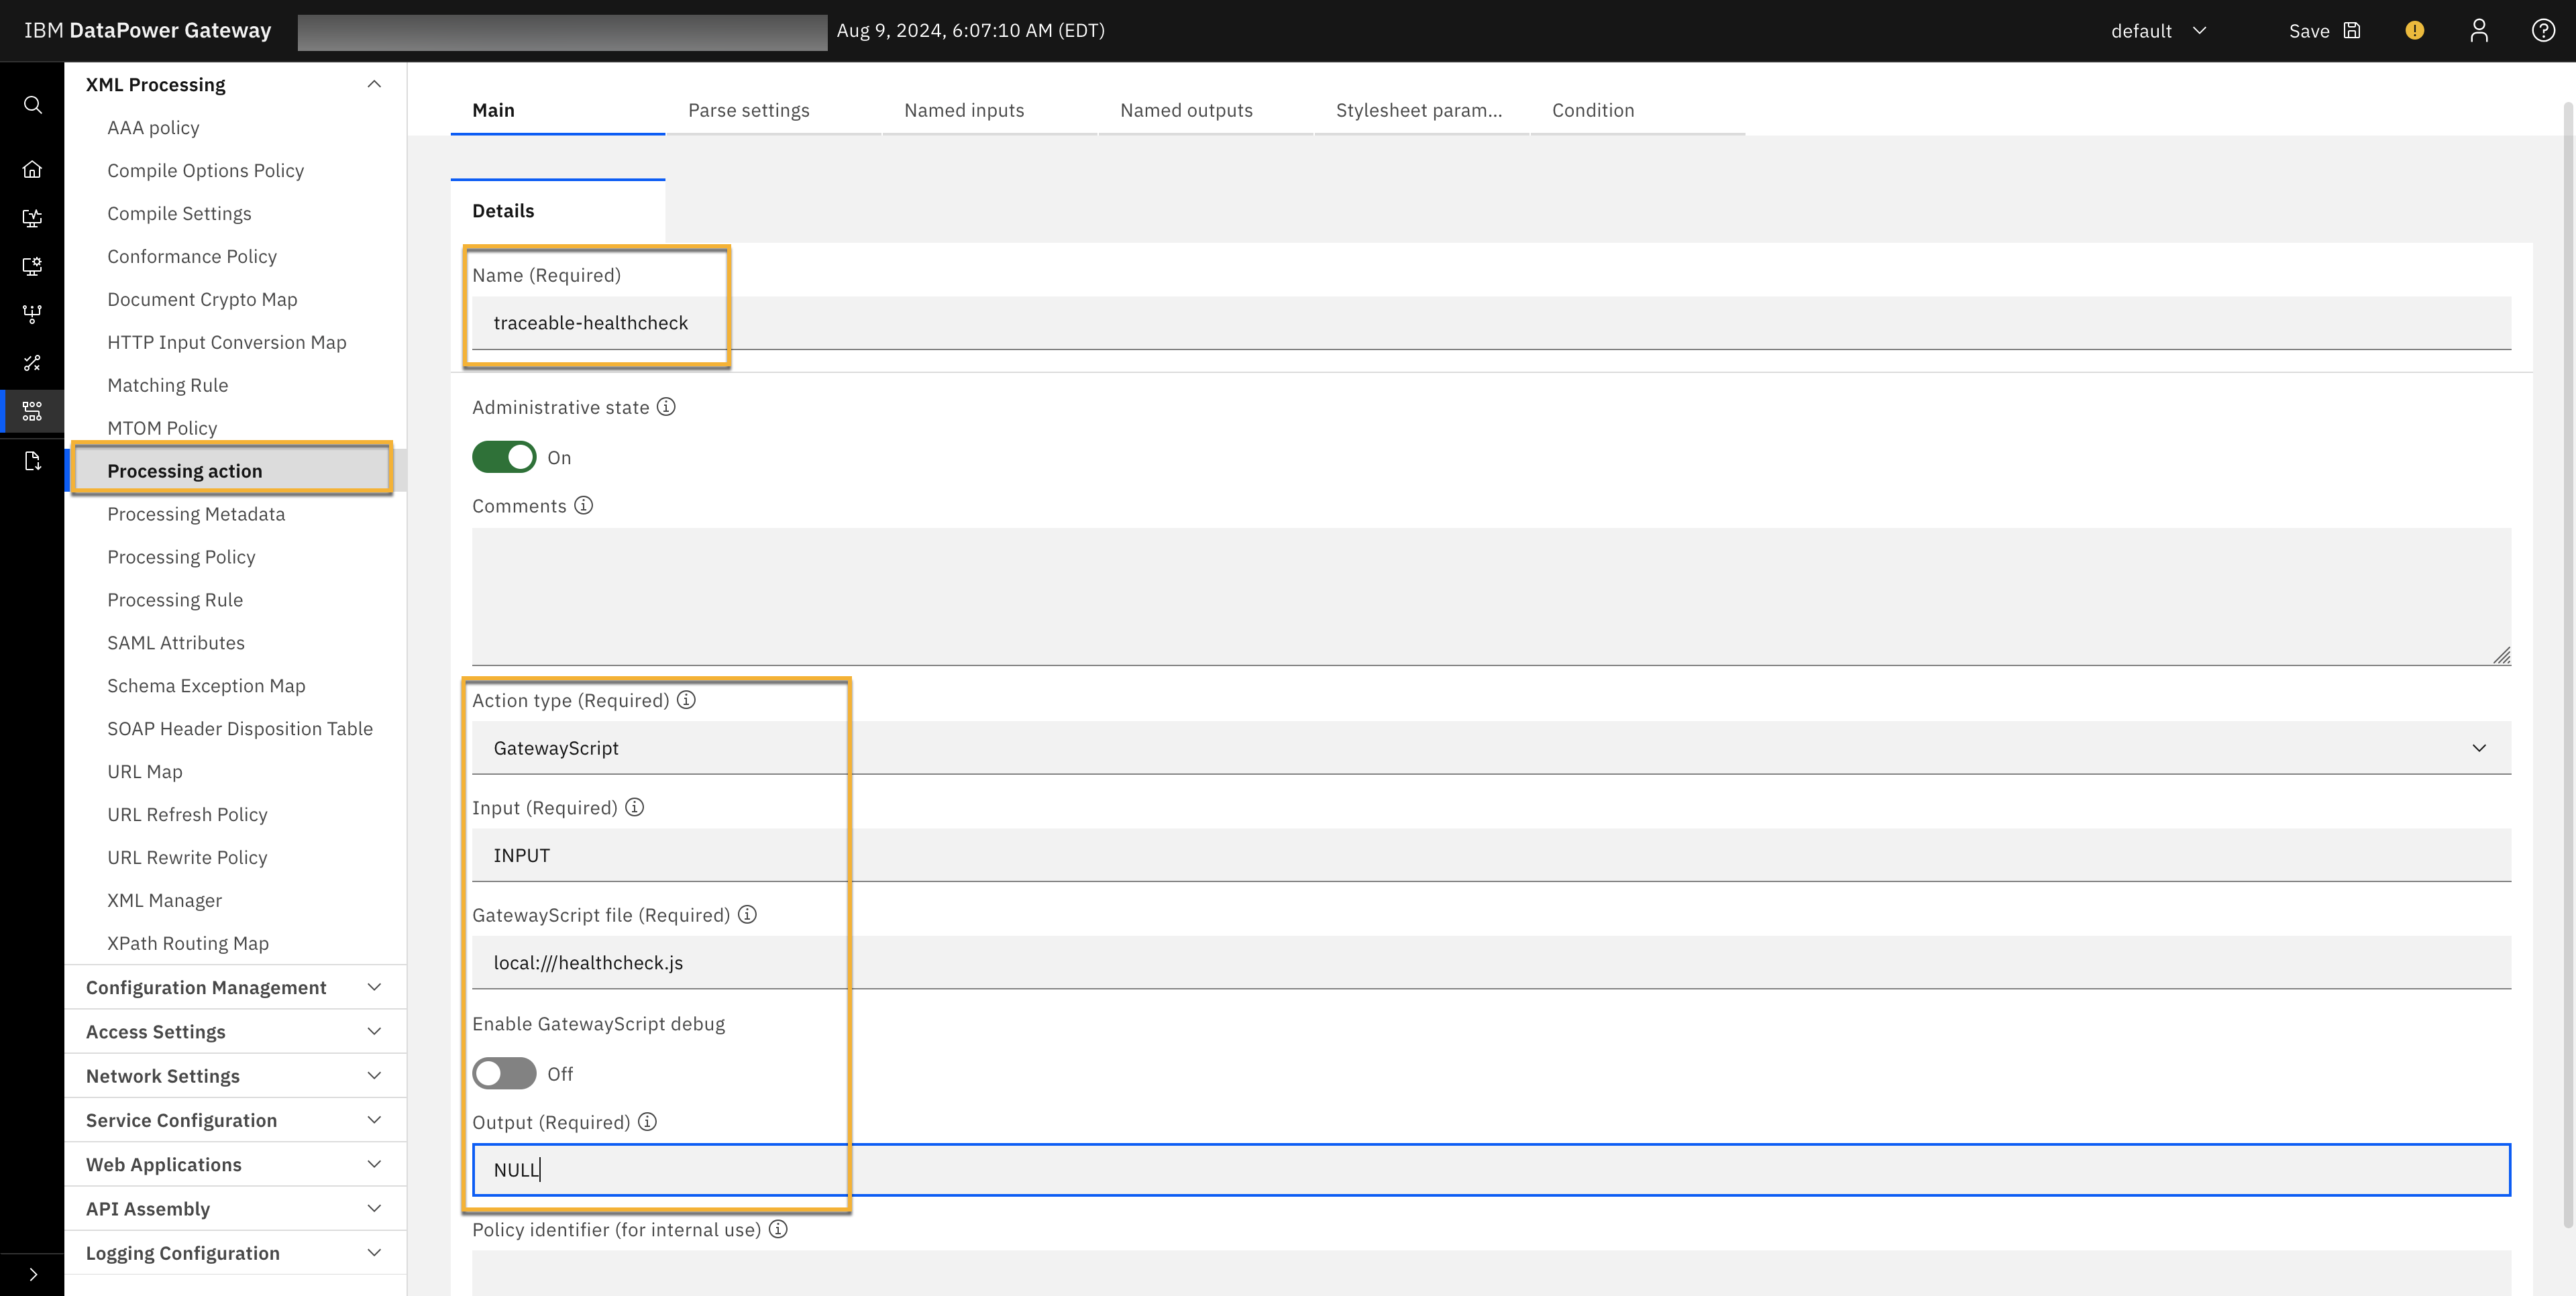
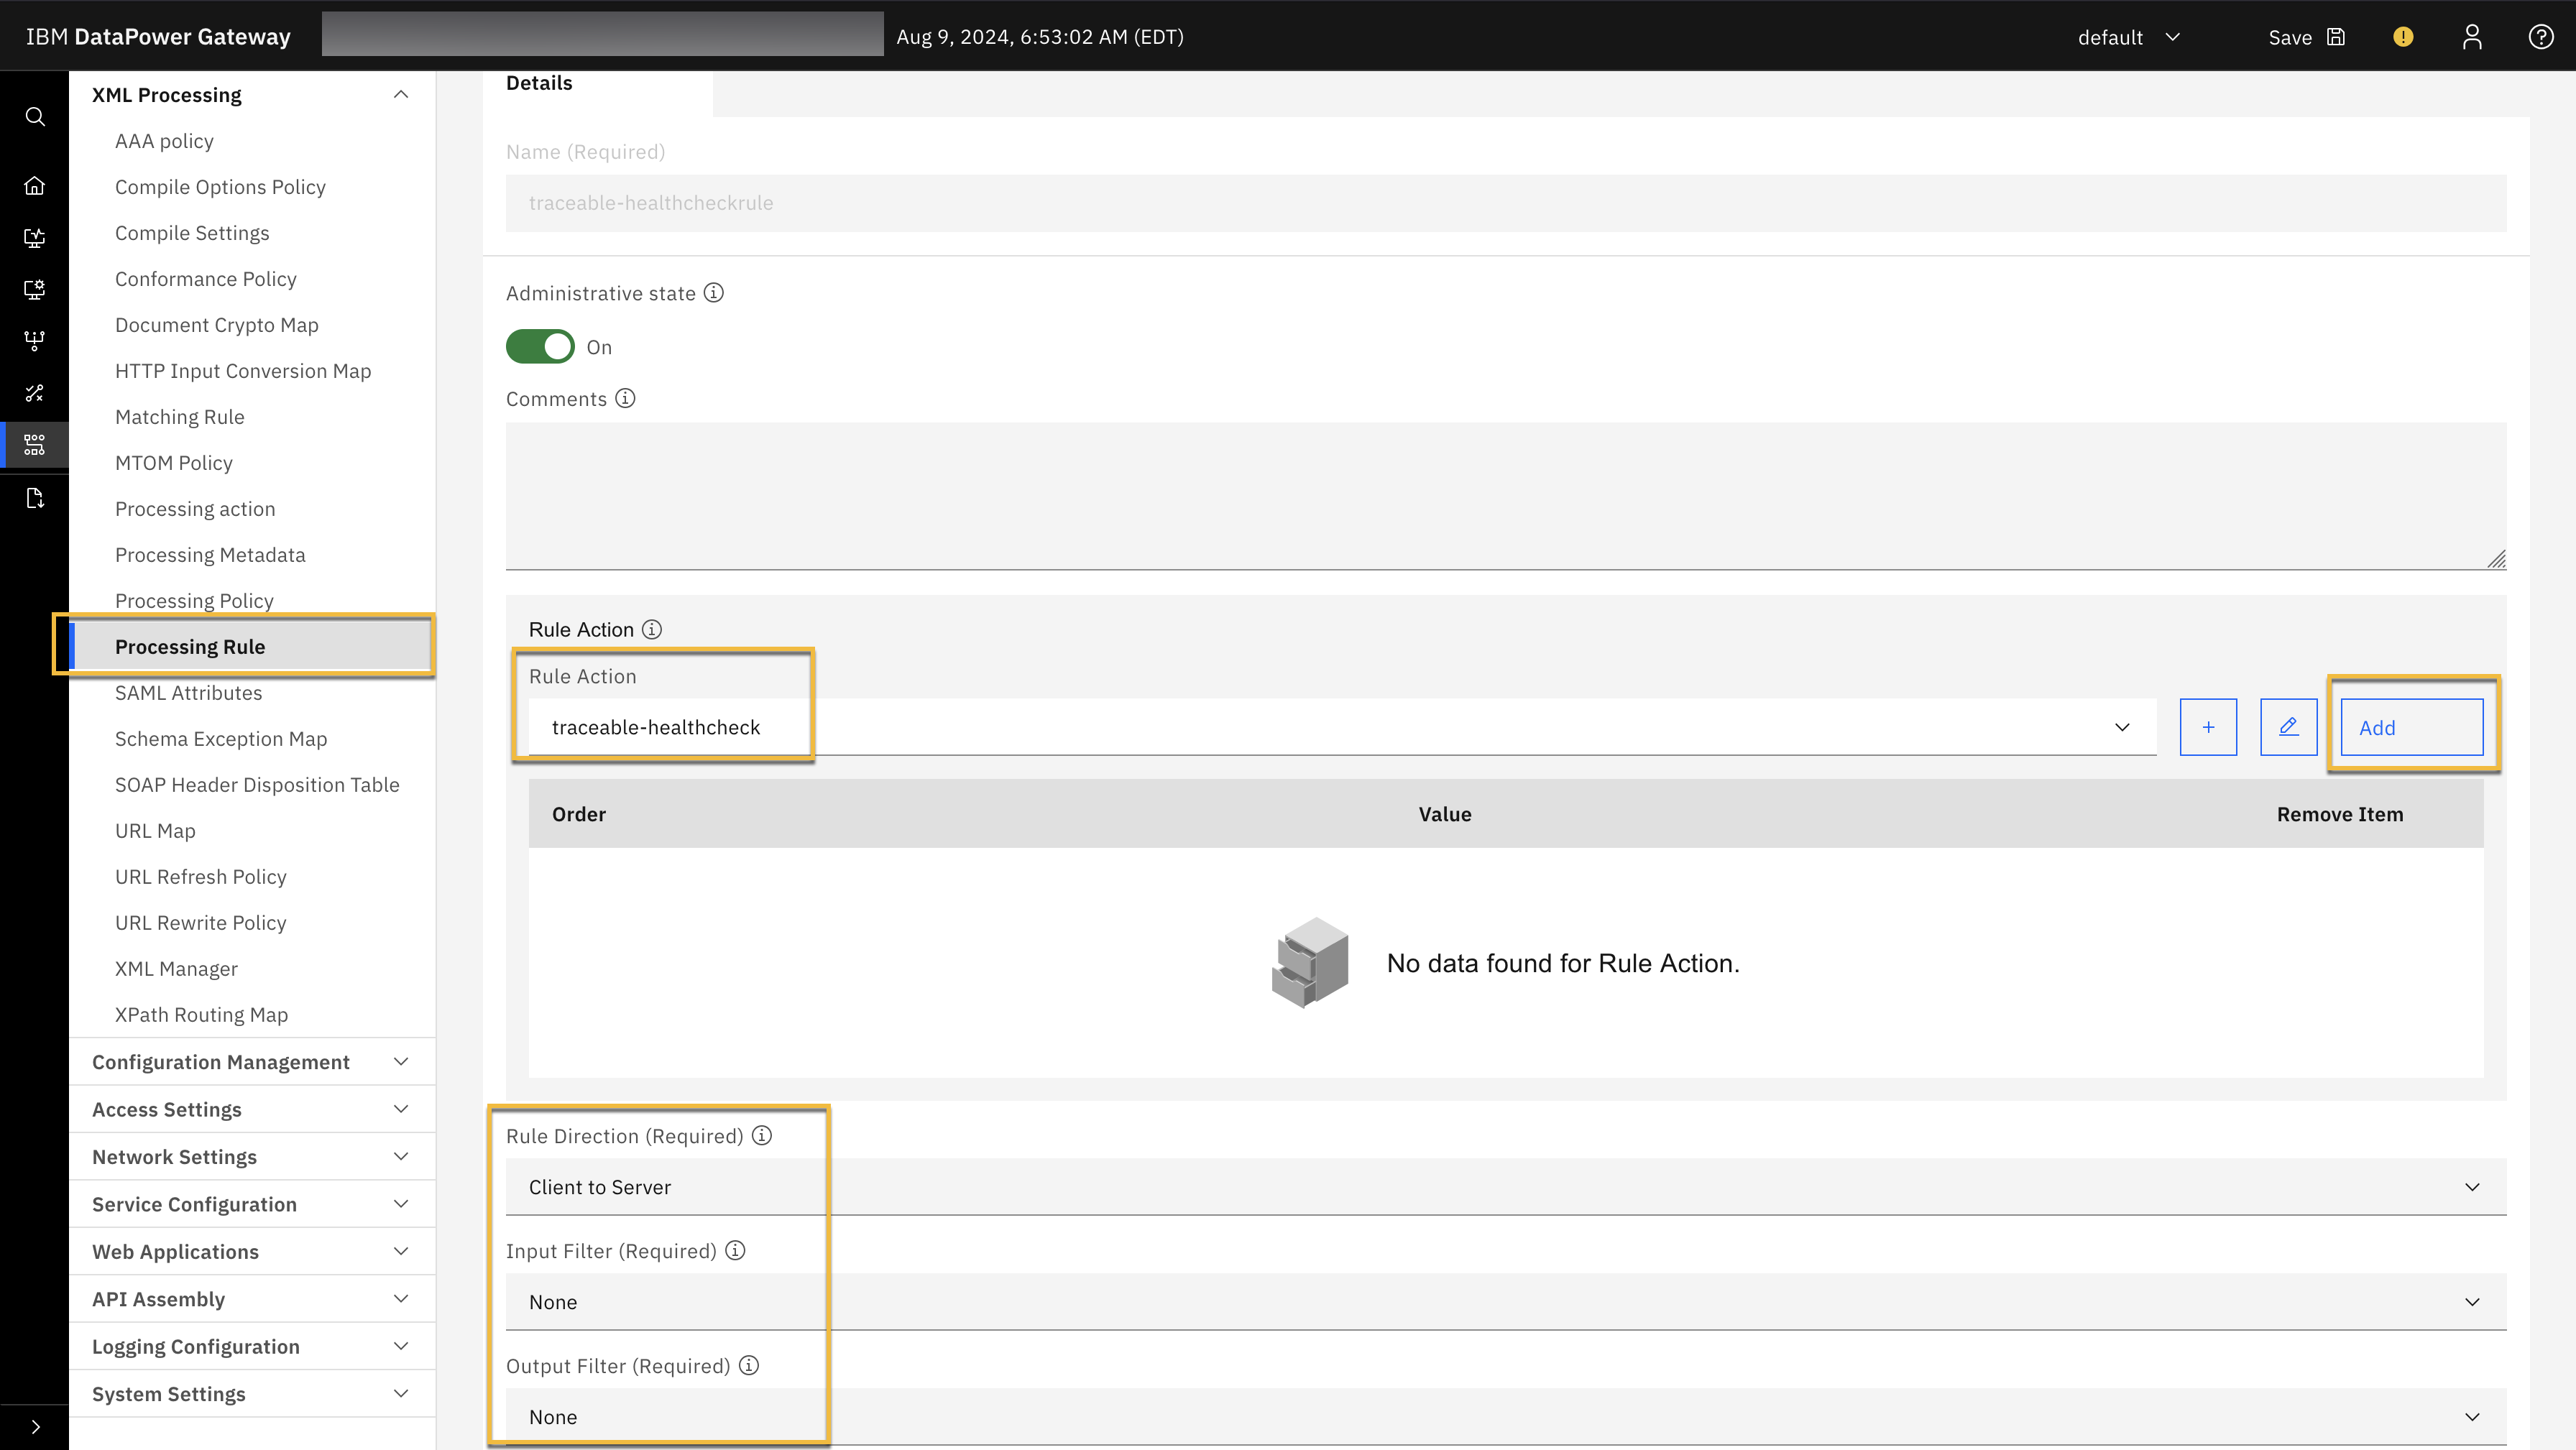
Create a processing rule.
Search for the Processing rule in search and click Add.
Configure the following values:
Name
Rule direction — Client to server
Rule action — traceable-healthcheck. Make sure to click on the Add button to add the Rule action.
Input filter — None
Output filter — None
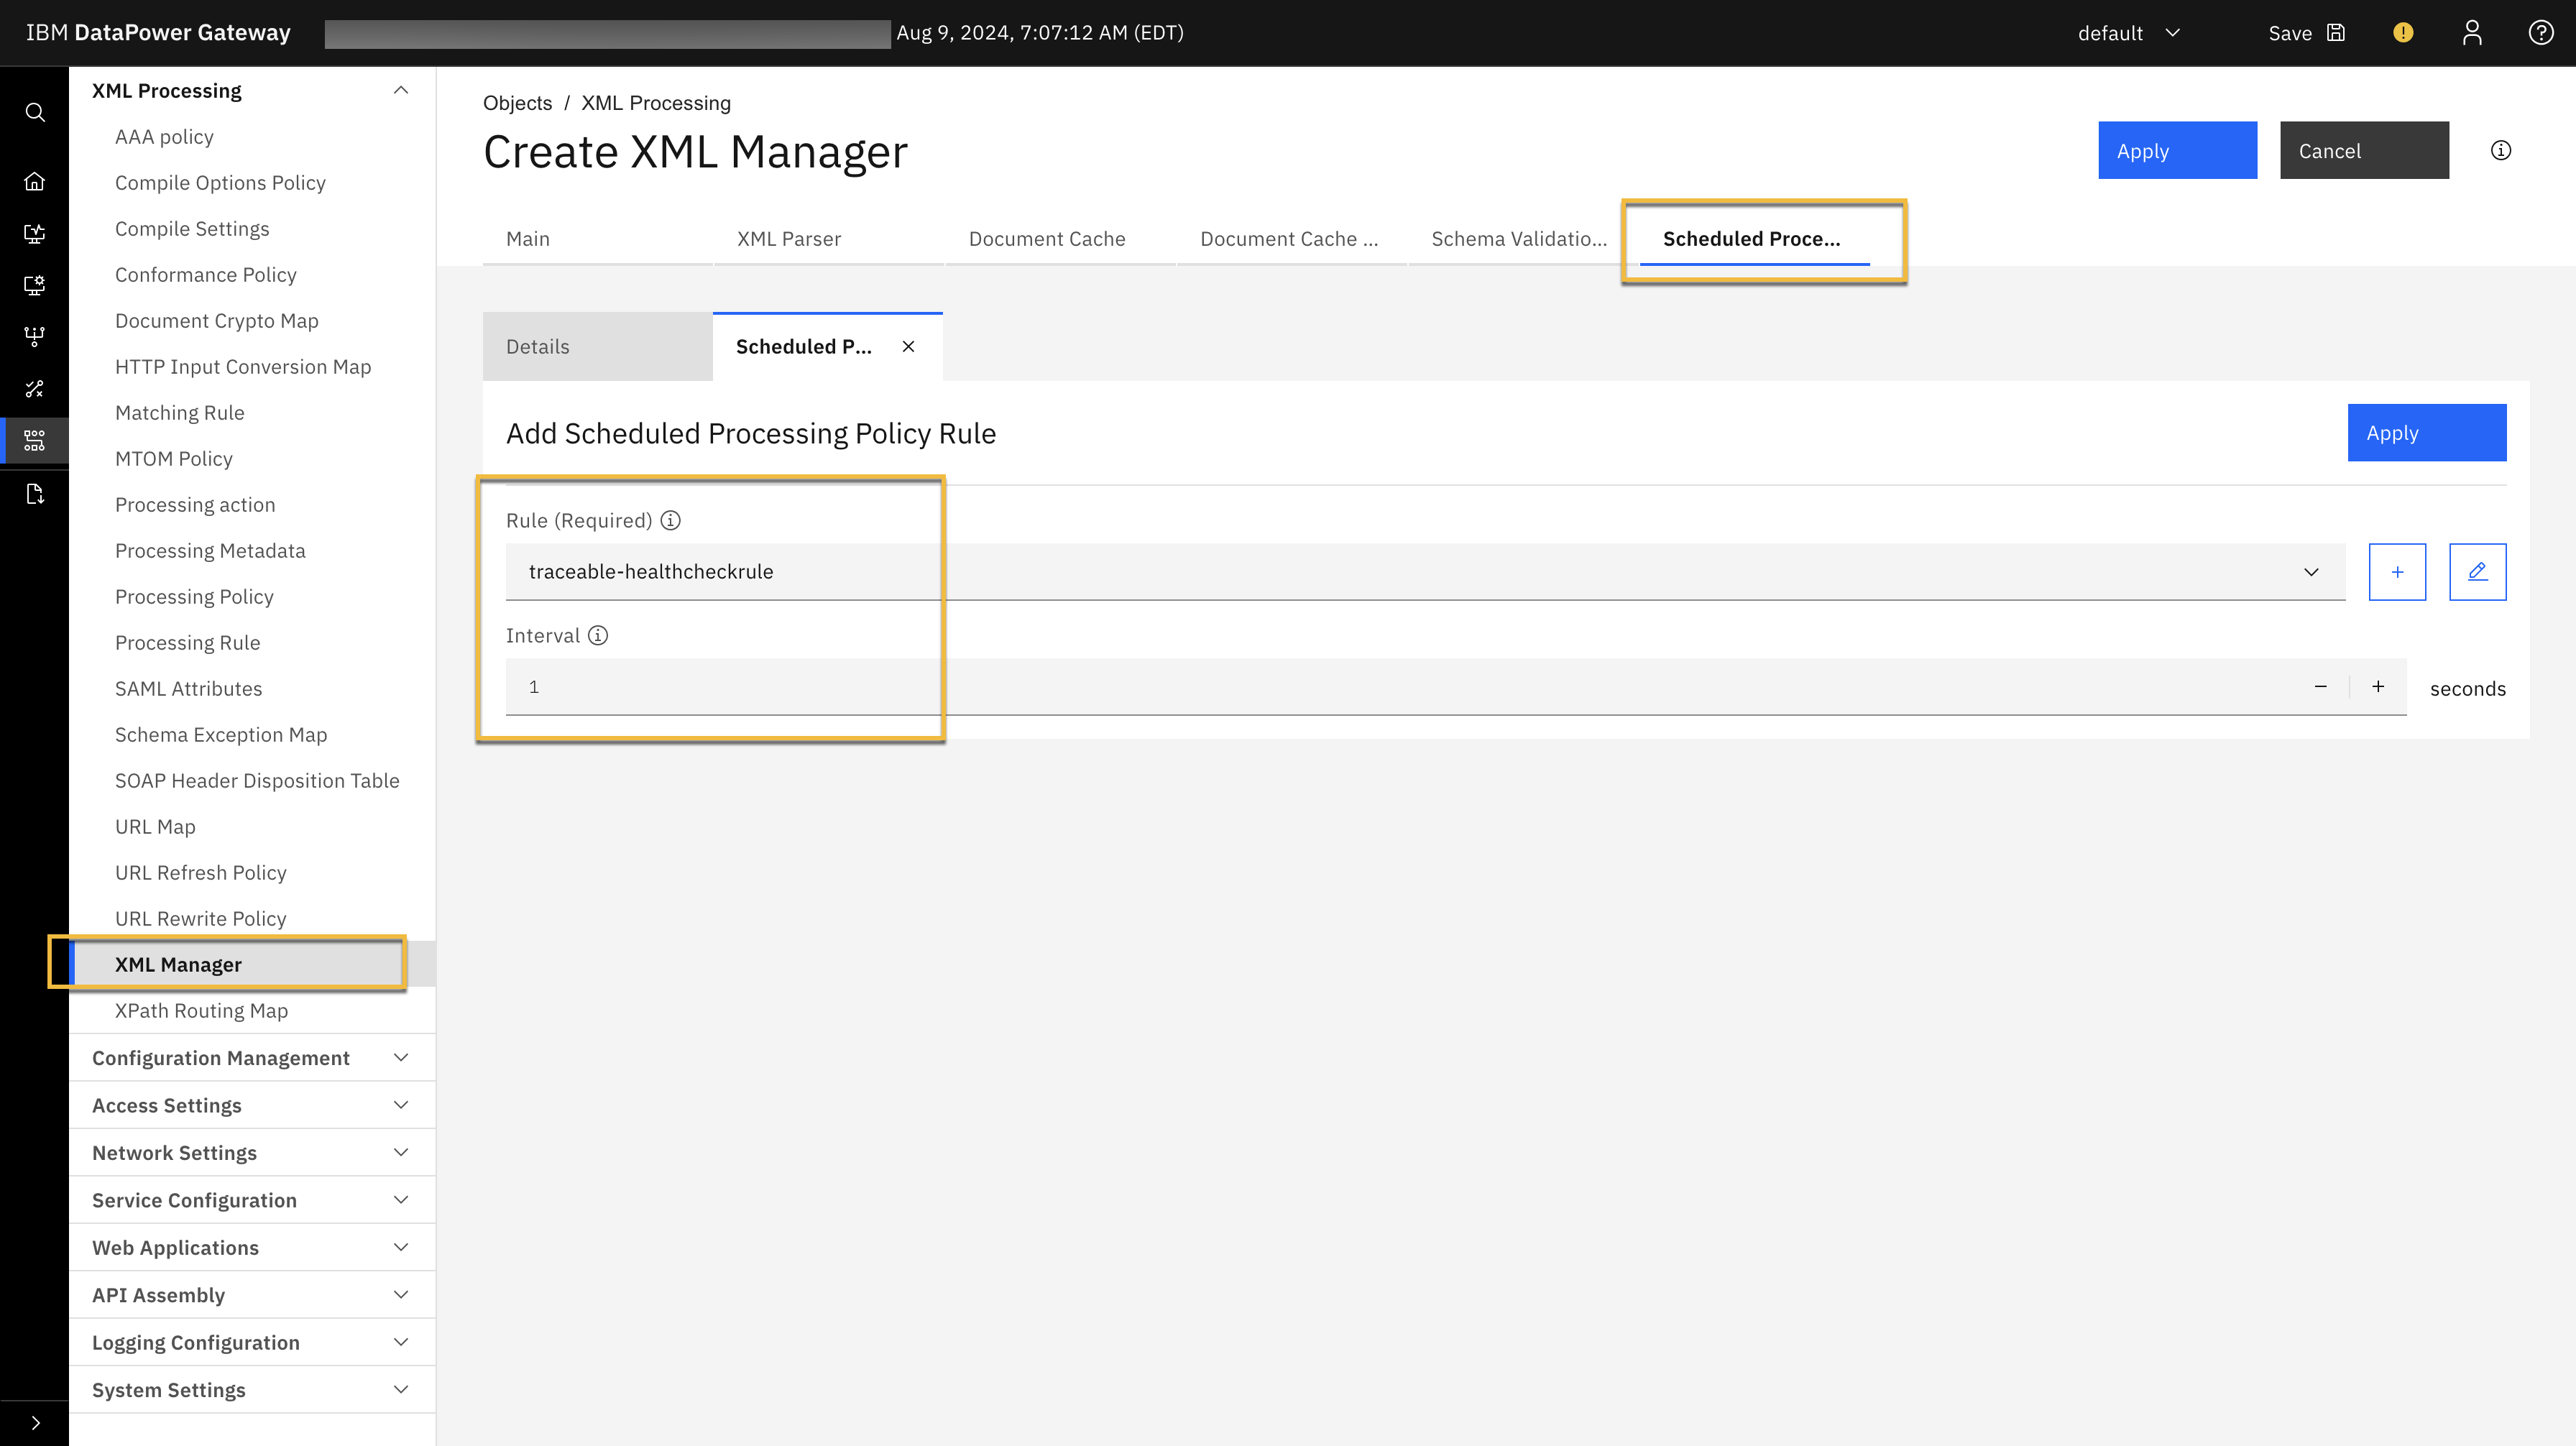
Configure the XML manager.
Search for XML manager in search and click Add
Navigate to the Schedule processing policy rule tab
Add a name
Choose the Rule from the drop-down list. Select the rule that you created in the previous step.
Configure the Interval as 1 second.
Configure non-blocking policy
Unzip the policy zip file that you downloaded from Traceable’s download site. You will get the following two files:
traceable-request-policy.jstraceable-response-policy.js
Complete the following steps to configure the non-blocking policy:
Log into your DataPower account and navigate to your Multiprotocol gateway.
Add a new Multi-Protocol Gateway Policy in the General tab or edit an existing one. Click the Edit button next to the + sign to edit an existing policy. You can choose an existing policy from the drop-down list.
.png "traceable_ibm_mpgw_config_non_blocking_step2(2).png")
In the Configure Multi-Protocol Style Policy window, select the request rule from the Configured rules table.
Drag and drop the Gateway script to the request rule, as shown below.

Double-click the Gateway script icon ({}) and upload the request policy from the Configure Gateway Script Action window and click on Done.
.png "traceable_ibm_mpgw_config_non_blocking_step6(1).png")
Follow steps 4 and 5 for uploading the response policy.

Click on the Edit button, as shown in the screenshot above, and edit the
traceable-response-policy.jsto configure the Traceable Platform agent and SSL client profile.
Submit and apply the policy.

API specific policy
Traceable provides you with an option to configure specific APIs for monitoring. To set up an API-specific policy, you must create a clone of your request and response rules and configure a matching function for those.
Complete the following steps:
Log into your DataPower account and navigate to your Multiprotocol gateway.
Select an existing policy from the Mutli-Protocol Gateway policy drop-down list in the General tab.

Click on the edit button next to the + sign.
In the Configure Multi-Protocol Gateway Style Policy window, select the Rule you wish to clone and then click New Rule. This will create a copy of the rule.

Move the Cloned rule above the cloned one, as shown below.

Double-click on the matching action (=), as shown in the screenshot above.
In the Configure matching action pop-up window, click the + sign to add a new matching action.

In the Matching rule window, configure the rule (APIs) that you wish to monitor. Select the Combine with Boolen (OR) checkbox to apply the OR operation to all the defined rules. The default behavior is the AND operation.

Click on Apply.
Repeat the above steps for other rules, like the response rule.
As the last step, add the gateway script to the cloned rules. Follow the steps mentioned in the Configuring non-blocking policy or the Blocking policy section.

Verification
You can verify a successful configuration by viewing the span data in Traceable Platform, as shown in the screenshot below. The screenshot shows your DataPower gateway host. You can also check the Response tab.
