- 26 Jul 2024
- 4 Minutes to read
- Print
- DarkLight
- PDF
Data collection with log analytics
- Updated on 26 Jul 2024
- 4 Minutes to read
- Print
- DarkLight
- PDF
Log Analytics in Azure APIM is a tool for gathering and examining detailed logs and metrics from your APIs. It helps you monitor, troubleshoot, and optimize your APIs effectively. Traceable uses Log Analytics to collect data from your APIs, which is sent to the Traceable Platform for further analysis.
This topic outlines the steps for configuring data capture for Azure API Management (APIM) using Log Analytics. The process involves creating a Storage Account, enabling diagnostic logs on APIM, setting up a Log Analytics export rule, and creating an Azure Function to handle the log data.
The following is a high-level data flow diagram for data collection using log analytics.
.png)
APIM Gateway: Collects and sends logs.
Diagnostic Logs: Stores logs before forwarding them to a Storage Account.
Storage Account: Receives logs from Diagnostic Logs and triggers the Azure Function.
Azure Function: Processes logs and sends data to the Traceable Platform agent.
Traceable Platform agent: Consumes the data.
Log Analytics Workspace: Stores and allows analysis of the processed data.
Before you begin
Make a note of the following points before you start with the configuration:
Make sure that the Traceable Platform agent is deployed. Note the platform agent's IP address. For more information, see Platform agent.
An Azure API Management gateway is created.
A Log Analytics workspace is created.
Configuration
Step 1 — Create a storage account
The Storage Account receives application insight logs, which are processed by an Azure App Function and exported to the Traceable Platform agent. Complete the following steps to create a Storage account:
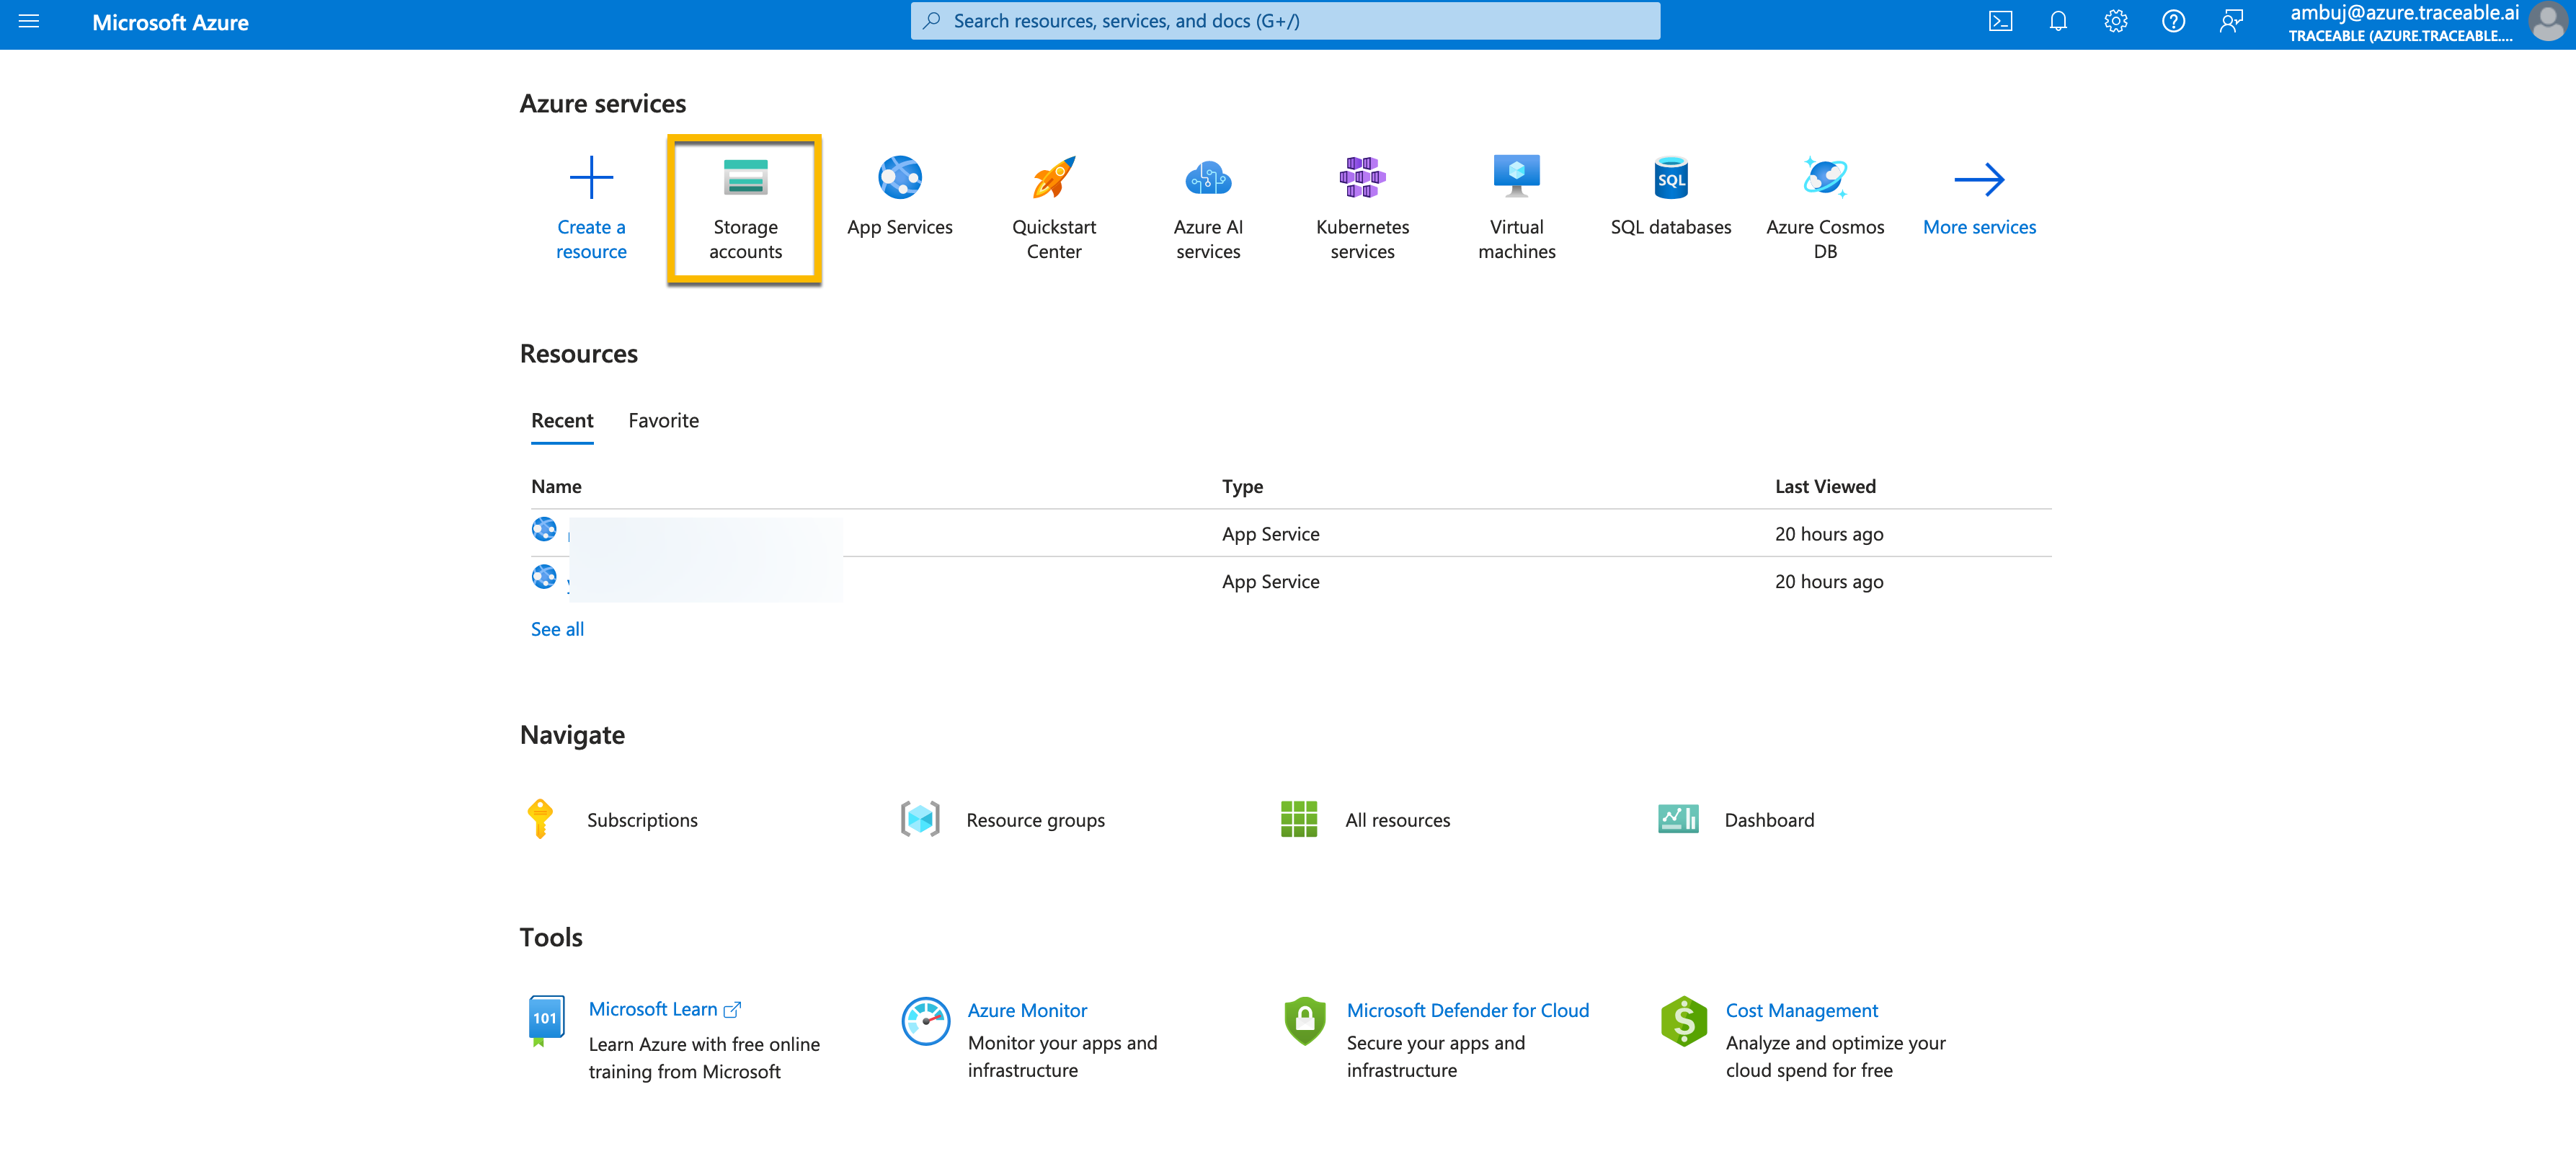
Log into your Azure account and click Storage accounts.
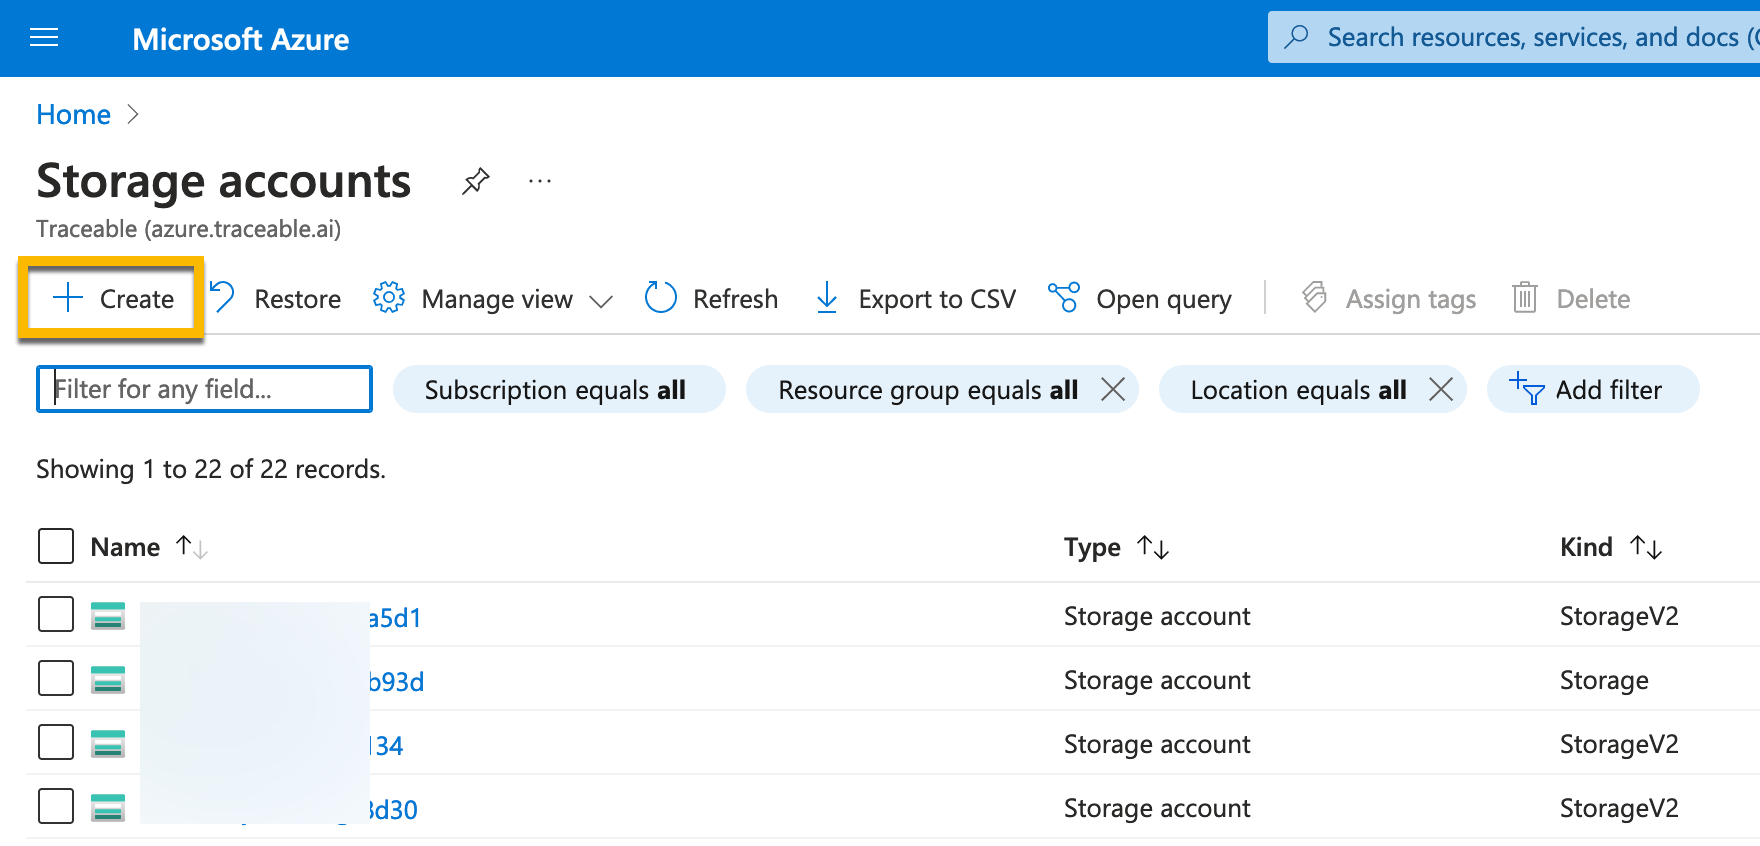
Click Create on the Storage accounts page.
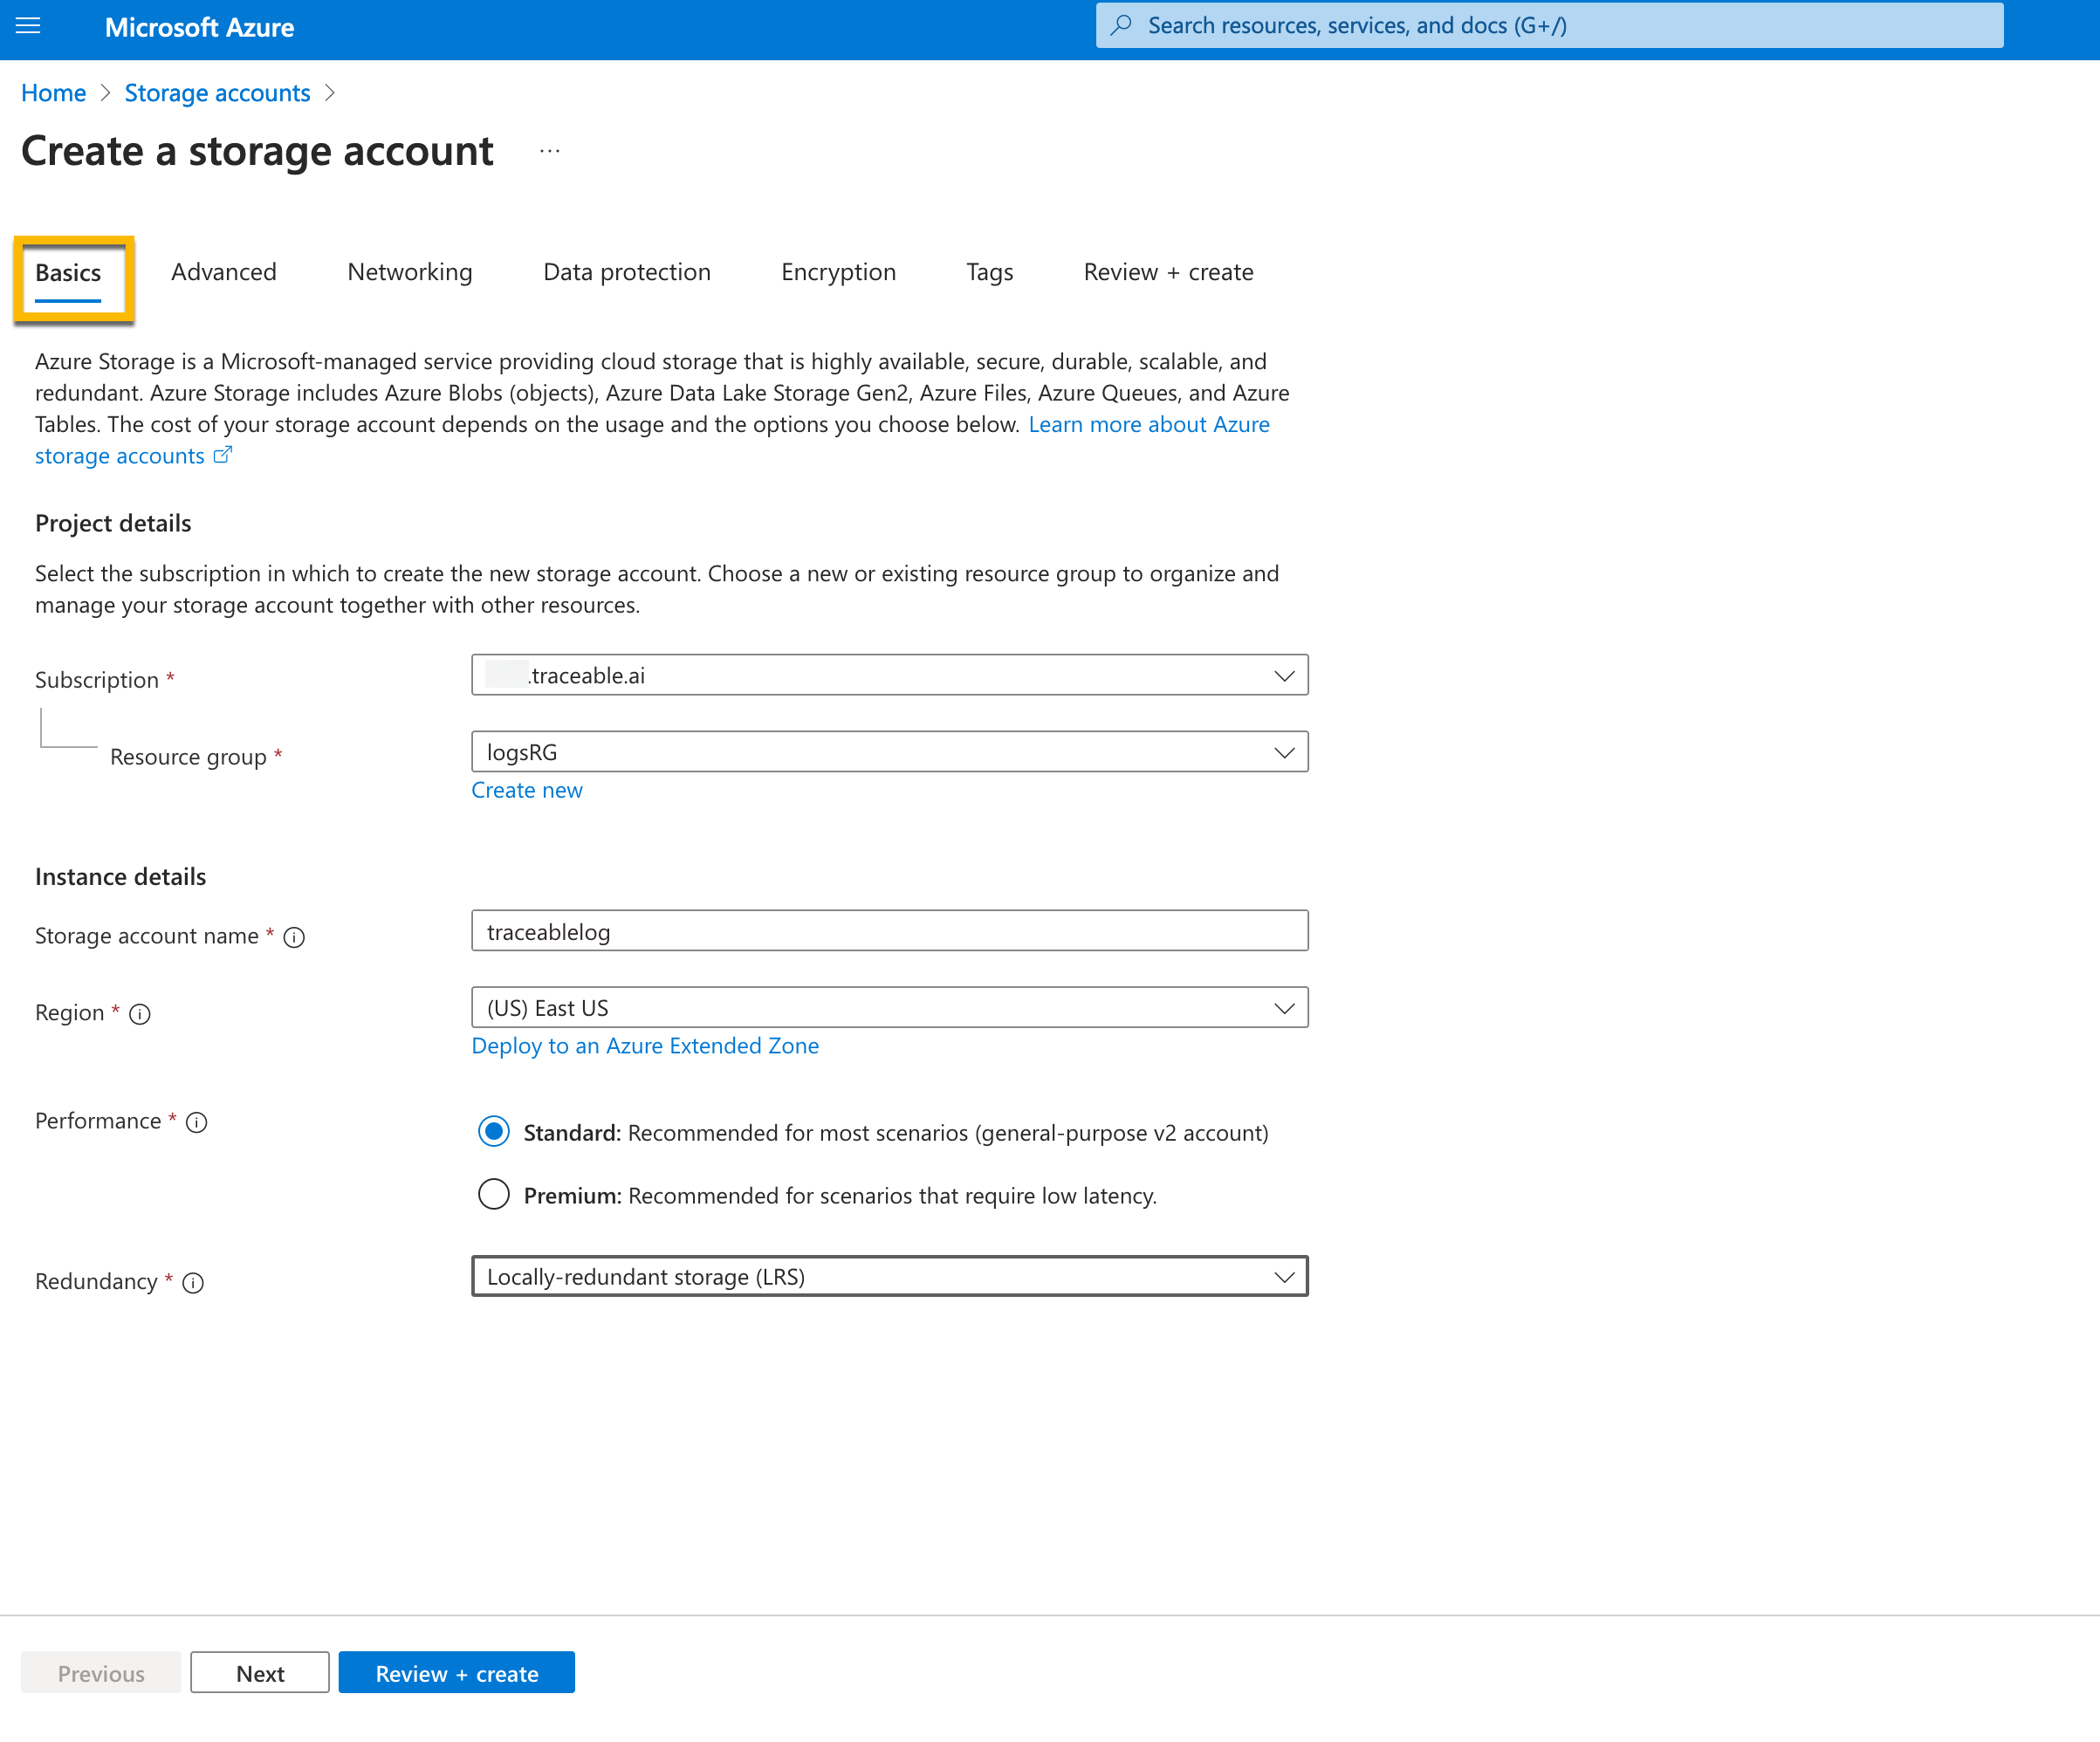
On the Create a storage account page, navigate to the Basics tab and fill in the values. In the Redundancy field, you may choose Locally-redundant storage (LRS).
Navigate to the Networking tab and configure the following. These configurations limit access to this Storage account so that it is accessible from the Log Analytics workspace and the App Function created in the later steps.
Network access — Enable public access from selected virtual networks and IP addresses.
Virtual networks — Configure your Virtual network subscription, Virtual network, and Subnets.
Network routing — Select Microsoft network routing.
.png)
Once the Storage account is configured, configure the retention limits. The integration is event-based, so a short retention period is acceptable. In the Storage account you created above, navigate to Lifecycle Management.
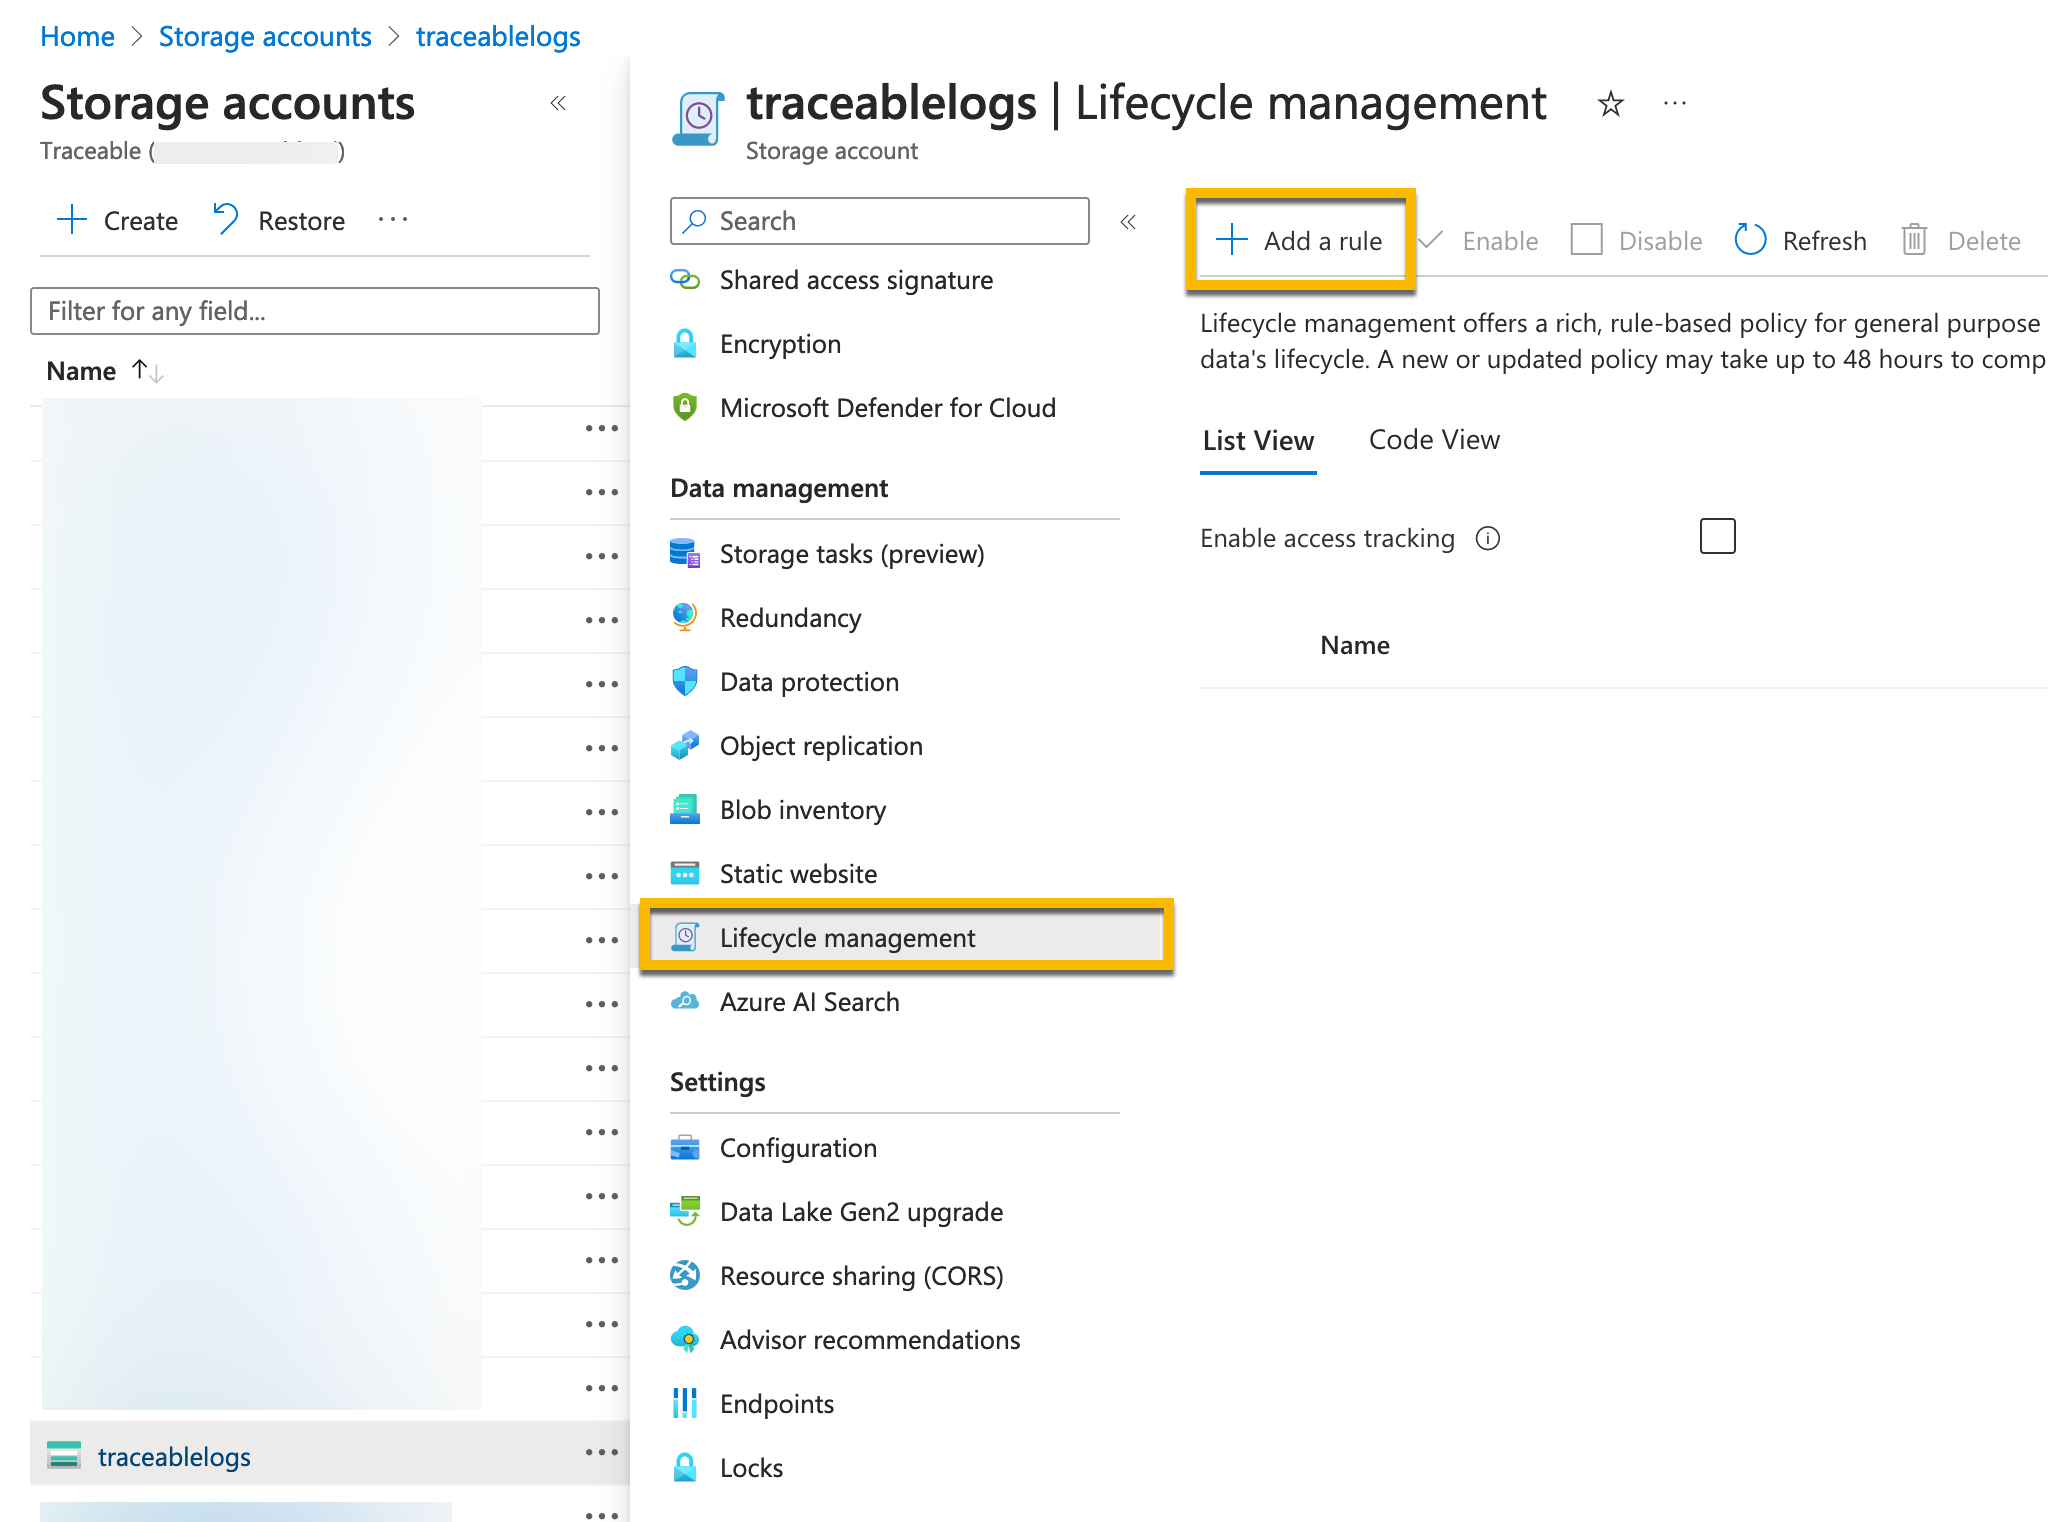
In the Details tab of Add a rule page, provide the following:
Rule name
Rule scope — Select Apply rule to all blob in your storage account.
Blob type — Select Block blobs.
Blob subtype — Select Base blob.
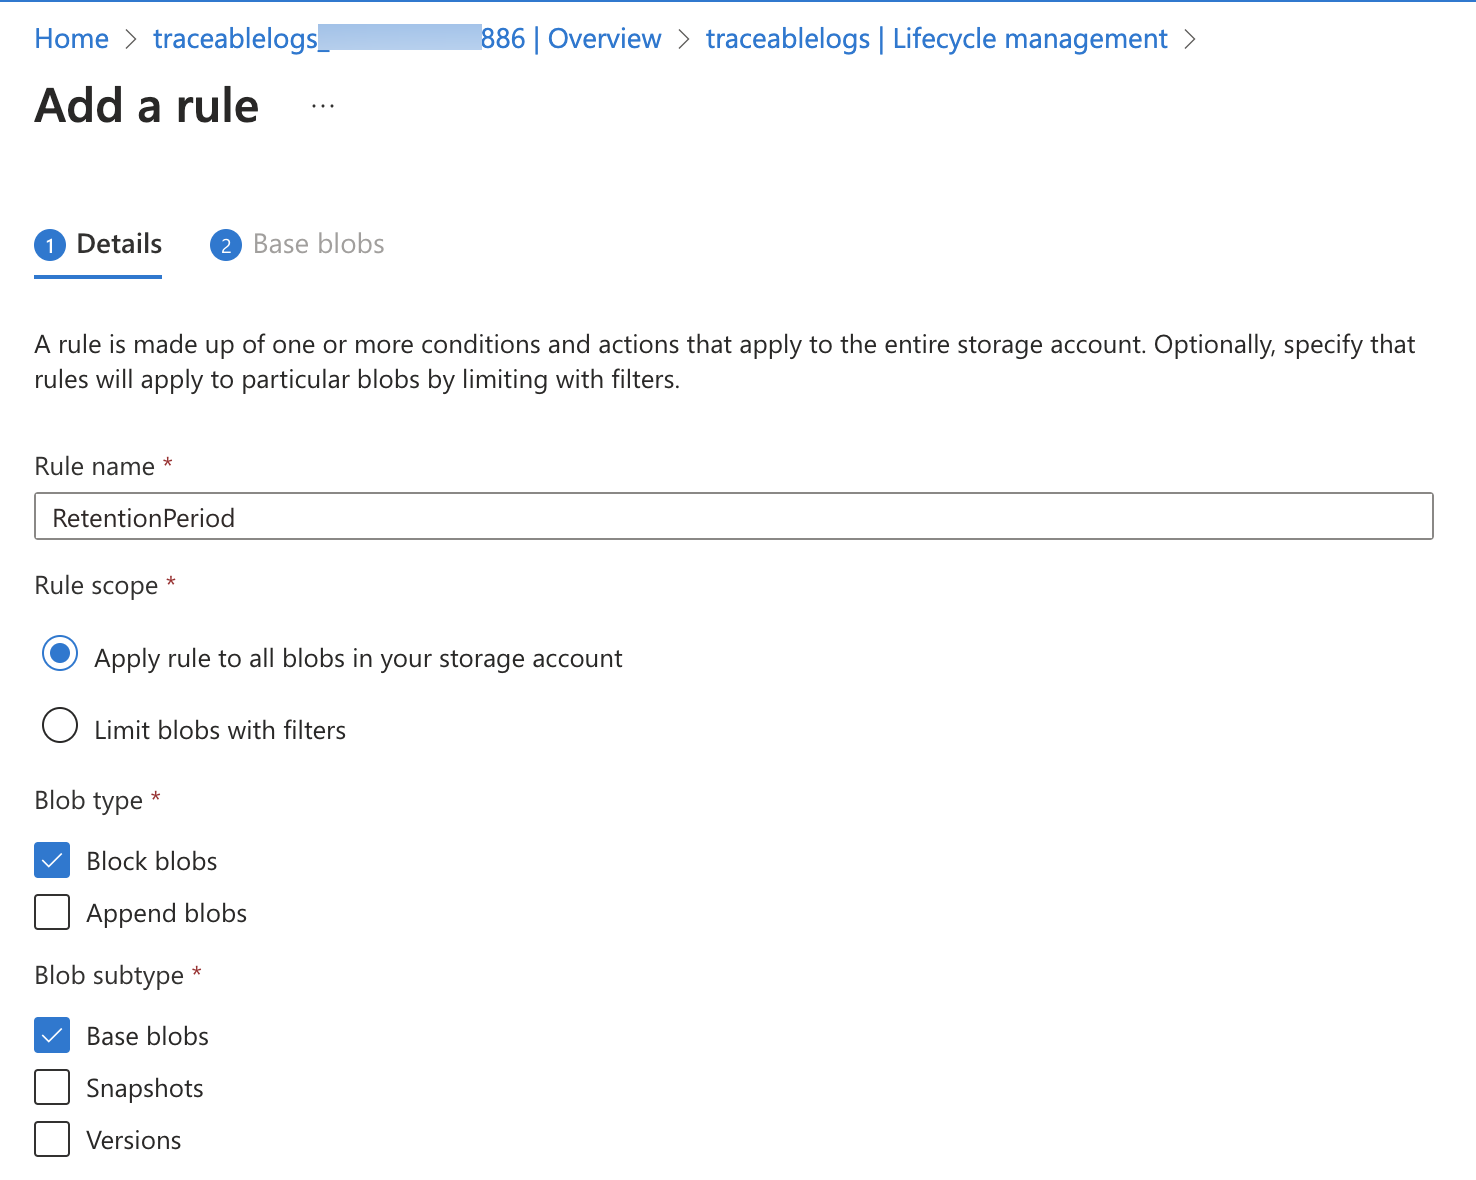
In the Base blobs tab, configure the rule conditions. You may select Delete the blob in the
thenoperation.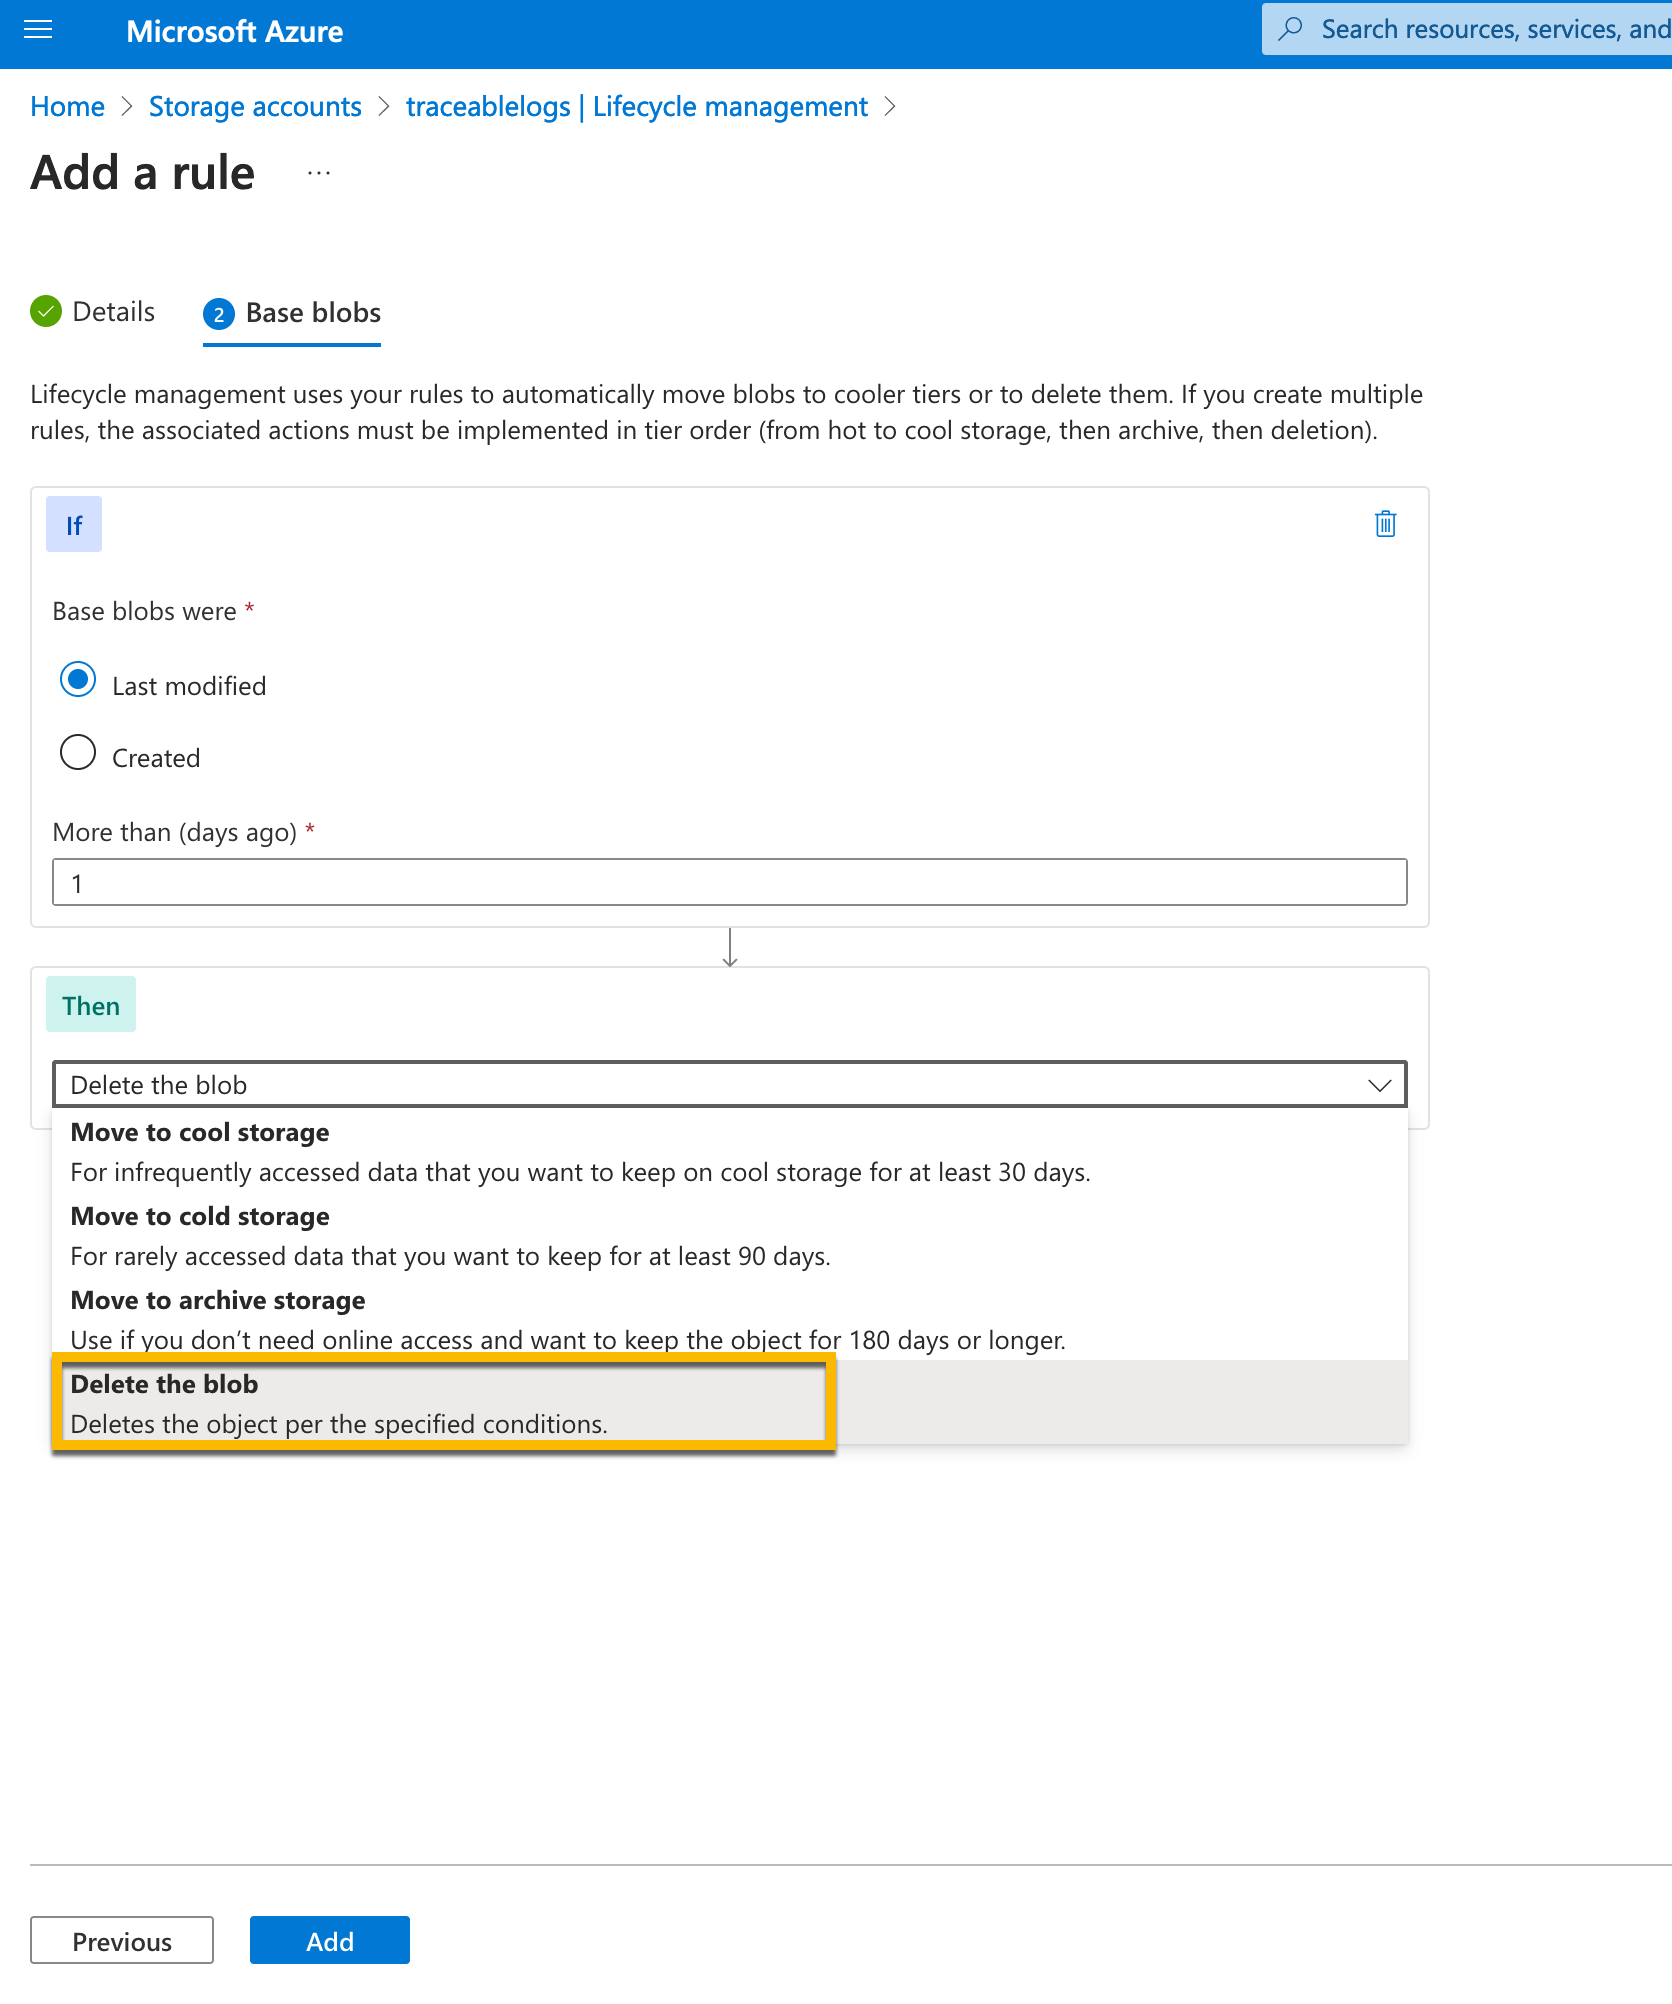
Click on Add.
Step 2 — Enable API management diagnostic logs
Complete the following steps:
In Azure, navigate to your APIM instance.
Go to Monitoring → Diagnostic Settings.
Create a new Diagnostic Setting:
Select the Send to Log Analytics Workspace checkbox.
Ensure the Destination table is set to Resource Specific.

Step 3 — Configure diagnostic logging on target APIs
Complete the following steps:
Navigate to APIs → <select an API> → Settings.
Enable the Azure Monitor setting.
Set sampling to 100% to capture all requests.
Ensure the Log Client IP address option is selected.
Under Additional settings, enable:
Frontend Request
Frontend Response
Specify any headers to be captured for both the Frontend Request and Response. For body capture to work correctly, ensure you capture content type and Content length.
Configure the maximum body bytes to capture. The maximum value is 8192 bytes.
Click on Save.
.png)
Step 4 — Create log analytics export rule
Complete the following steps:
Navigate to the Log Analytics workspace.
Set up an export rule to send data to the Storage account you created earlier. Navigate to All services → Analytics → Log Analytics workspace.
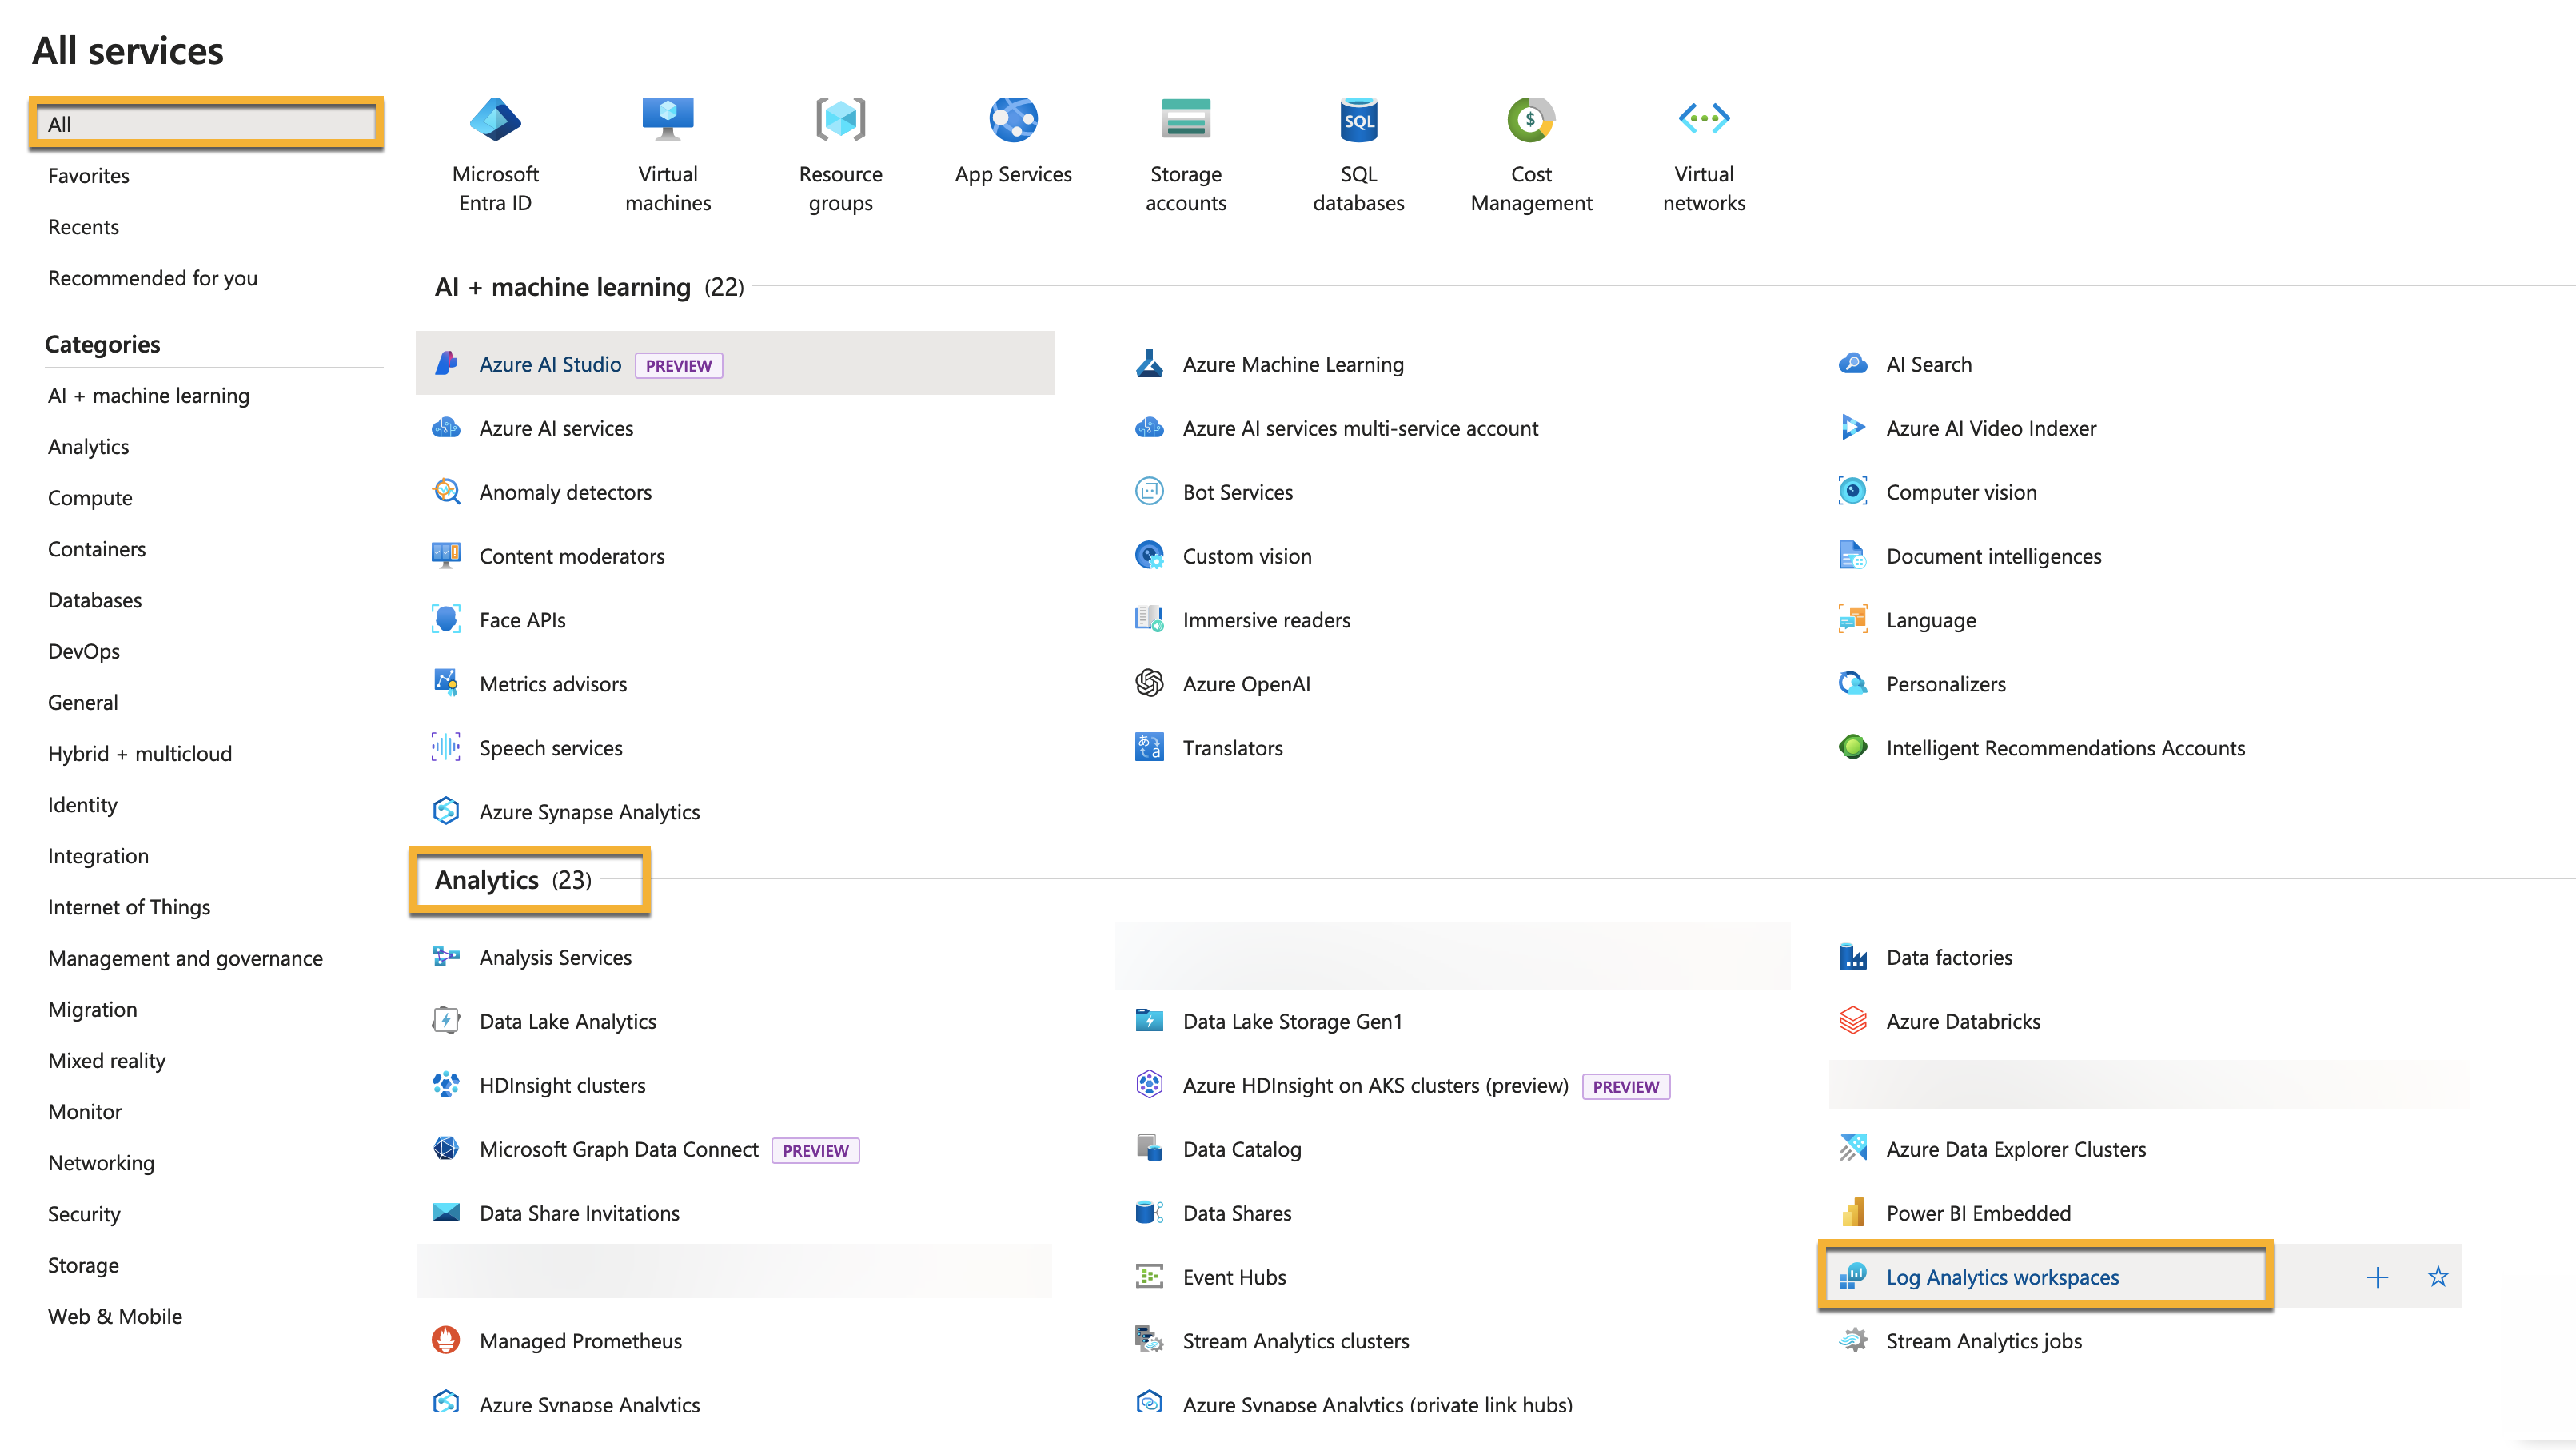
Select your workspace and navigate to Settings → Data export.
.png)
Click +New export rule on the Data export page.
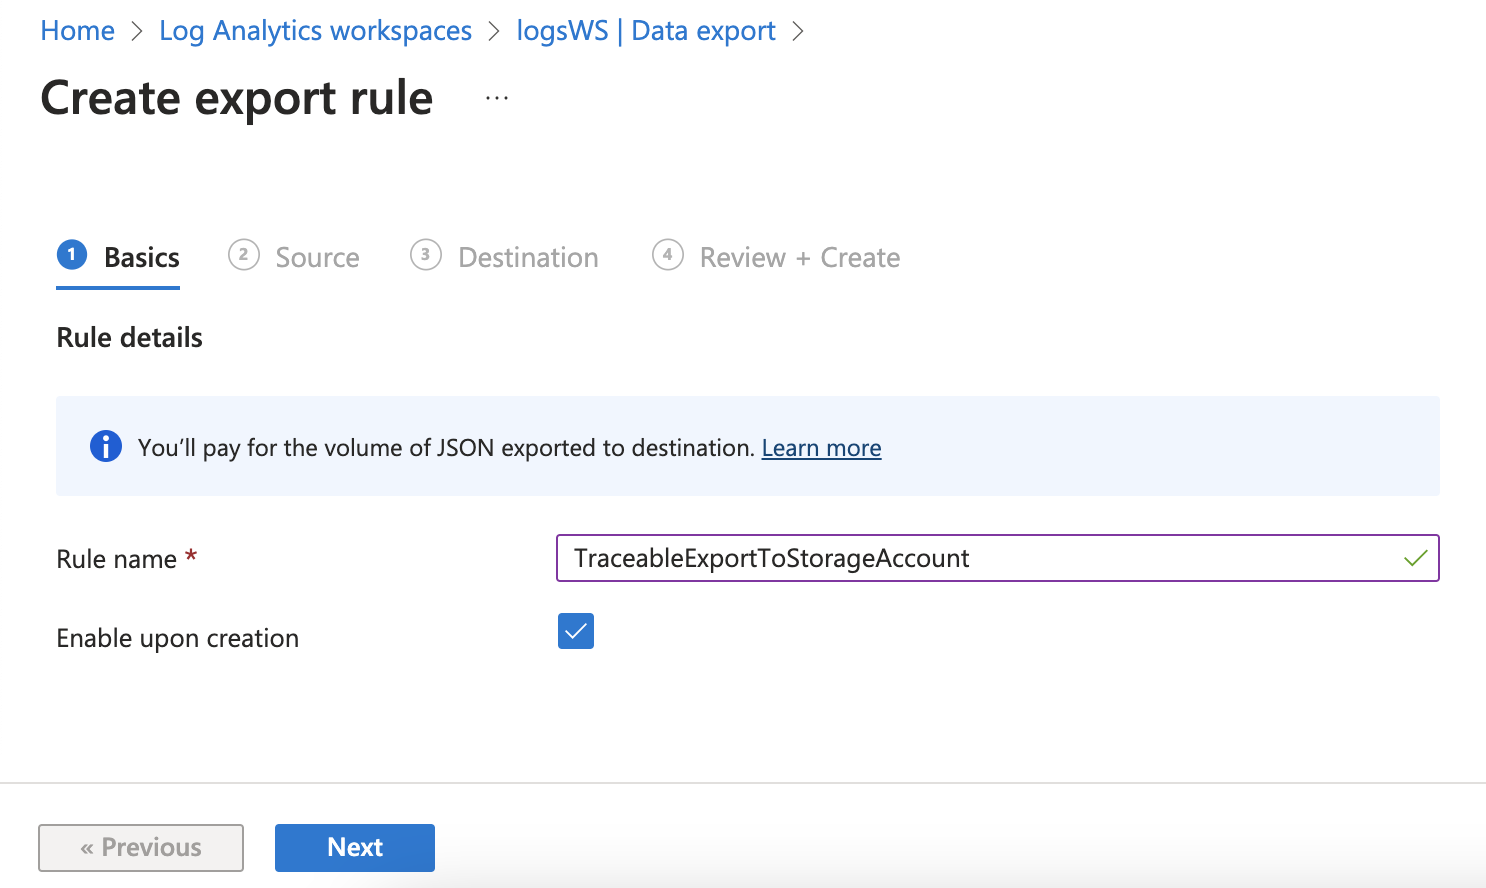
Click Next and select the Source.
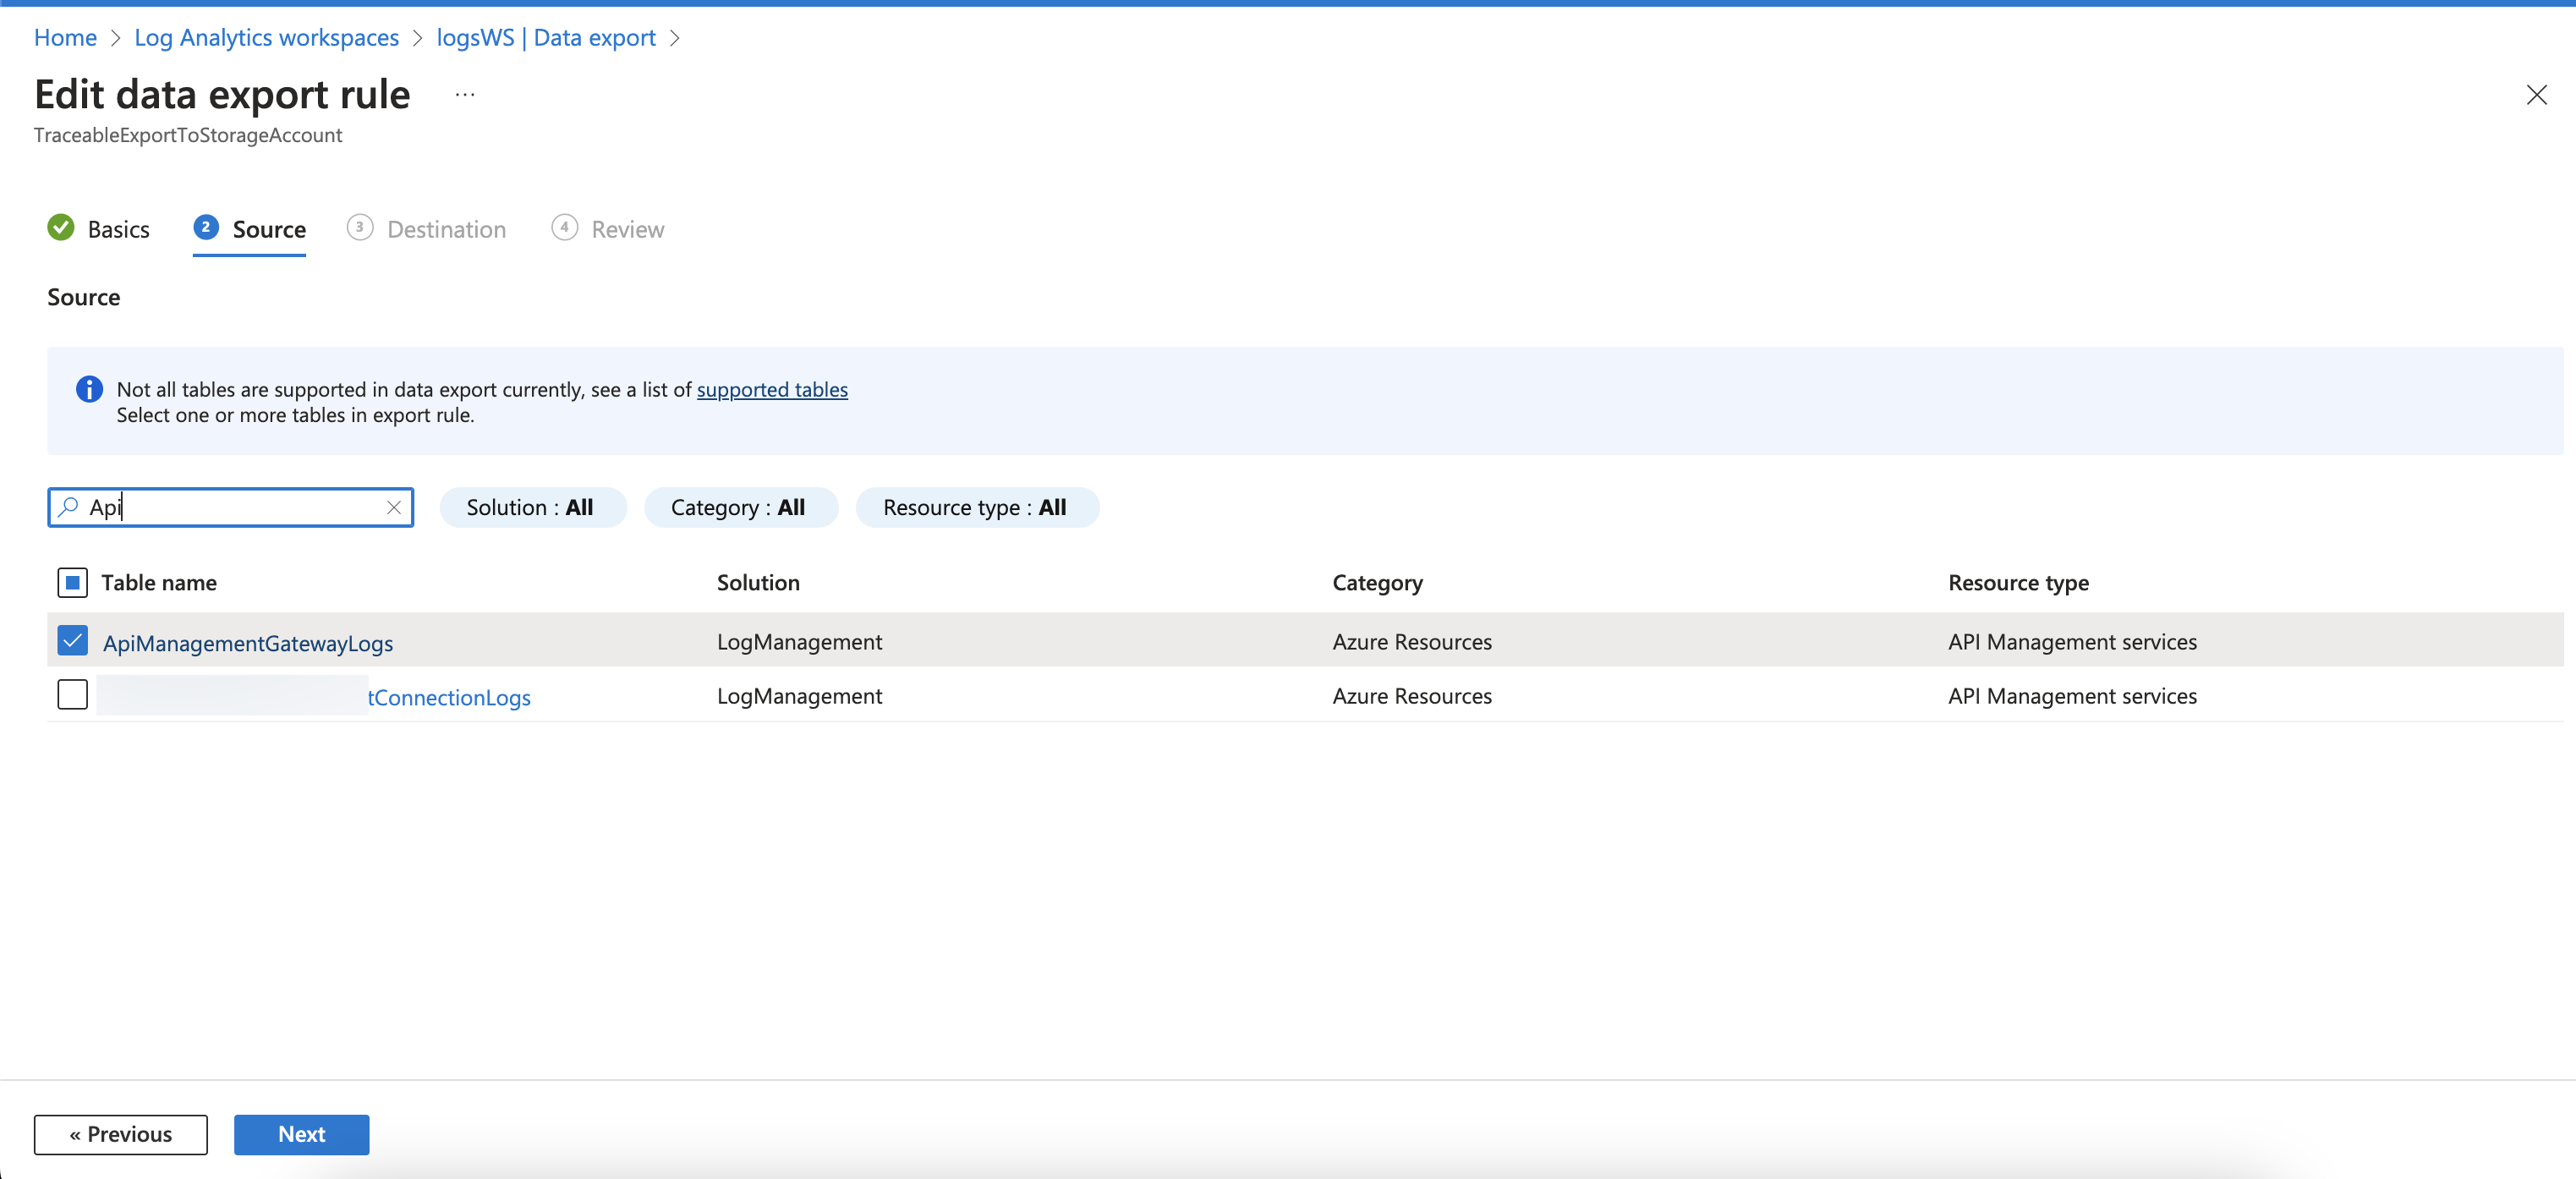
Select Storage account in the Destination tab. Click on Next and Review + Create.
Step 5 — Create a Function App and a Function
Create an Azure App Function to be triggered when APIM logs are sent to the Storage account. The App Function that you create will need network access to the Storage accounts and Traceable Platform agent. If the Traceable Platform agent is hosted privately, you must use Functions Premium to enable vNet connectivity between the App Function and Traceable Platform agent. Complete the following steps to configure the App Function.
Navigate to Function App and click Create.
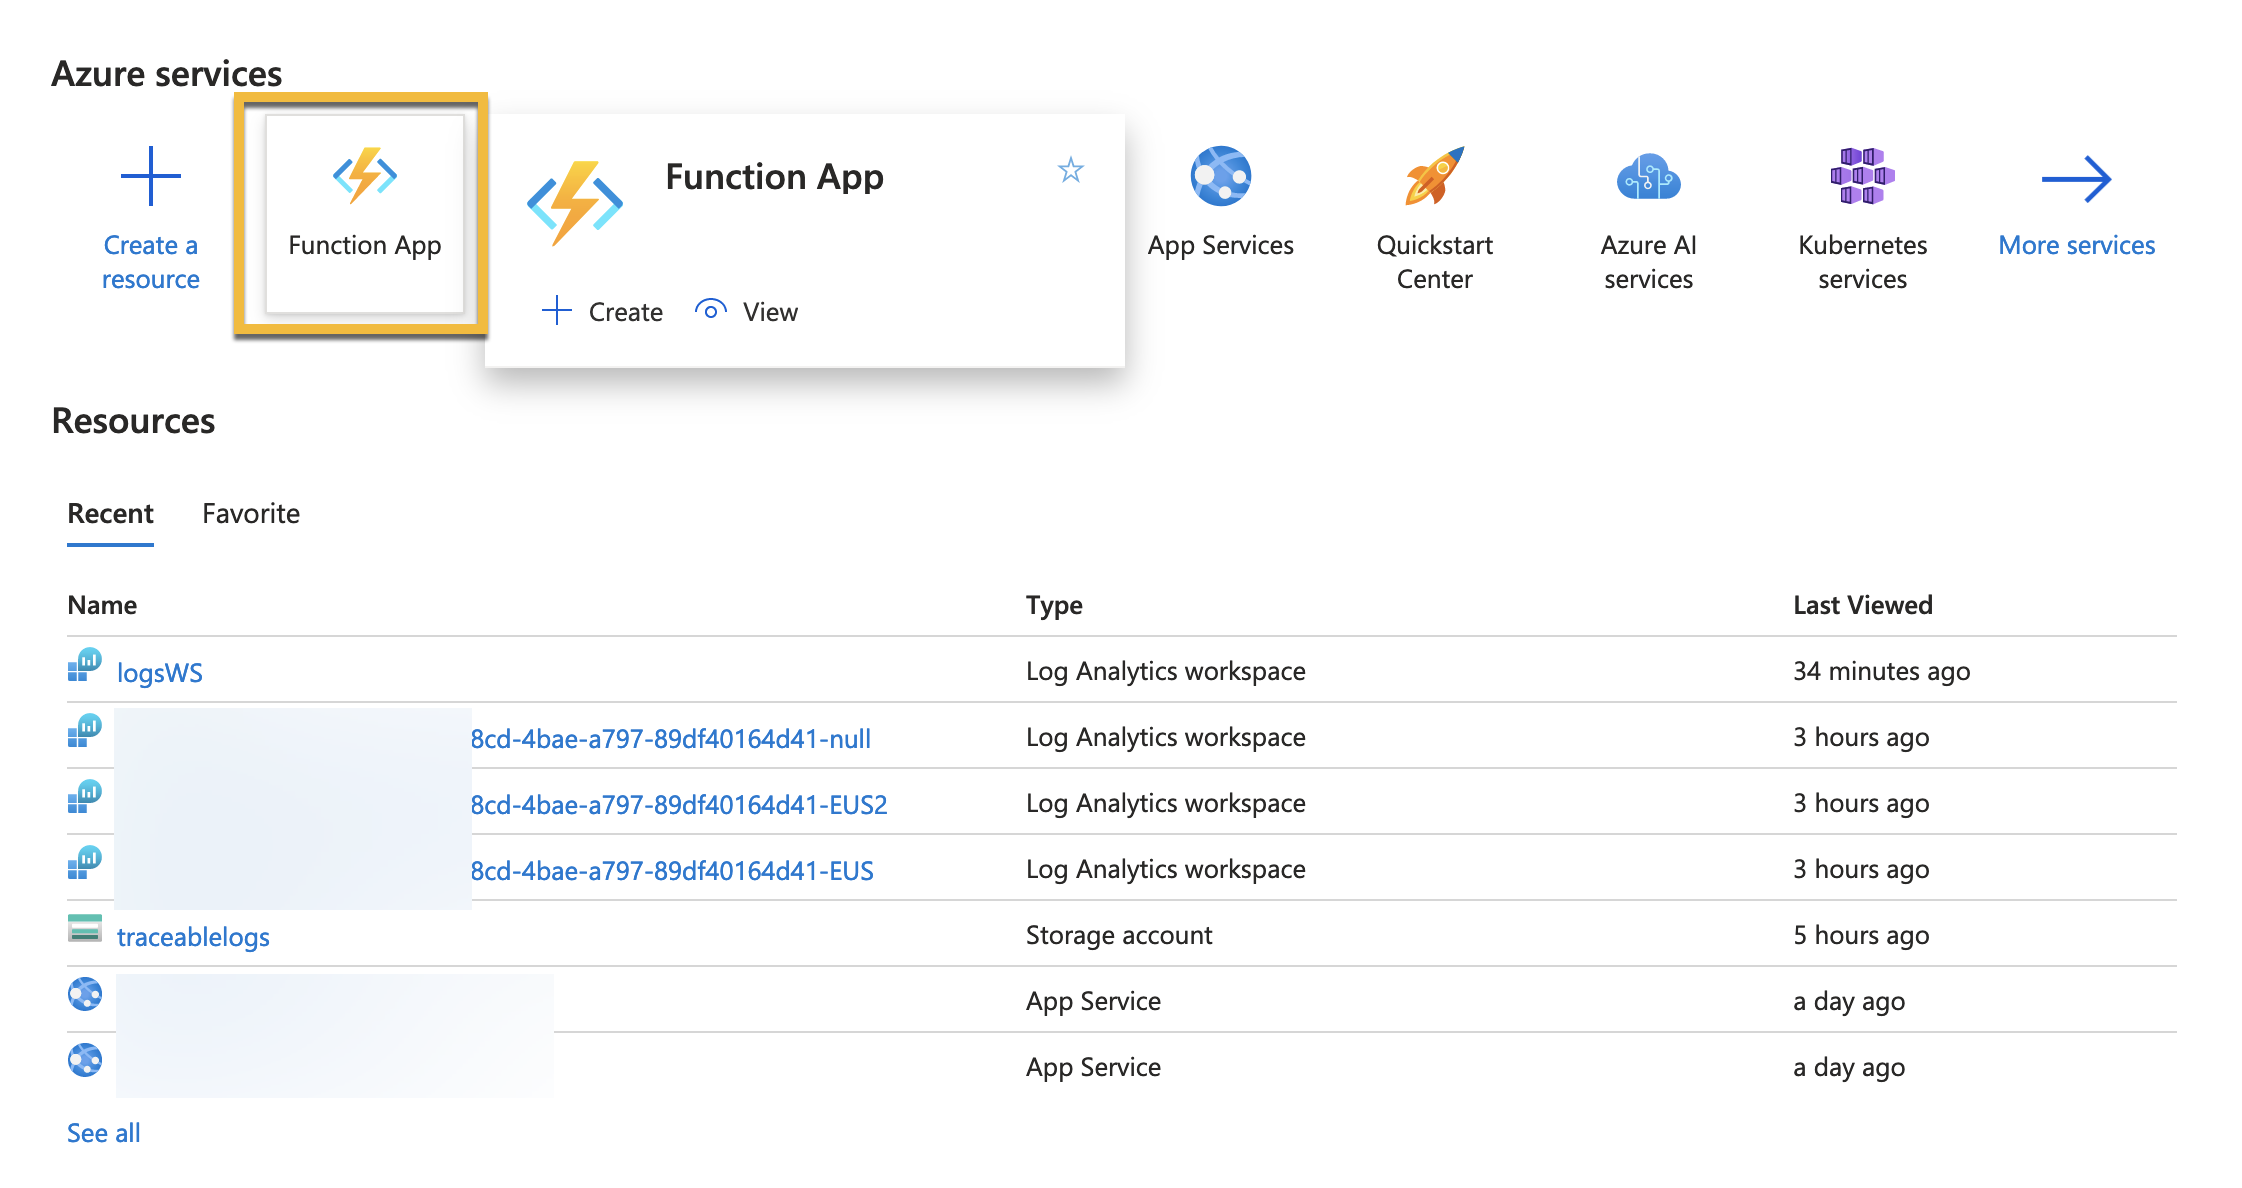
Choose Functions Premium as the hosting option.
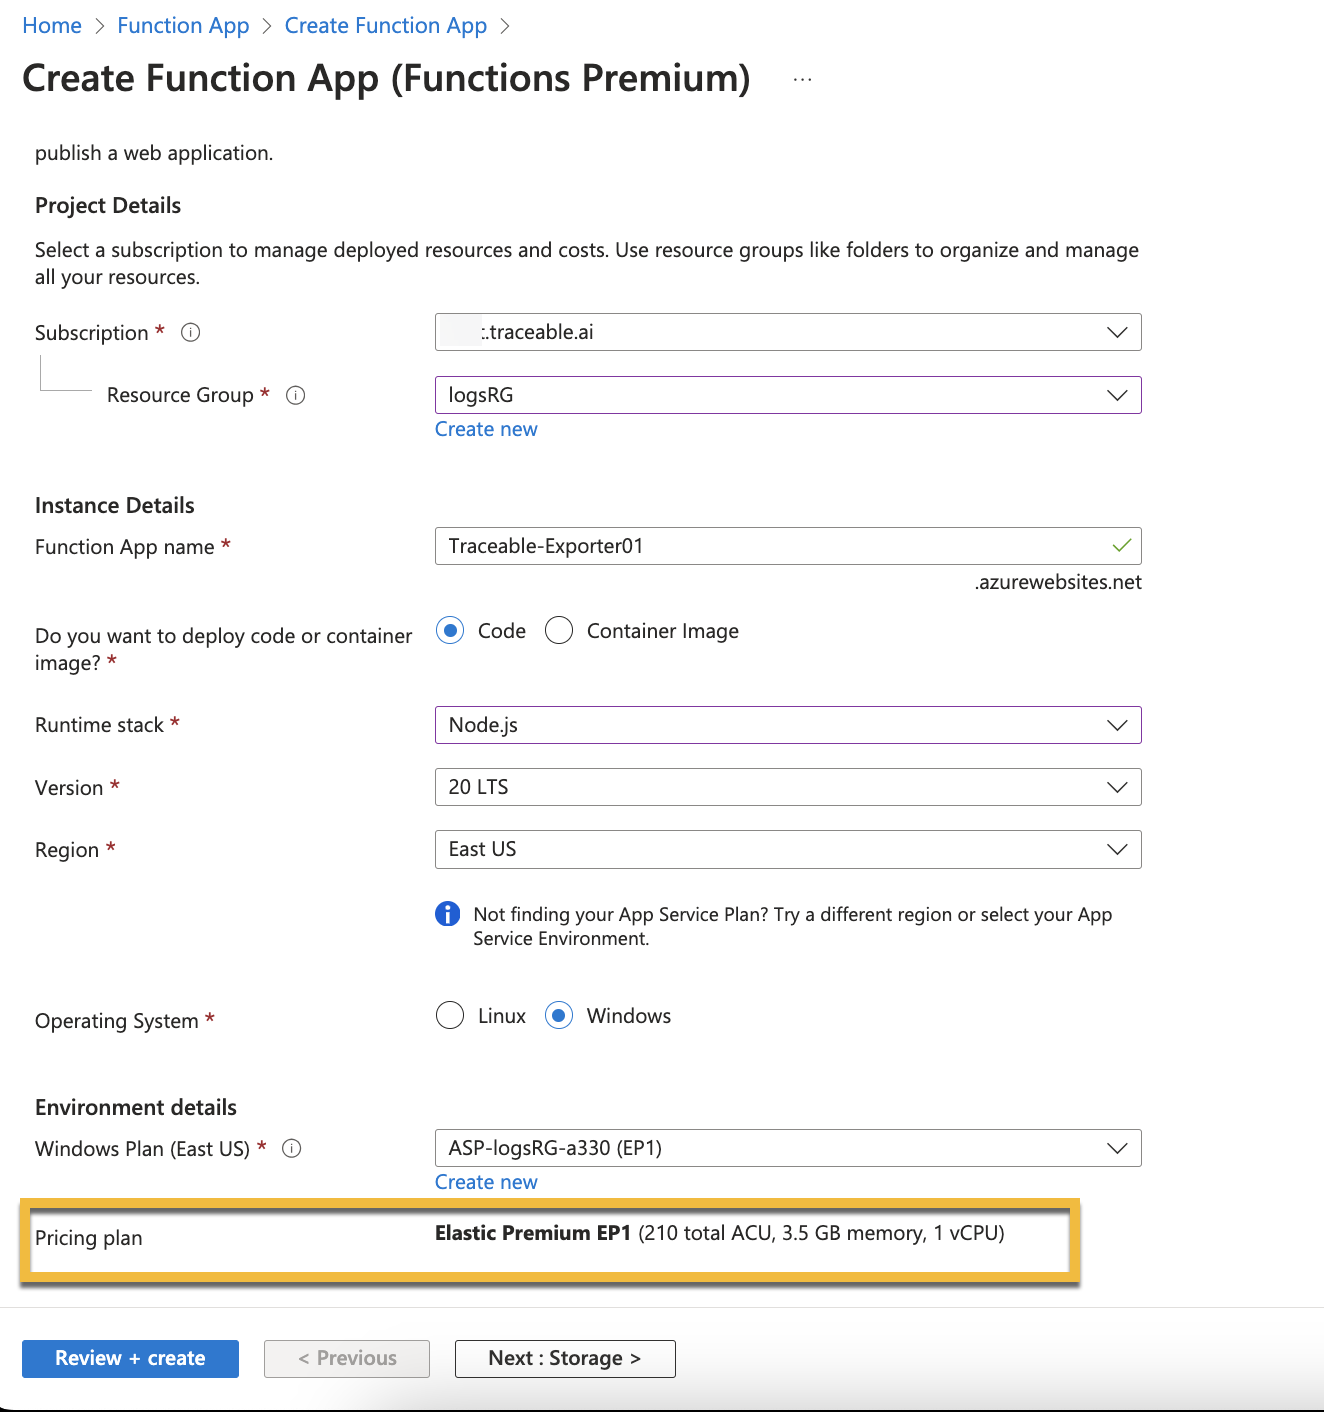
Choose Node.js as the Runtime stack and configure the other options as shown. Click Next
In the Storage tab, select the storage account that you created earlier.
In the Networking tab:
Select Off in the Enable public access option
Select On in the Enable network injection option.
Select the Virtual network.
Inbound access — Select Off in the Enable private endpoints option.
Outbound access — Select On in the Enable Vnet integration and select the Outbound subnet from the drop-down list.
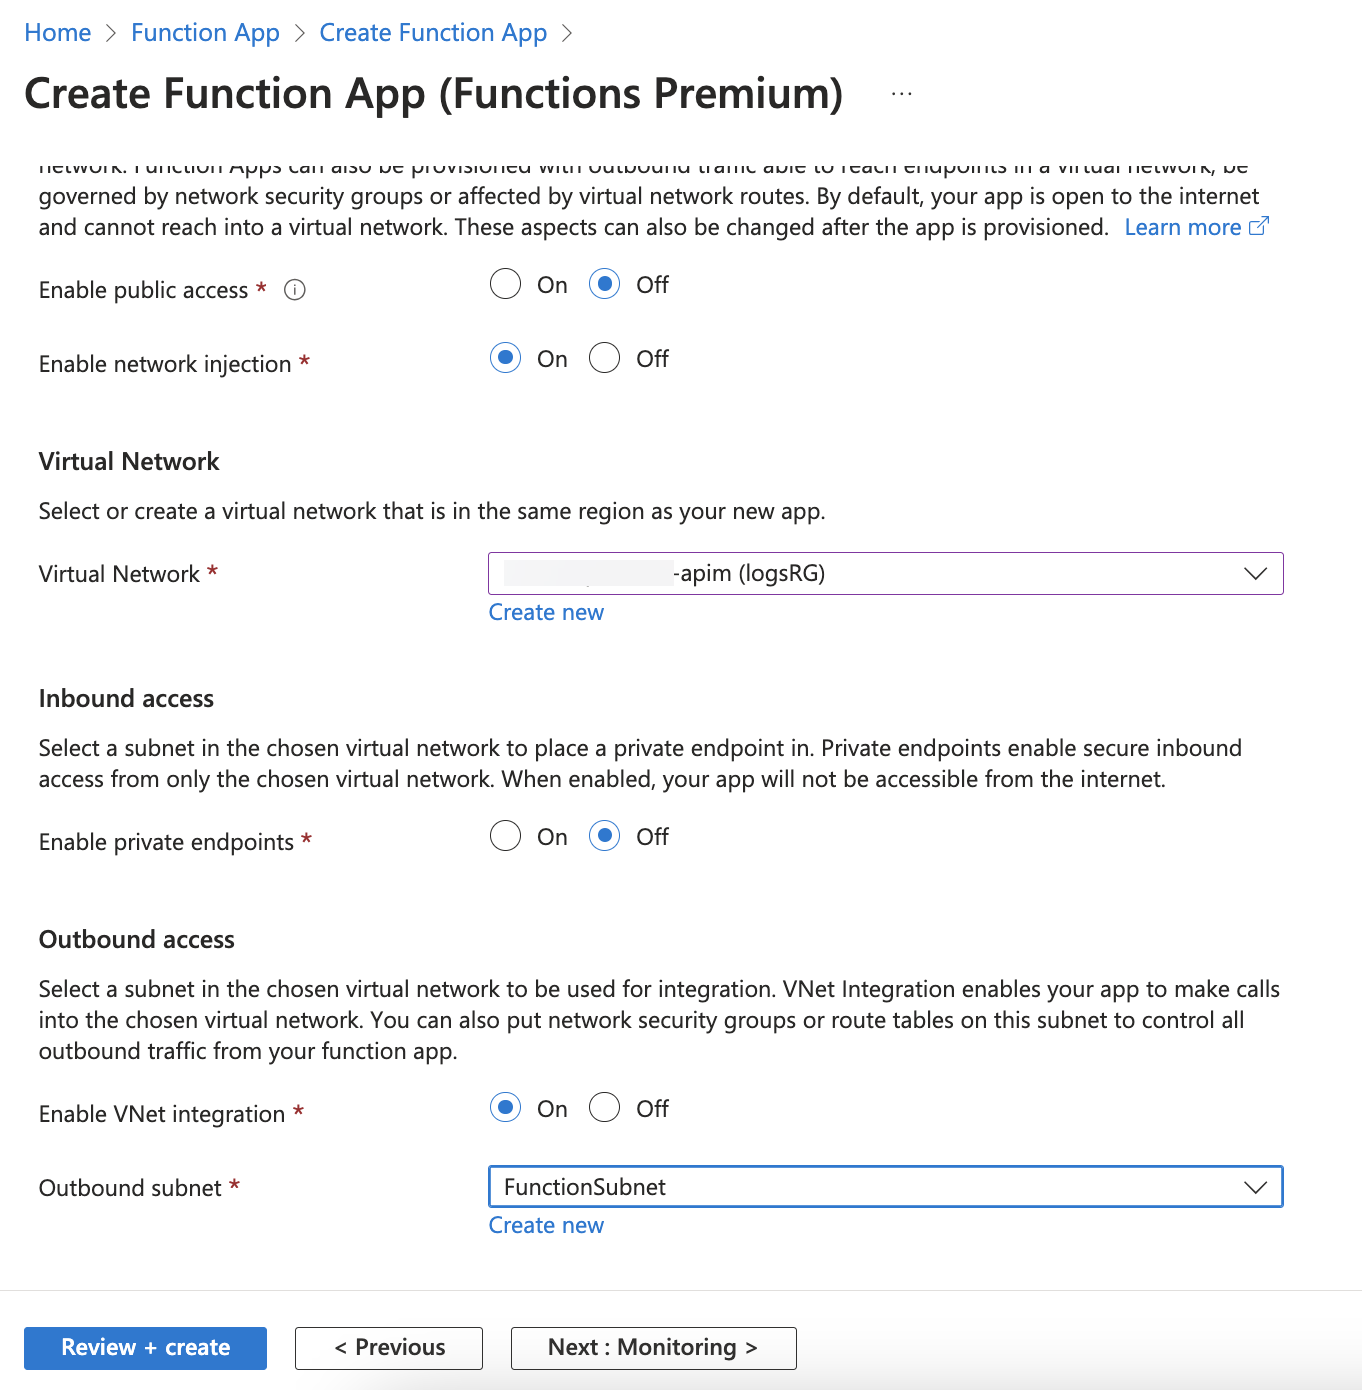
Navigate through the rest of the Monitoring, Deployment, and Tags tabs. Finally, Review and Create the App Function.
Navigate to your newly created Function App and click Create to create a new function, as shown below.
In the Select template tab, select Azure Blob Storage trigger and click Next.
.png)
In the Template details tab, provide the following:
Function name
Path — This must be
am-apimanagementgatewaylogs.Storage account connection — Select the previously created Storage account.
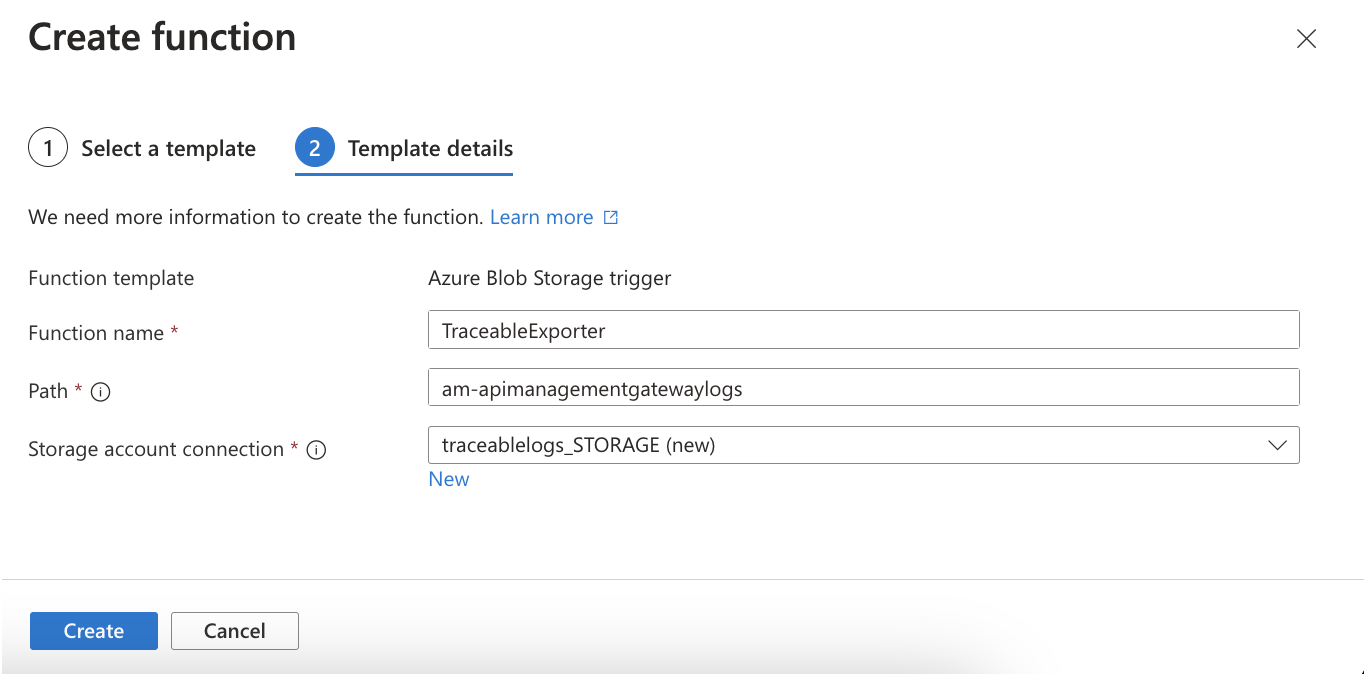
Click Create to create the Function, and navigate to the Code + Test tab to configure the function.
Navigate to Traceable’s download site and copy the function.js from agent → azure-logging → latest → function.js.
Paste the function you copied in Step 10 in the Code + Test tab, as shown in Step 9. Configure the Traceable Platform agent IP address and service name. A default service is already provided.
.png)


.png)


.png)


.png)

.png)