Apigee is a platform for developing and managing APIs. By fronting services with a proxy layer, Apigee provides an abstraction for your backend service APIs, including security, rate limiting, quotas, analytics, and more. Traceable offers a message for capturing requests and responses passing through your Apigee deployment to detect anomalous behavior or attacks. The following deployment diagram shows a high-level traffic flow architecture through Apigee and Traceable agent. Traceable's policy captures the incoming request and makes an asynchronous call to Traceable's platform.
.png "image(1).png")
Data export options
Traceable provides three options to export data: MessageLogging, ServiceCallout, and JavaScript. Here is a high-level difference between them:
MessageLogging: The
MessageLoggingpolicy logs information from an API proxy's flow, such as request or response data, headers, or custom messages. It's typically used for monitoring, debugging, auditing, or analytics purposes. The logged data can be stored in various destinations such as files, syslog, or external systems such as Traceable. Note that the Apigee agent sends data to the Platform agent through a TCP syslog call.Note
MessageLogging policy is preferred if you have Syslog configured in the Traceable Platform agent. Also, MessageLogging policy is less resource intensive for Apigee.
ServiceCallout: The
ServiceCalloutpolicy allows you to call external HTTP or HTTPS services within an API proxy. This is typically used to interact with third-party APIs, backend systems, or other services to retrieve or send data while processing an API request.JavaScriptCallout: This option enables making HTTP or HTTPS requests using the HTTP client within JavaScript code. The implementation employs a "fire-and-forget" approach, ensuring calls are fully asynchronous and do not wait for a connection to be established.
Before you begin
Note the following points before you start the deployment. The following prerequisites apply to both the MessageLogging policy and the ServiceCallout policy.
The document expects a basic working knowledge of the Apigee environment.
Traceable supports Apigee-x, hybrid, and Apigee Edge cloud.
Download the Traceable’s policy file. The bundle has both MessageLogging policy and ServiceCallout policy files.
Ensure the Traceable platform agent is already deployed on a VM accessible from the Apigee environment. For more information, see Virtual Machine.
Note the IP address of the Traceable platform agent. This will be used in the Traceable policy configuration.
MessageLogging policy
Following are a few MessageLogging policy-specific prerequisites:
Traceable’s MessageLogging Apigee agent requires a minimum Traceable Platform agent version 1.43.0.
In your Platform agent deployment, ensure the Apigee log server is enabled. Edit the
config.yamlfile to configure the following:global: apigee_server: enabled: true message_end_token: "__SPAN_END__" server: endpoint: "0.0.0.0:8444" key_file: "" cert_file: "" max_queue_size: 1000 max_buffer_size: 1024Ensure that port 8444 (or the configured port for the Apigee log server) of the instance where the Platform agent is installed is accessible from the Apigee servers.
Note
Apigee log server is a part of Traceable Platform agent. The port number of Apigee log server is part of Traceable Platform agent configuration. The Apigee log server recieves data from Apigee.
Note that the port of the Apigee log server is a TCP port. Make sure that from your Apigee setup, there should be outgoing data access to the TCP port of the Apigee log server (part of the Platform agent).
Note
You can configure either a MessageLogging policy or a ServiceCallout policy.
Download
Download the Traceable policy for Apigee from Traceable's download site. Navigate to agent → apigee → latest to download the traceable-shareflow.zip file. Save the file. This file would be used in the Configuration section.
Configuration
The configuration of the Traceable policy for Apigee consists of the following two steps:
Adding Traceable agent for Apigee as sharedflow
Attaching Traceable agent to:
All API proxies using FlowHooks, or
To a specific API proxy only
Policy bundle
The policy bundle has the following files based on the export method you use:
Common file
The TraceableJS.xml file is common between the different exporting options. The configuration in this file decides which export method will be used. This file also has the other data capture configurations.
<?xml version="1.0" encoding="UTF-8" standalone="yes"?>
<Javascript continueOnError="true" enabled="true" timeLimit="20" name="TraceableJS">
    <DisplayName>TraceableJS</DisplayName>
    <Properties>
        <Property name="ta_service_name">apigee</Property>
        <Property name="ta_environment_name">apigee</Property>
        <Property name="ta_data_capture_body_max_size_bytes">131072</Property>
        <Property name="ta_data_capture_http_body_request">true</Property>
        <Property name="ta_data_capture_http_body_response">true</Property>
        <Property name="ta_data_capture_http_headers_request">true</Property>
        <Property name="ta_data_capture_http_headers_response">true</Property>
        <Property name="ta_data_capture_target_request_response">false</Property>
        <Property name="ta_data_capture_allowed_types">json,graphql,x-www-form-urlencoded,xml</Property>
        <Property name="ta_reporting_trace_reporter_type">service_callout</Property>
        <Property name="ta_extra_attribute_list"></Property>
        <Property name="ta_service_name_var"></Property>
        <Property name="ta_data_capture_body_max_size_bytes_var"></Property>
        <Property name="ta_data_capture_http_body_request_var"></Property>
        <Property name="ta_data_capture_http_body_response_var"></Property>
        <Property name="ta_data_capture_http_headers_request_var"></Property>
        <Property name="ta_data_capture_http_headers_response_var"></Property>
        <Property name="ta_data_capture_target_request_response_var"></Property>
        <Property name="ta_data_capture_allowed_types_var"></Property>
        <Property name="ta_reporting_trace_reporter_type_var"></Property>
    </Properties>
    <ResourceURL>jsc://Traceable.js</ResourceURL>
</Javascript>
The following table lists the various Traceable agent configurations.
Note
The table lists both dynamic and static properties. Dynamic property names end with
_var, for example,ta_service_name_var. The policy first checks the dynamic property; if it is not set, the policy then uses the value from the corresponding static property. You can configure both properties at the same time.
Configuration | Description |
|---|---|
| The name of the service. This is the name that will be displayed on the Traceable Platform. The default name is |
| Defines the environment name. |
| Configure the maximum size of the request's body that you would like to capture. |
| Set it to |
| Set it to |
| Set it to |
| Set it to |
| Defines the type of data that is captured. List without spaces: |
| Defines whether to capture outgoing calls to target the backend from Apigee. The default value is |
| Defines the type of exporter to use between MessageLogging or ServiceCallout. The values are:
|
| This is an optional property. Use it to capture additional context variables other than those captured by default. The property defines a list of pairs to extract variables into span attributes, a list of variable names, and an attributeName separated by
|
Context Variables | |
| The context variable to get the value to be set in |
| The context variable to get the value to be set in |
| The context variable to get the value to be set in |
| The context variable to get the value to be set in |
| The context variable to get the value to be set in |
| The context variable to get the value to be set in |
| The context variable to get the value to be set in |
| The context variable to get the value to be set in |
| The context variable to get the value to be set in |
| The context variable to get the value to be set in |
MessageLogging
If you are using MessageLogging policy, then ExportSpansML.xml file is used. This file has the Traceable Platform agent endpoint and TLS configuration.
<?xml version="1.0" encoding="UTF-8" standalone="yes"?>
<MessageLogging continueOnError="true" enabled="true" name="ExportSpansML">
  <Syslog>
    <Message>{TRACEABLE_DATA}__SPAN_END__</Message>
    <!-- Host IP/address TPA -->
    <Host></Host>
    <Port>8444</Port>
    <Protocol>TCP</Protocol>
    <PayloadOnly>true</PayloadOnly>
    <SSLInfo>
      <Enabled>false</Enabled>
      <ClientAuthEnabled>false</ClientAuthEnabled>
      <TrustStore>ref://give_your_truststore_reference</TrustStore>
      <IgnoreValidationErrors>false</IgnoreValidationErrors>
    </SSLInfo>
  </Syslog>
  <logLevel>ALERT</logLevel>
</MessageLogging4
ServiceCallout
If you are using ServiceCallout policy, then ExportSpansSC.xml file is used. This file has the Traceable Platform agent endpoint and TLS configuration.
<!-- Configure the timeout in milli seconds -->
<Timeout>250</Timeout>
<HTTPTargetConnection>
    <!-- The URL would be https://TPA_HOST:5443/ext_cap/v1/req_res_cap in case of TLS configuration -->
    <URL>http://TPA_HOST:5442/ext_cap/v1/req_res_cap</URL>
    <SSLInfo>
    <Enabled>false</Enabled>
    <ClientAuthEnabled>false</ClientAuthEnabled>
    <TrustStore>ref://give_your_truststore_reference</TrustStore>
    <IgnoreValidationErrors>false</IgnoreValidationErrors>
    </SSLInfo>
</HTTPTargetConnection>
JavaScriptCallout
If you are using JavaScriptCallout policy, then ExportSpansJS.xml file is used. Make sure that ta_reporting_endpoint property is mandatorily configured in TraceableJS.xml file.
<?xml version="1.0" encoding="UTF-8" standalone="yes"?>
<Javascript continueOnError="true" enabled="true" timeLimit="200" name="ExportSpansJS">
    <DisplayName>ExportSpansJS</DisplayName>
    <Properties/>
    <SSLInfo>
        <Enabled>false</Enabled>
        <ClientAuthEnabled>false</ClientAuthEnabled>
        <TrustStore>ref://give_your_truststore_reference</TrustStore>
        <IgnoreValidationErrors>false</IgnoreValidationErrors>
    </SSLInfo>
    <ResourceURL>jsc://ExportSpans.js</ResourceURL>
</Javascript>
Step 1 - Add Traceable agent for Apigee as Shared Flow
Complete the following steps to add Traceable's Shared Flow:
Login to your Apigee account.
Click on the Develop tab and navigate to SharedFlows.

Add a new SharedFlow. Click on Upload Bundle. Navigate to the location where you have downloaded Traceable's Apigee policy.
.png)
Upload the Traceable SharedFlow zip. You may wish to change the name of the file and import it.
Click on the imported SharedFlow and navigate to the Develop tab.
.png "traceable_apigee_cloud_develop_tab_messagelogging(5).png")
Click on the ExportSpansML/ExportSpansSC and TraceableJS policy and update the configuration values. The sample files and configurations are listed above in the Policy bundle section. In ExportSpansML/ExportSpansC, configuring the Traceable Platform agent IP address or hostname is mandatory. The other configurations are optional.
.png "traceable_apigee_cloud_config_variables_ml(2).png")
Click on Save.
Deploy the SharedFlow — Click the Deploy button and select the environment to which you wish to deploy the agent. This will deploy the agent as a SharedFlow to that environment.

Step 2 - Attach the traceable agent
You can attach the Traceable agent to all the API proxies or a specific API proxy. Follow the steps in one of the following sections. Make a note of the following while attaching Traceable's Flow Callout policy. If you are attaching the policy directly to an API proxy, then make Traceable's Flow Callout policy as follows:
Traceable policy should be the first one in Proxy → Request → Preflow
Traceable policy should be the last one in Target → Request → Preflow
Traceable policy should be the first one in Target → Response → Postflow
Traceable policy should be the last one in Proxy → Response → Postflow
Option 1 - Attach Traceable agent to all API proxies using Flow Hooks
Complete the following steps to attach Traceable agent to all the API proxies:
Navigate to Admin Environment → Flow Hooks.
Edit the Flow Hooks and attach the
traceable-agentsharedflow to Pre-proxy, Pre-target, Post-target, and Post-proxy Flow Hooks. This will attach the Traceable agent with all API Proxies..png)
You can now make requests to your API proxy. Traceable will capture these requests for analysis.
Option 2 - Attach Traceable agent to a specific API proxy
Complete the following steps to attach the Traceable agent to a specific API proxy:
Navigate to the API Proxy to which you wish to attach the traceable-apigee agent and click on the Develop tab.
.png)
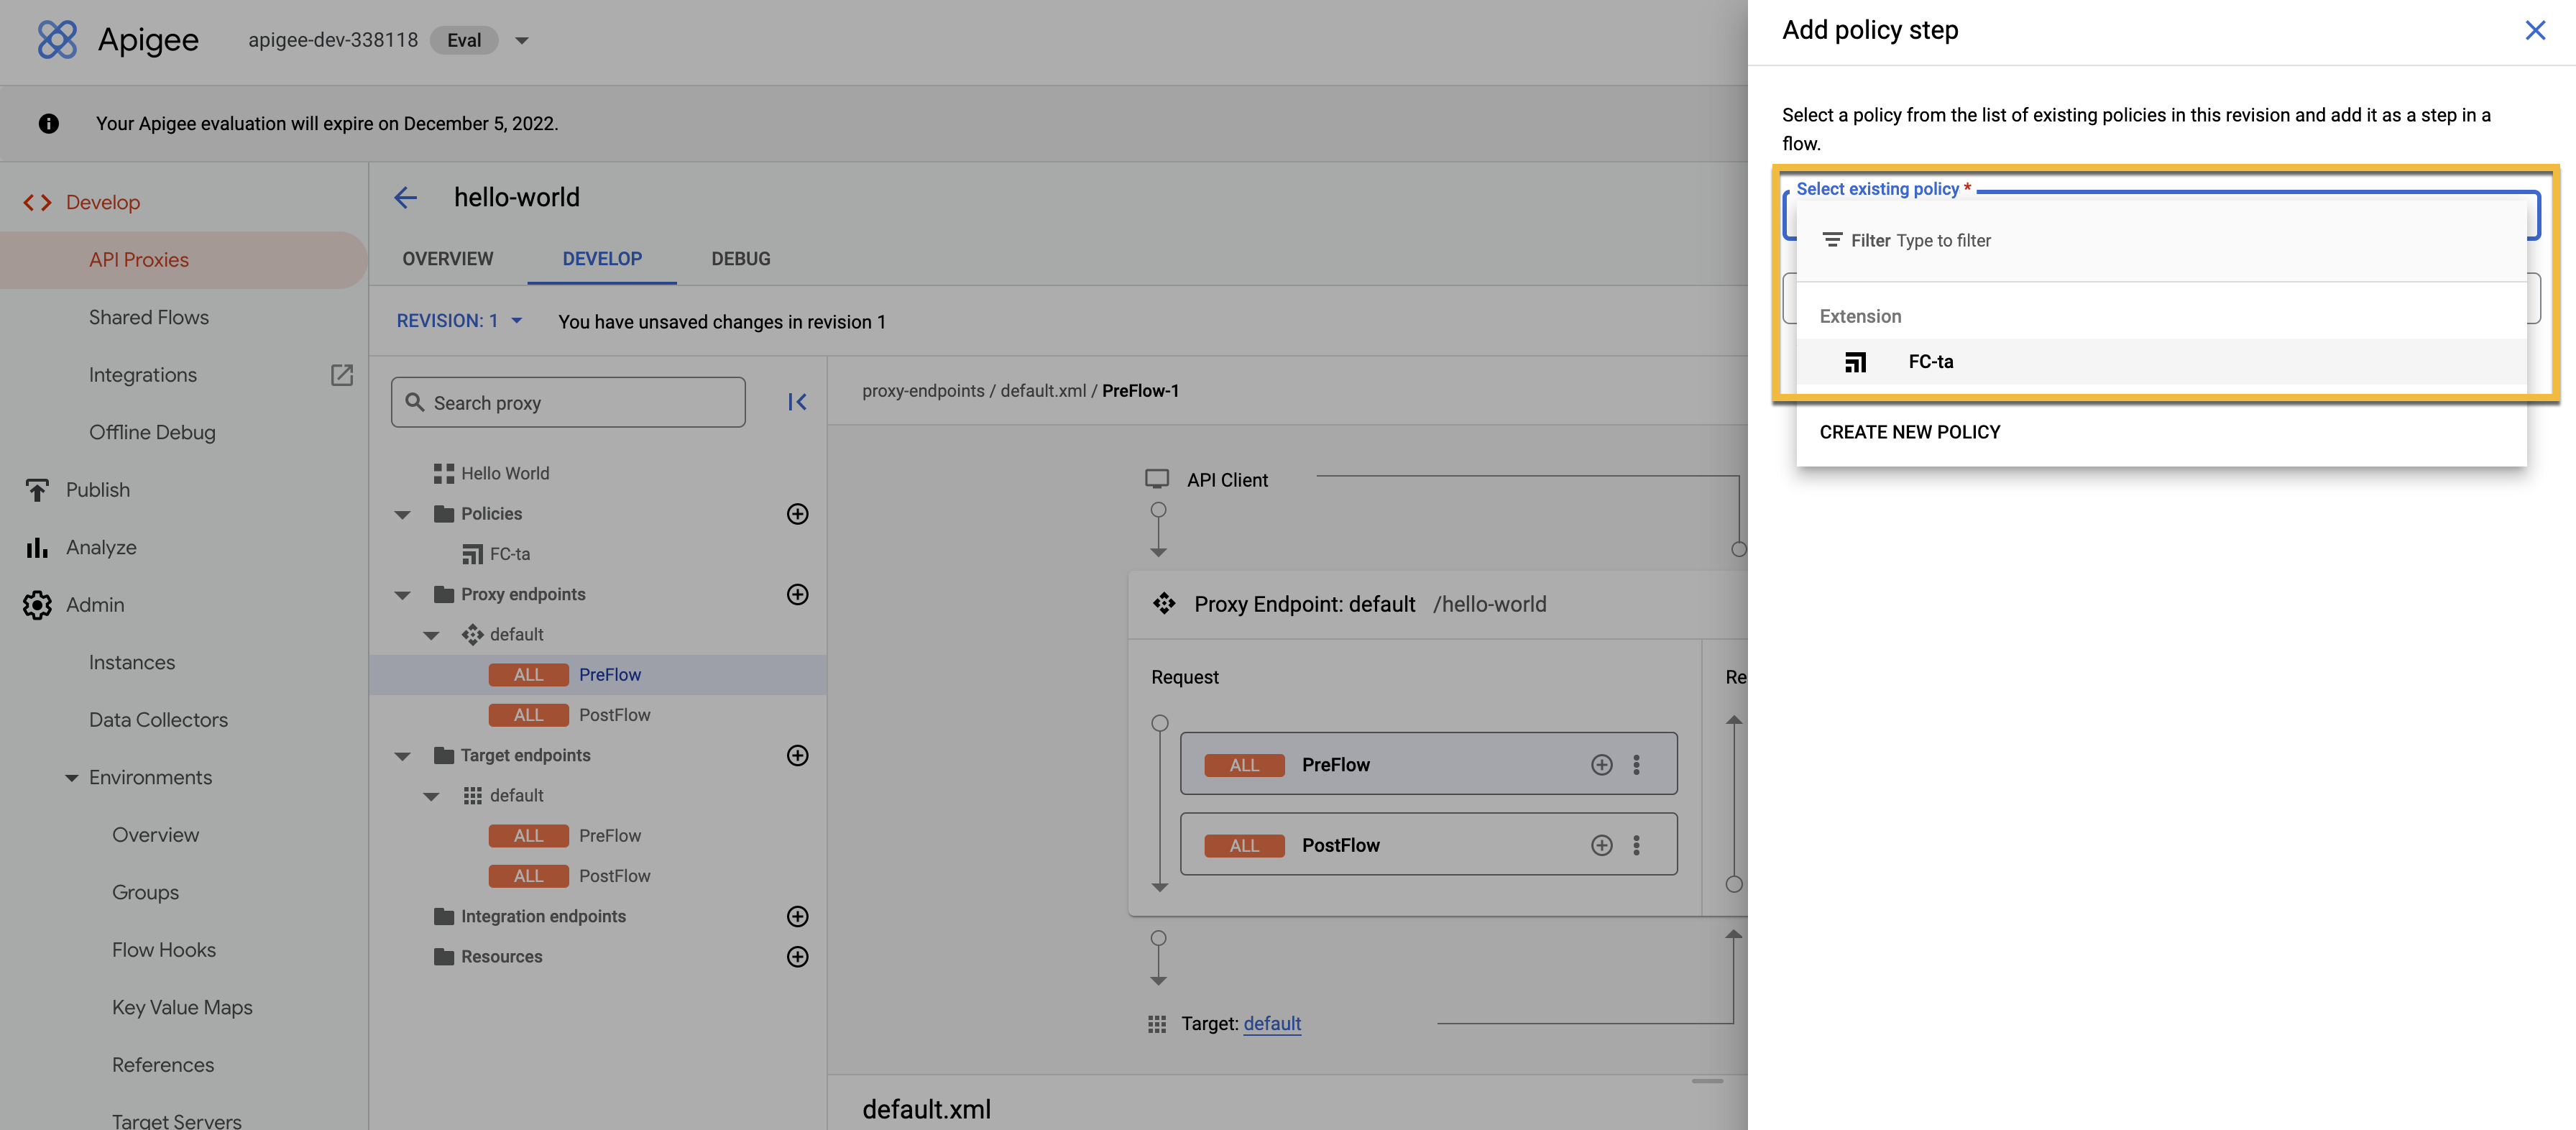
Click on Add a policy, the + sign beside Policies.
.png)
Select Policy Type Flow Callout (refer to the above screenshot), update the names, and select traceable-shared-flow from the list of sharedflows.
In the Proxy Endpoints, click on PreFlow for the endpoint to which you want to attach the agent.
Click +Step for PreFlow on the request side in the flow diagram.
.png)
In the Add Step dialogue box, click on the Existing Policy instance.
Select the Flow Callout Policy we added earlier and click on Add.
Click on Postflow for the proxy endpoint.
Click +Step for Preflow on the response side in the flow diagram.
.png)
In the Add Step dialogue box, click on the Existing Policy instance.
Select the Flow Callout Policy we added earlier and click on Add.
Repeat the above steps for Target endpoints while keeping the following in mind to attach the policy.
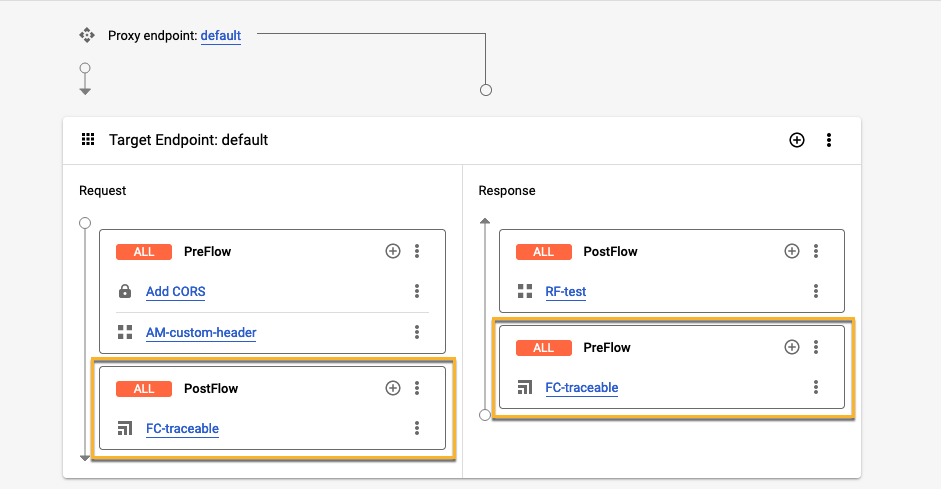
Traceable policy should be the last one in Target → Request → Postflow
Traceable policy should be the first one in Target → Response → Preflow
Add a Fault Rule in both the Proxy Endpoints and Target Endpoints in XML as follows. Update the name of the flow callout policy.
ActionScript
<FaultRules>
    <FaultRule name="traceable fault rule">
        <Step>
            <Name>NAME_OF_TRACEABLE_FLOW_CALLOUT_POLICY_ADDED_ABOVE</Name>
        </Step>
    </FaultRule>
</FaultRules>
Click on Save the Configuration.
You can now make requests to your API proxy. Traceable will capture these requests for analysis.
(Optional) PostClientFlow instrumentation
Update the sharedflow
default.xmlas given below. Save and deploy the sharedflow.Already attached to PreProxy, PreTarget, PostTarget, PostProxy. Now attach it to PostClientFlow as well.
Note
If you are attaching to each API, you should not have the sharedflow in flowhook. Therefore, remove it from all flowhooks if present.
<?xml version="1.0" encoding="UTF-8" standalone="yes"?>
<SharedFlow name="default">
    <Step>
        <Condition>current.flow.name != "PostClientFlow"</Condition>
        <Name>TraceableJS</Name>
    </Step>
    <Step>
        <Condition>(current.flow.name = "PostClientFlow") and (TA_REPORTING_TRACE_REPORTER_TYPE = "message_logging")</Condition>
        <Name>ExportSpansML</Name>
    </Step>
    <Step>
        <Condition>(current.flow.name = "PostClientFlow") and (TA_REPORTING_TRACE_REPORTER_TYPE = "service_callout")</Condition>
        <Name>ExportSpansSC</Name>
    </Step>
</SharedFlow>
Contact the Traceable support team at support@traceable.ai for more help with this option.
Uninstall
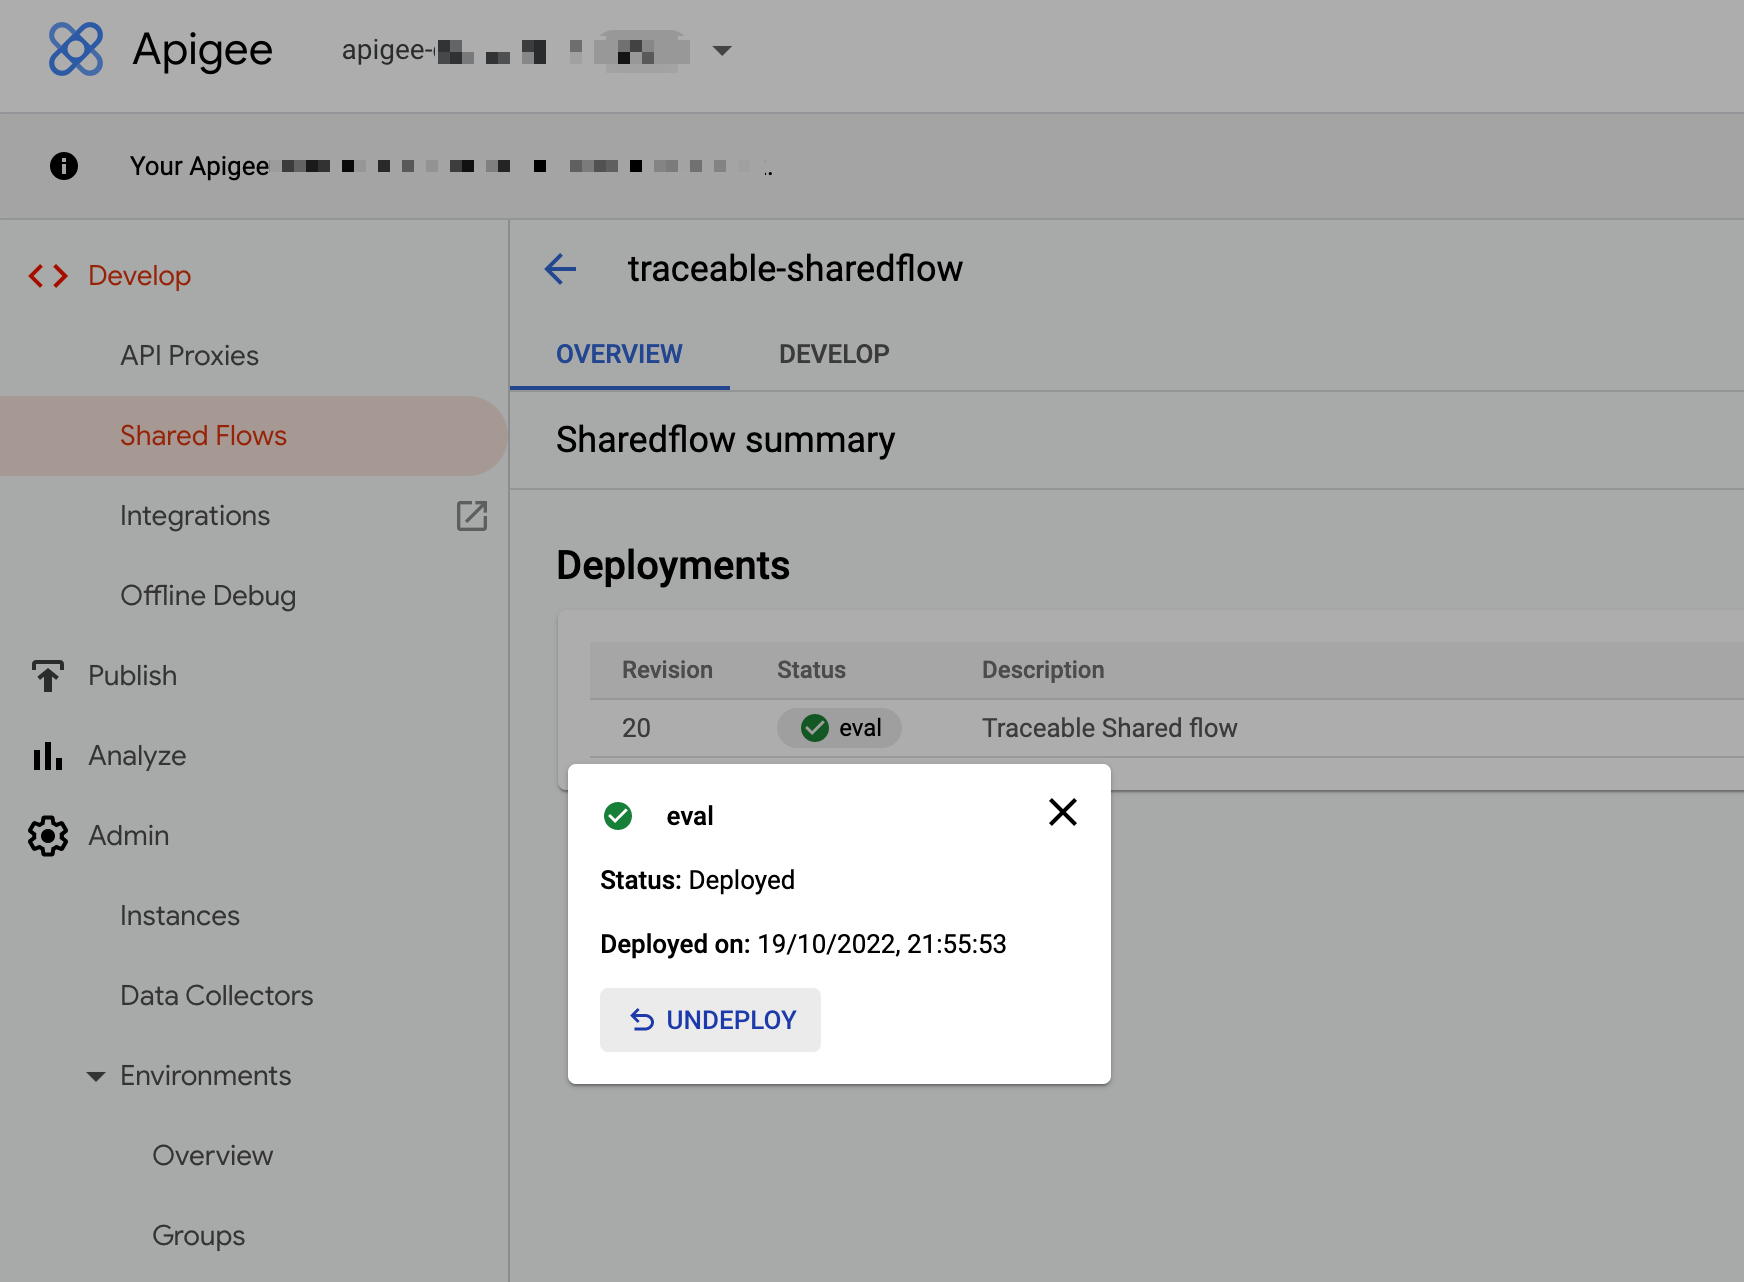
If you have attached a Traceable agent as a flow hook, remove it from the flow hook. If you have attached it to specific APIs, remove it from the APIs. Navigate to traceable sharedflow and click on Status. Click on Status > Undeploy.
To delete it completely, navigate back to the SharedFlows Tab. In the list, delete traceable-sharedflow.
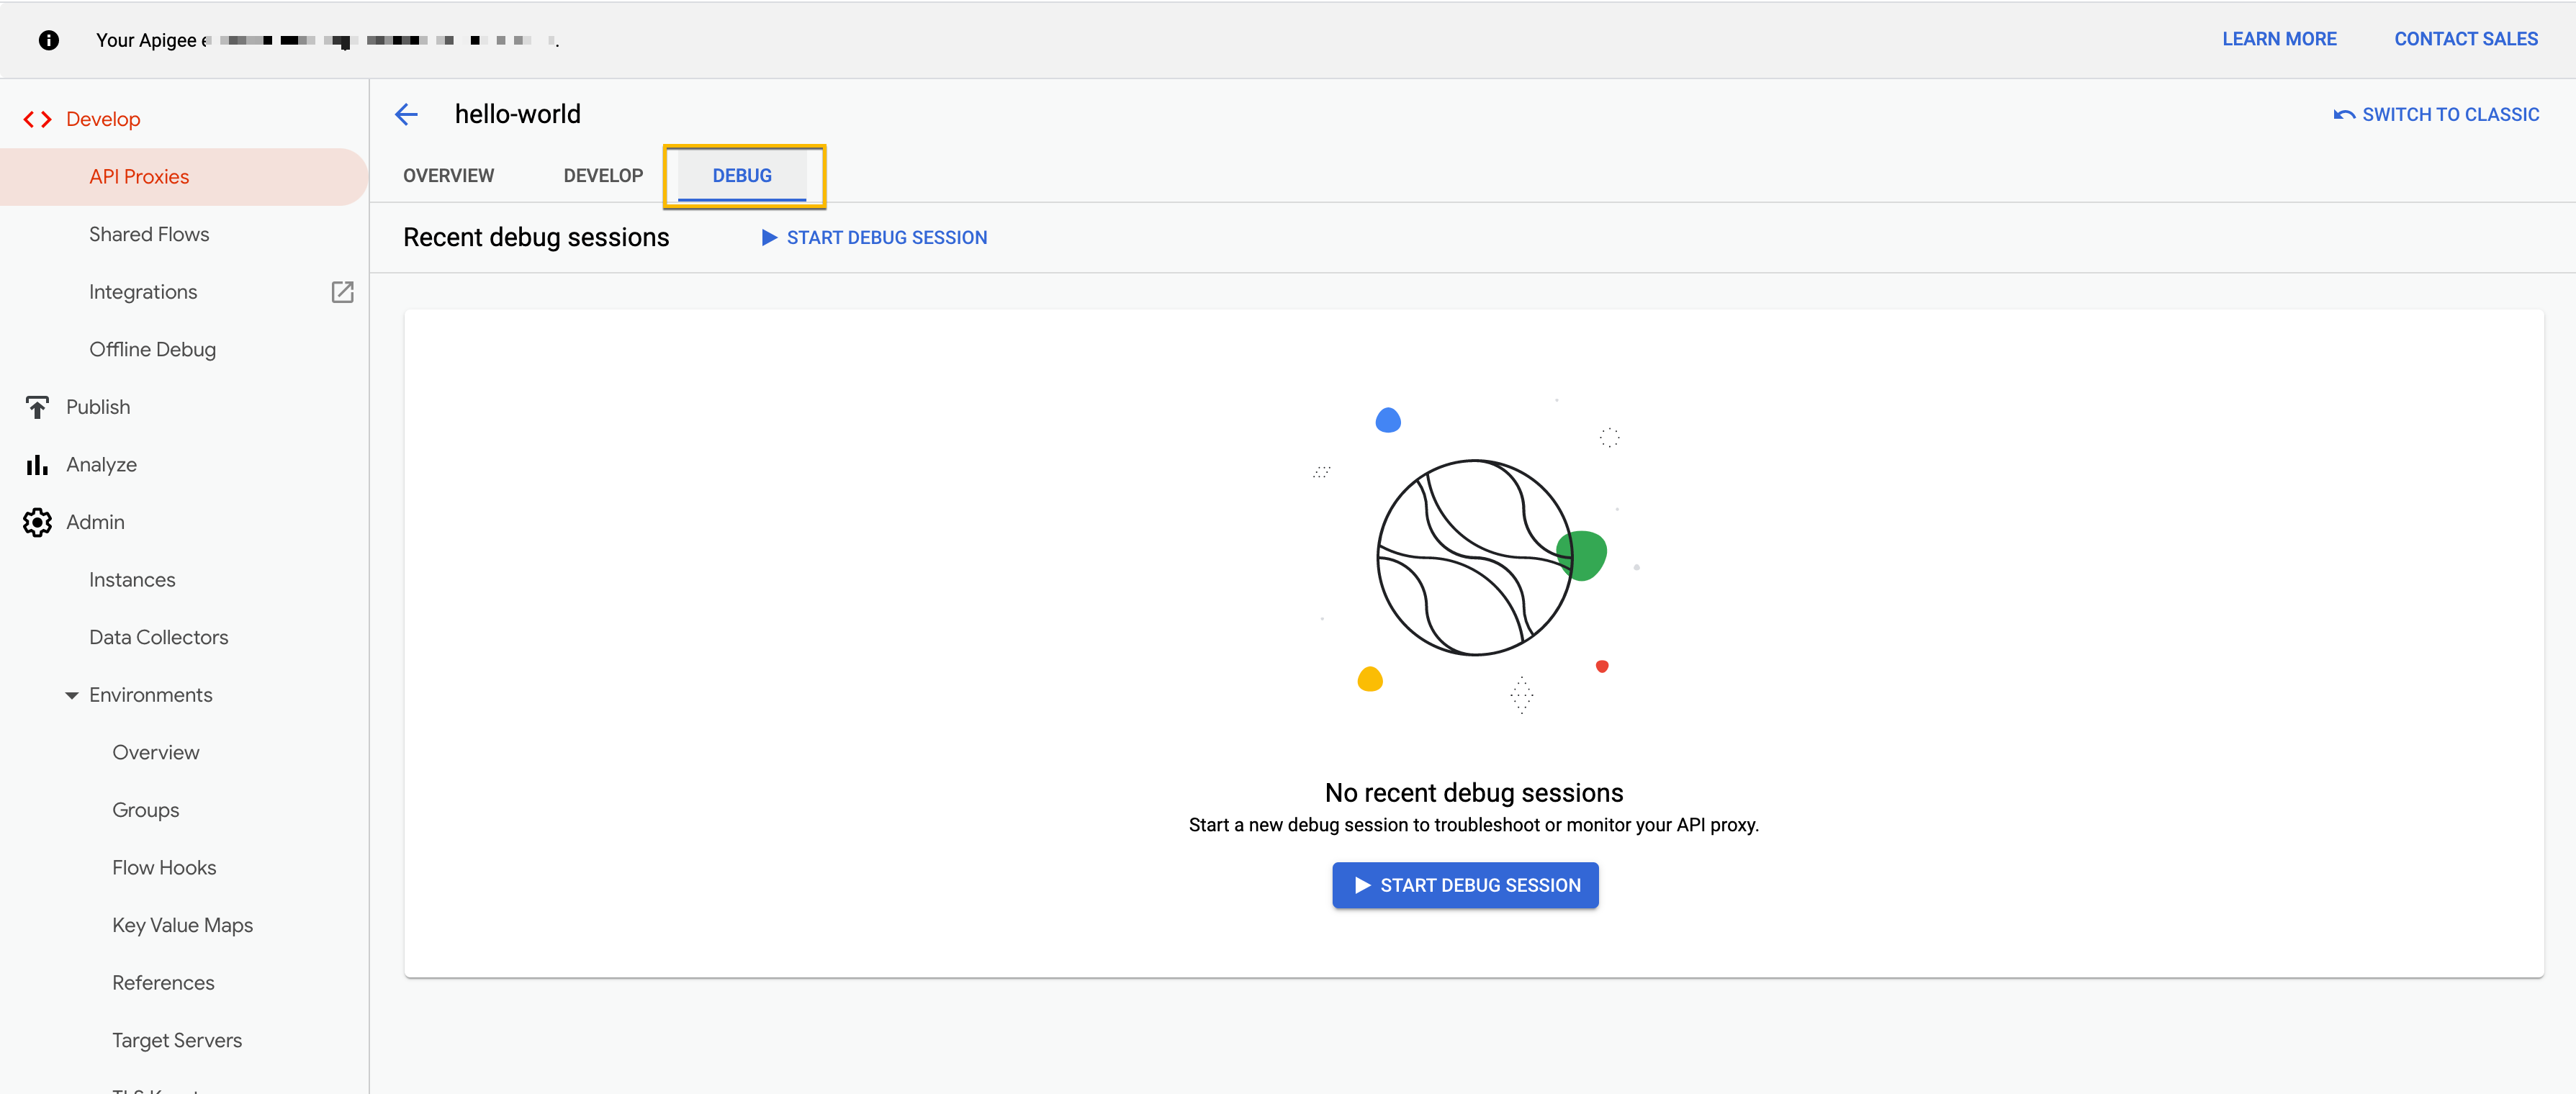
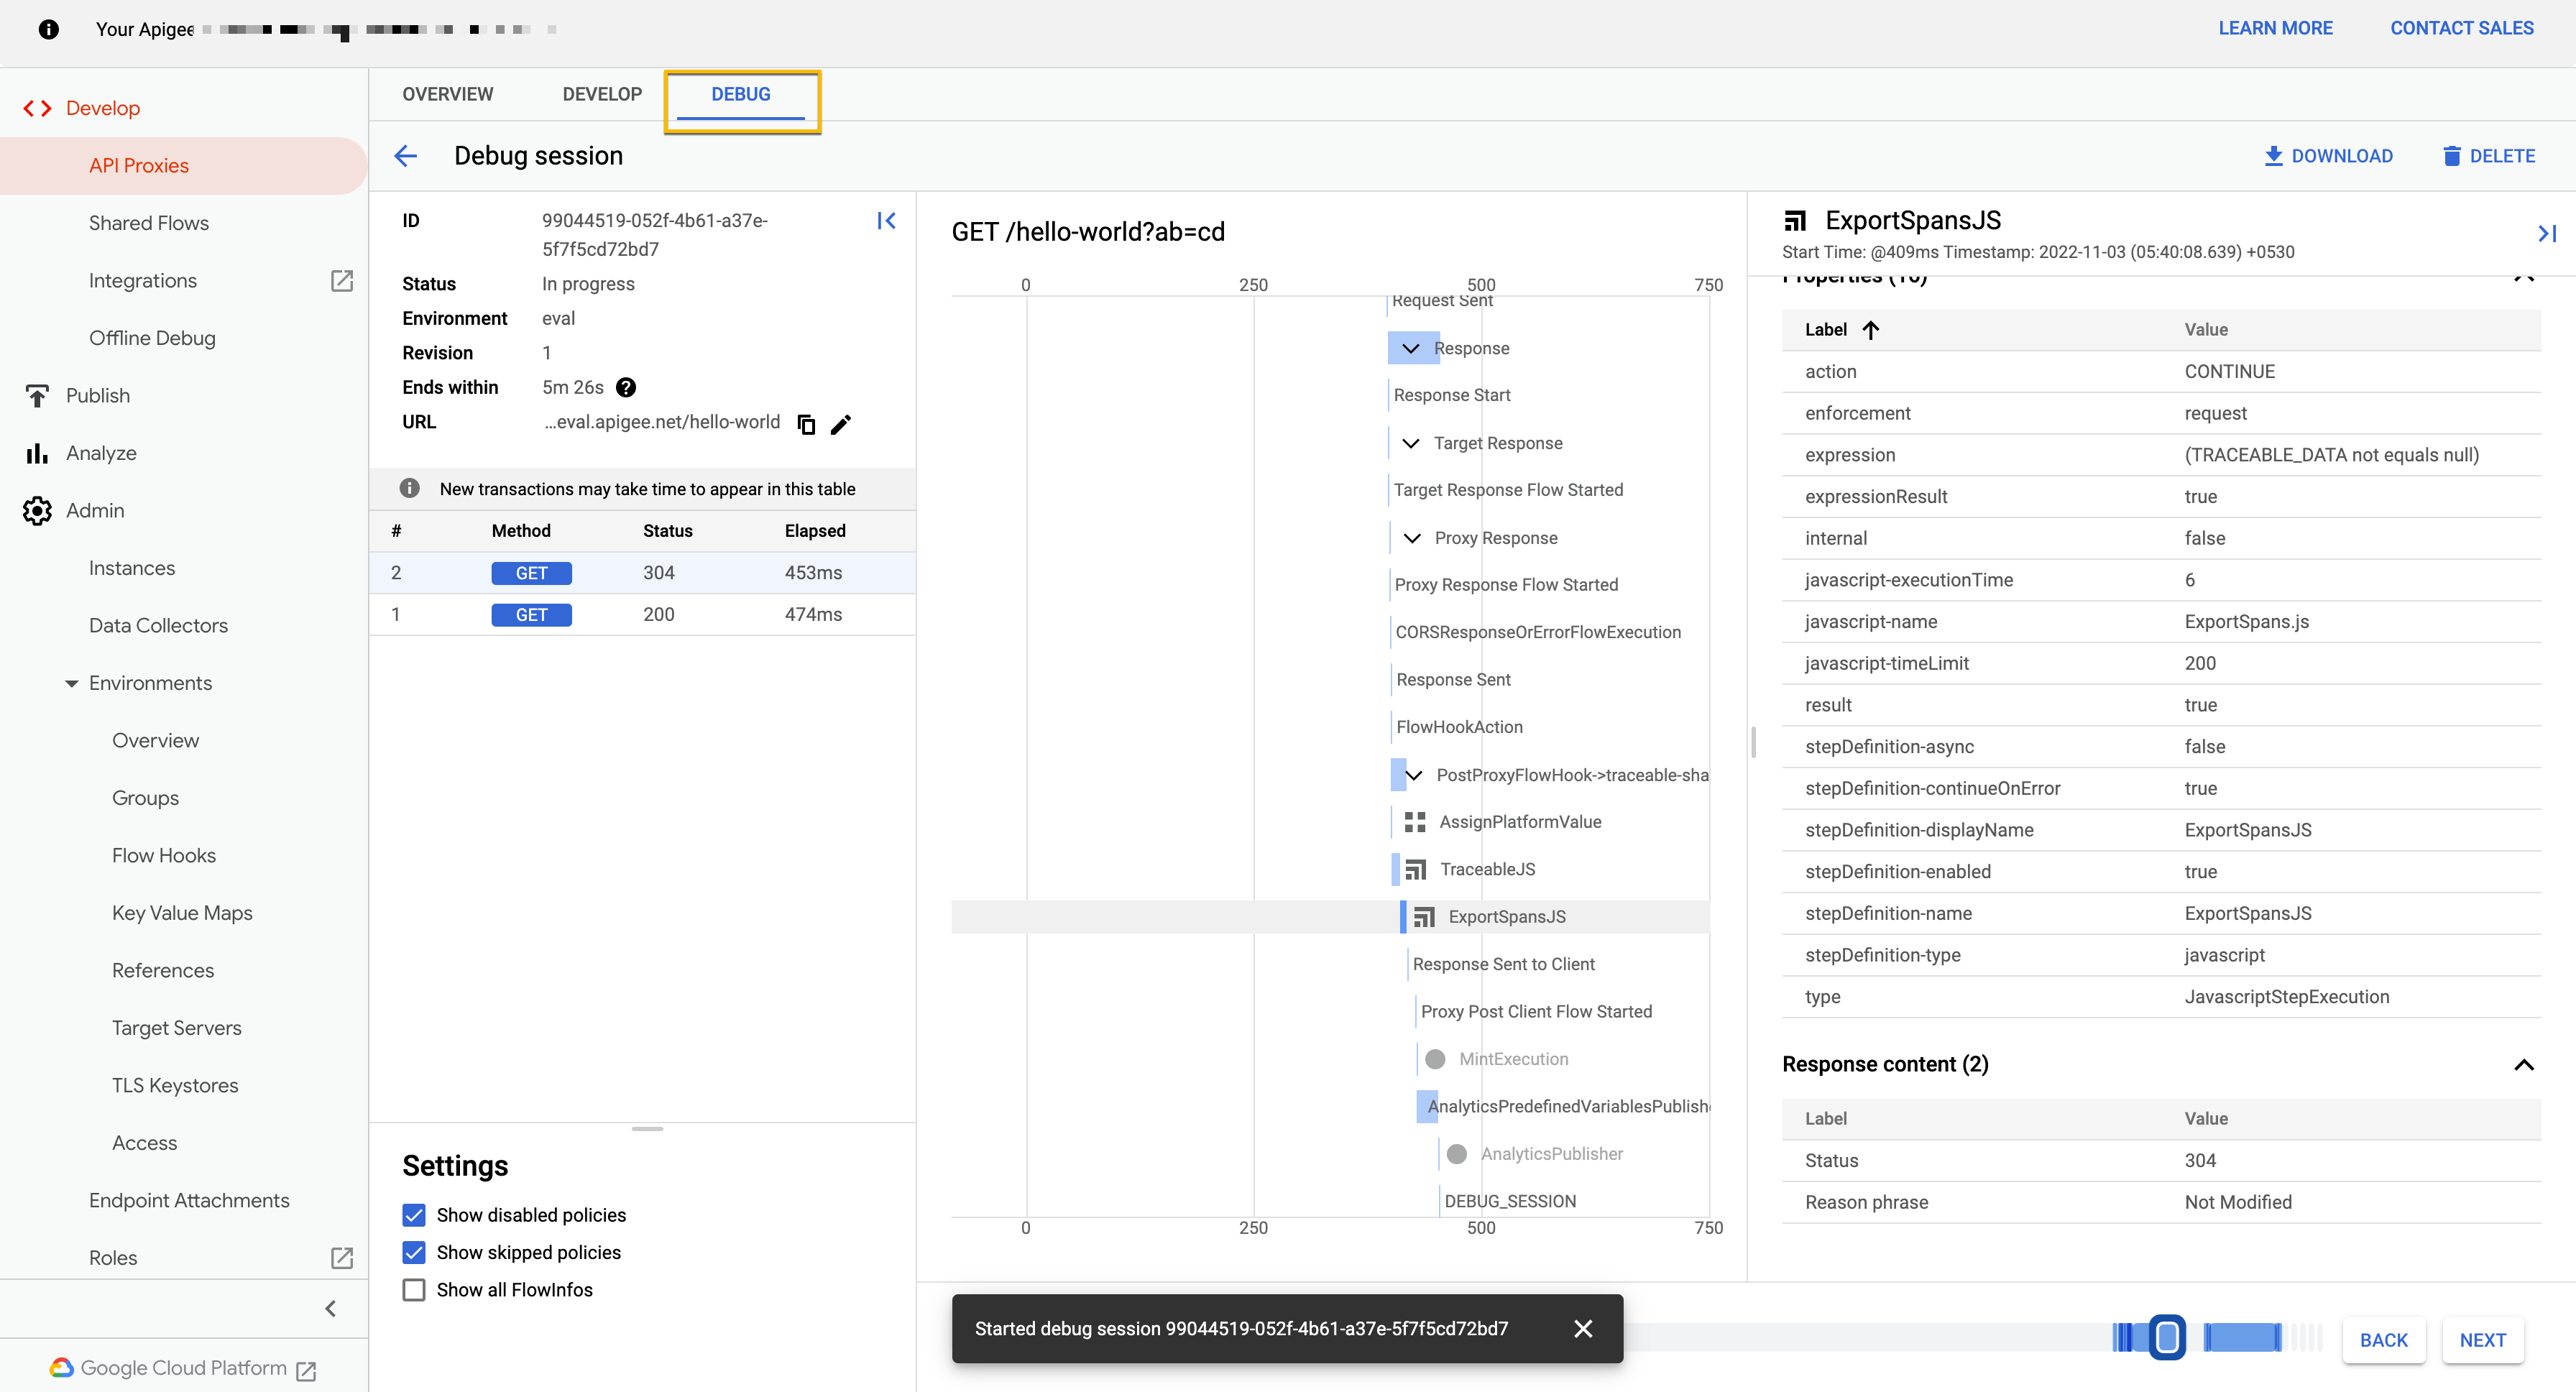
Troubleshooting
In Apigee UI, you can go to any API Proxy on which a Traceable agent is attached and click the Traces/Debug tab. Start the trace session, send a request, and check the flow of requests and variables in TraceableJS policy on both the request and response side. Verify that the ExportSpansML or ExportSpansSC policy was executed on the Response side (not skipped). Also, ensure the connection from Apigee to the Traceable Platform is proper.